After Heather’s neck seal started leaking more and my wrist seals started leaking a little, we decided it was time to upgrade our drysuits. But rather than get all new drysuits, we instead upgraded the seals. In my case I went from neoprene seals (which I really loved for the last decade) and in Heather’s case she went from fixed latex seals to SI Tech SLÄGGÖ Flex Ring wrist systems and ORUST Neck Systems. That allows us to field change seals if they tear. We went with silicone seals as the new setups on our drysuits.
I also replaced the zippers on my drysuit and redid the seams while I was at it.
Hopefully this will give us several more years of use out of these drysuits before it’s time to hang them up for good and get new drysuits. The crushed neoprene drysuits we have really handle the conditions in Monterey and further north quite well but it’s getting hard to find that style of suit anymore.
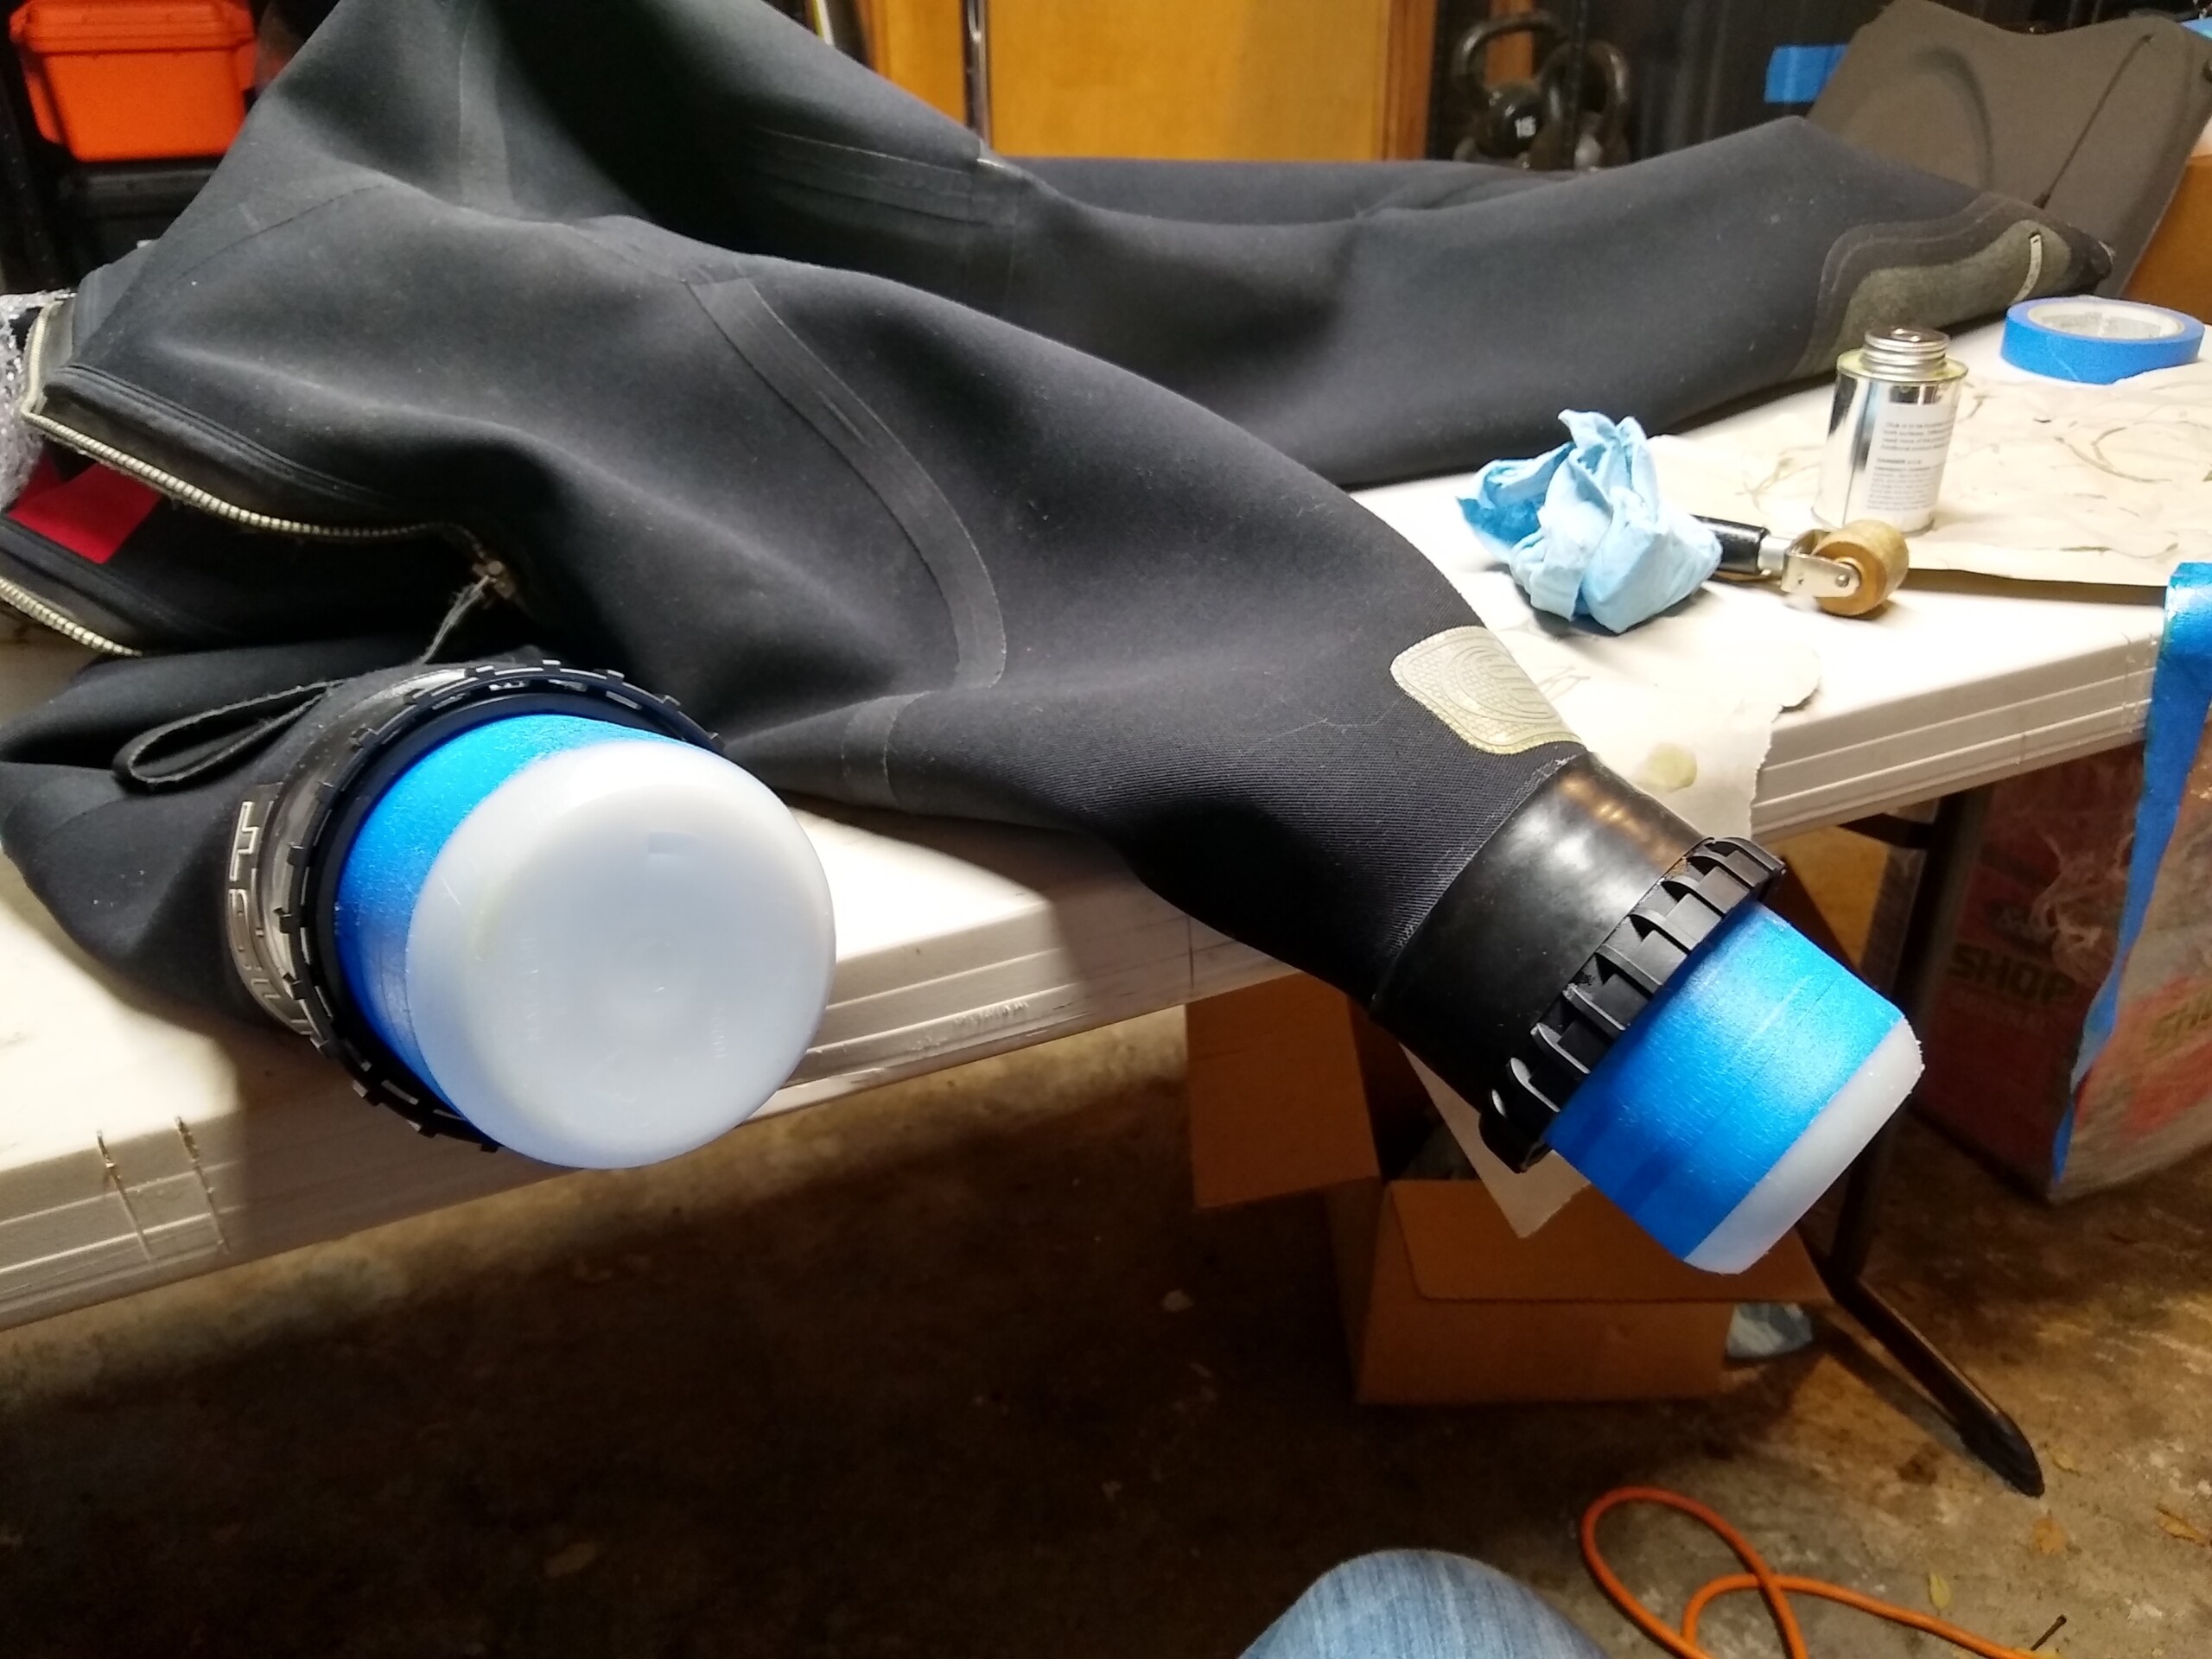
It turns out Nalgene bottles are almost the perfect size to work with the wrist seal system for installation.
Working on my drysuit. It requires cutting away quite a bit of neoprene to fit the ring onto the suit. That can be a bit nerve-wracking.
Doing Heather’s drysuit. The little clips are somewhat easy to break on the neck ring. It’s a good idea to get some spares to have handy because it can take a while to get new ones. I had to order those in from a seller in Estonia.
Doing both zippers on my suit. While the relief zipper was still in good shape, the back zipper was pretty much toast. I probably could have had it survive another 50 dives but it felt like this was a good time to do everything.
Re-sealing all the seams in my drysuit. I tried using the seam tape but it didn’t work very well with the suit material. I ended up using auqa seal flex to reinforce everything. Should be good to go now for a few more years.
Editor’s Note: This post is from the PC800 UK forums and was written by Spacetiger (otherwise known as Jerry). I have copied it over here because I thought it valuable enough to preserve in case that forum ever goes away.
All this time apart and I never measured the spring rates of the stock shocks… I have to get this done before I button things up, so it’s down to the gym equipment.
The PC800 has 2 different rear shocks; I have not seen any other bike with this kind of set up, so I was curious what it would look like. I know most PC owners out there are not into this kind of fiddling with their PC, so it this is mostly for Fred and Doug and a few others out there with farkle curiosity. Note: The pics are up loaded 1 to 7, but may not display this way.
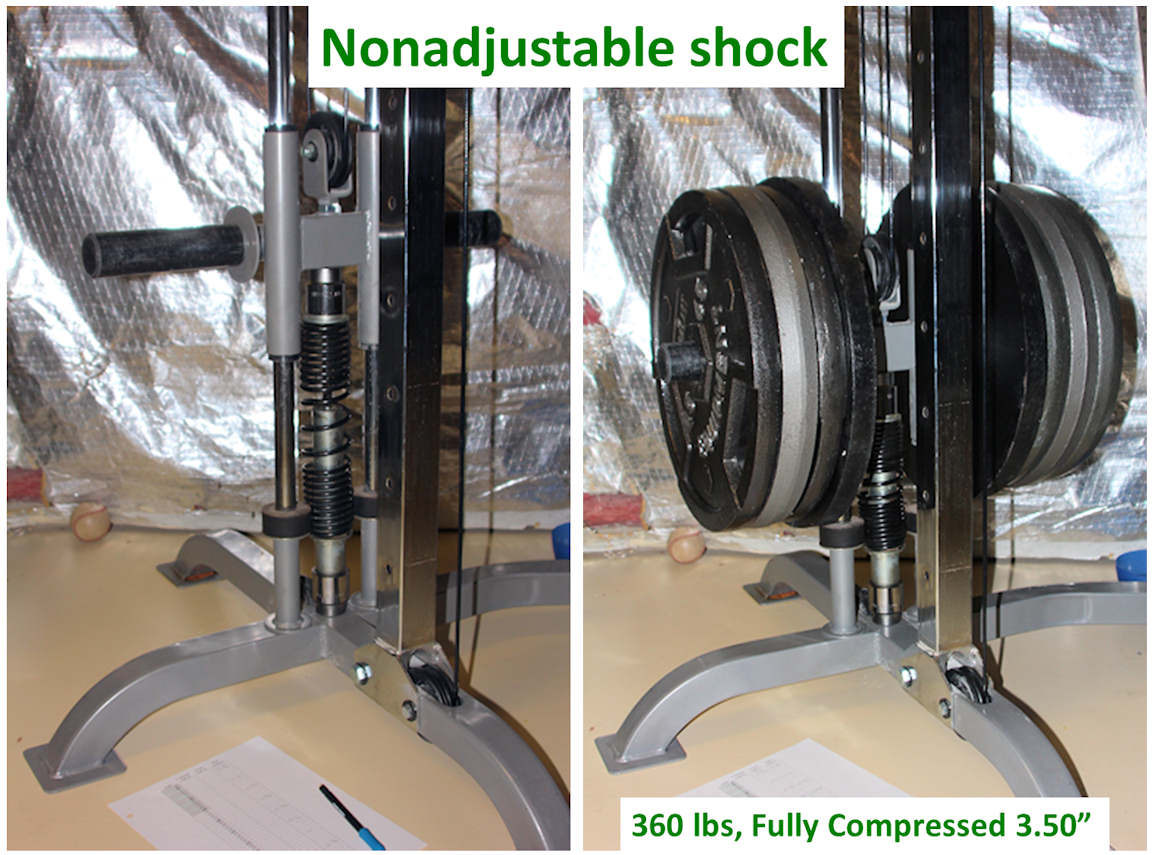
Pic 1: Pre and post-test configuration for the non-adjustable Showa shock; 360 lbs. fully compressed the shock 3.50″
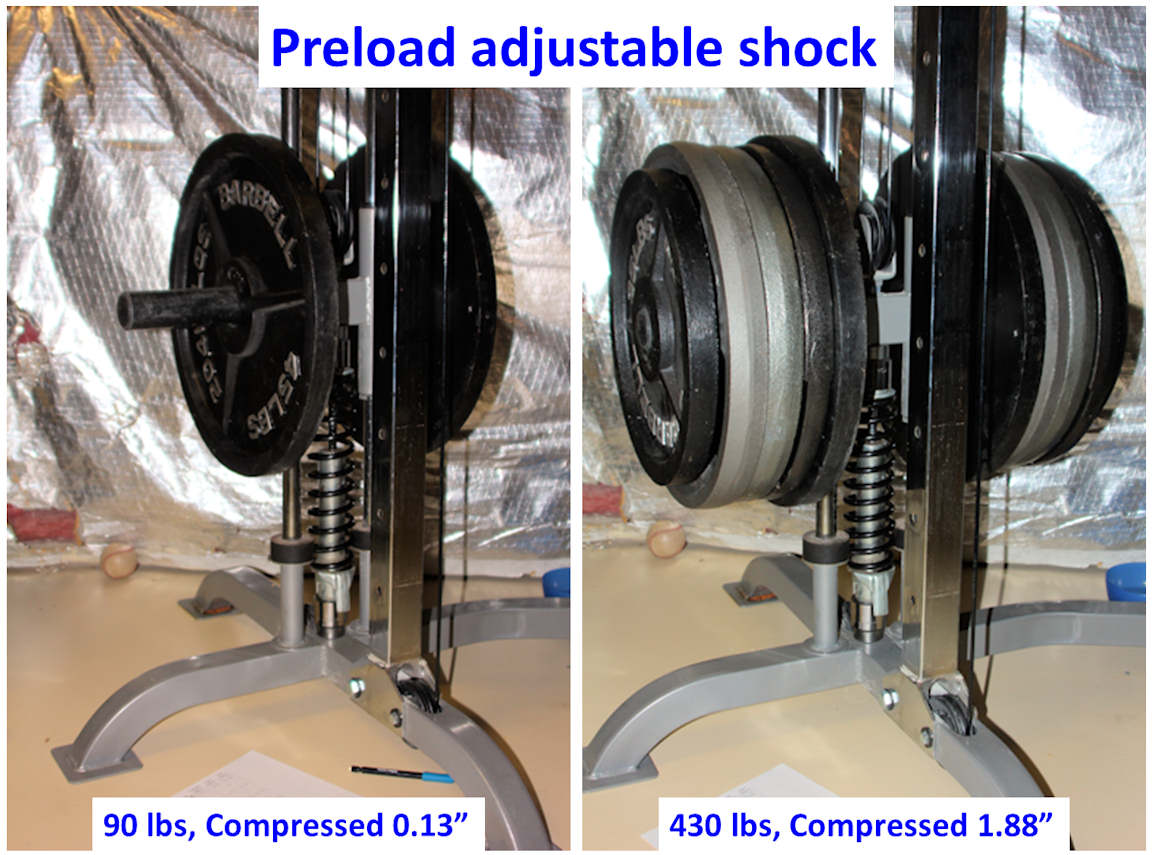
Pic 2: Pre and post-test configuration for the preload adjustable Showa shock; I loaded 430lbs and only compressed the shock 1.88″! There was 2″ more to go but I couldn’t put any more weight on.
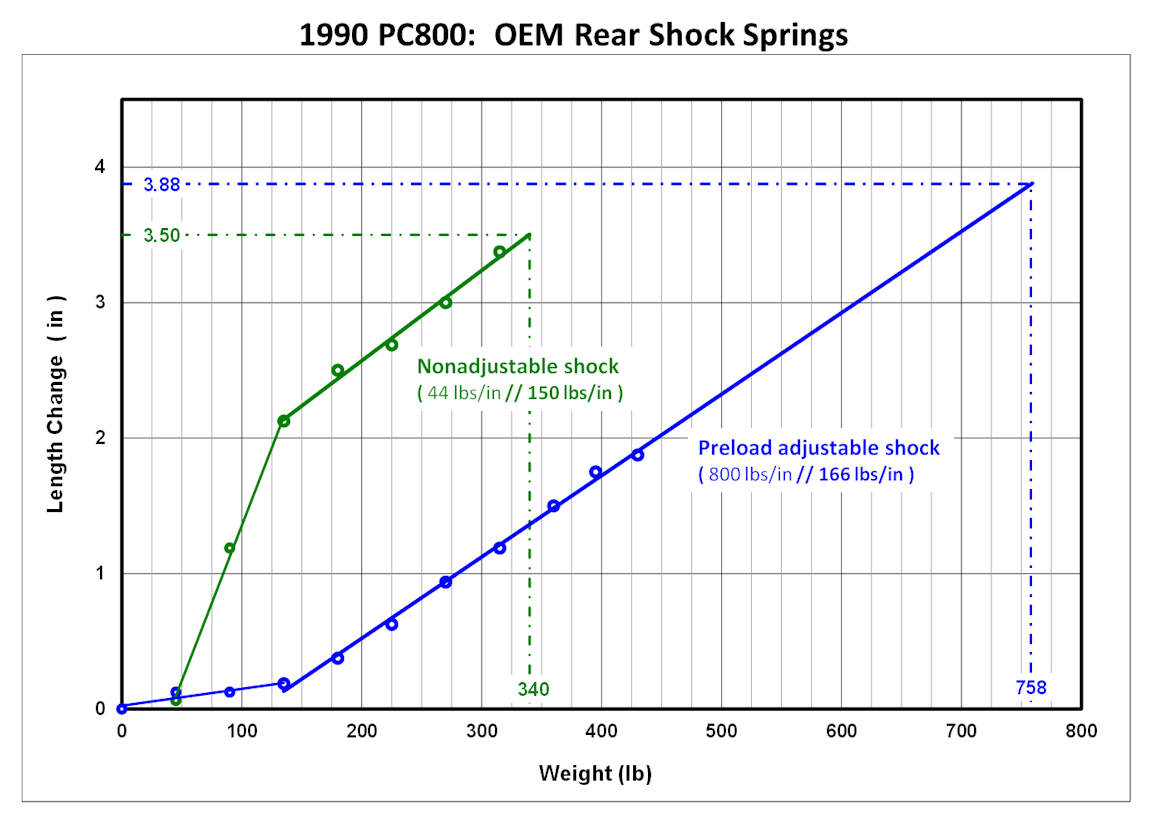
Pic 3: [Surprising] test results; The adjustable shock spring carries the load, the fixed shock functions like a booster spring. Now it makes sense why they only have a preload adjuster on one shock. Its a bit of a pain to get to the shocks with the rear trunk, so the adjustable shock is on the left and the single muffler on the right.
Pic 4: Shows the difference between PC800 and 86/87 VT700 (and 88 VT800) swing arm. They are the same length but the cross brace is placed further back in the PC800 swing arm. I believe this is done because of the differences in the shock loading. In the VT swing arm, the shocks are both adjustable, so they can be set equally and not impart much of a twisting load on the swing arm. The cross brace is important because the 17″ wheel and modern radial tire touches the PC cross brace, so I had to get more clearance hence the need for the VT700 swing arm. The VT700 swing arm has a 3 bolt pattern vs. the PC with a 4 bolt, so I have to swap the final drive out. I had been running a VT1100 final drive to lower the RPM. The VT700 final drive has the same drive as the PC… but the 86/87 VF700C final drive is a 3 bolt set up and is geared like the VT1100, so I will use the VF700C final drive (after swapping the input pinion gear with the VT700) and 86 VT700 swing arm. Clear as mud?
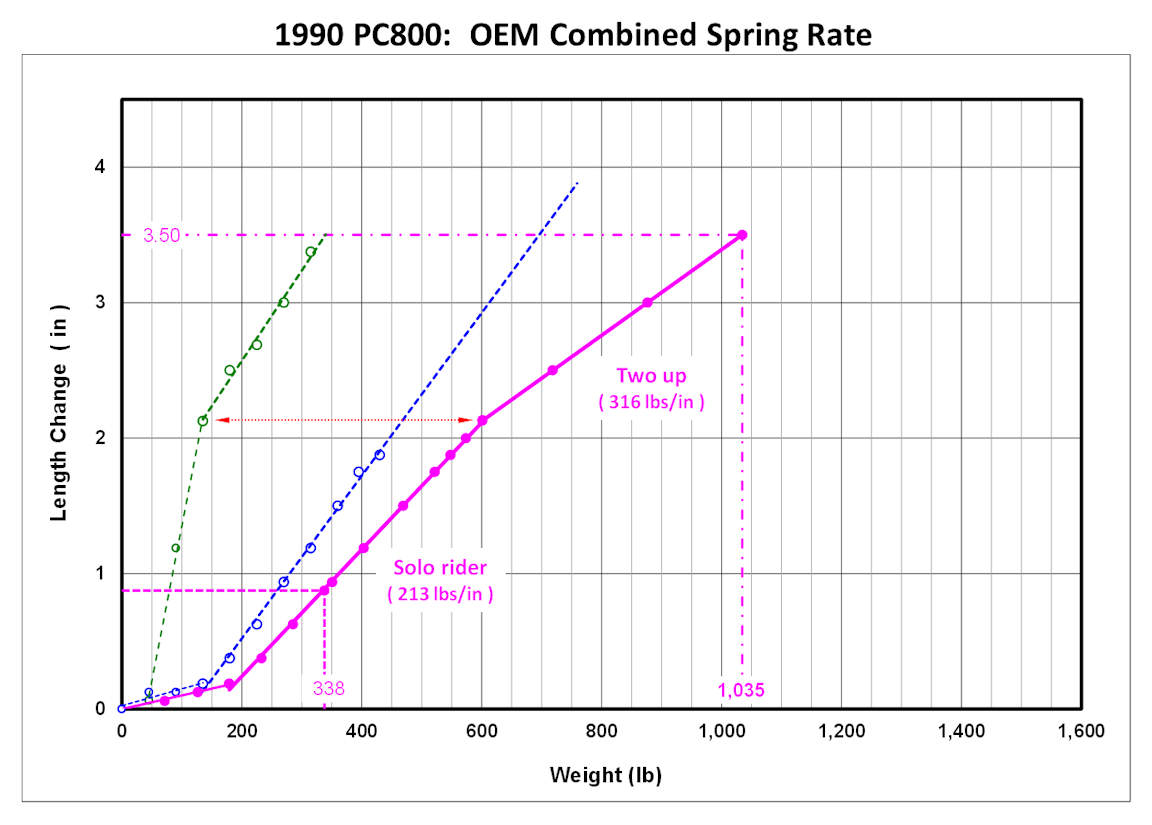
Pic 5: The magenta line shows the net effect of the 2 springs. You can see the adjustable shock (blue line) is the stronger spring but there is some clever engineering here. The magenta line has 3 linear portions; the first shows little movement with approaching 200 lbs., then transitions to the 2nd linear portion. I believe if you are setting your preload correctly you will be in this region as depicted by the dotted line in the lower left. The bike wet weight is close to 600 lbs. Add a rider and stuff in the trunk and it’s not hard to imagine at least 338 + lbs. on the rear. Then, the 2 springs function at a 213 lb/in rate till about 600 lbs. There, the combined rate increases to 316 lbs./in due to the booster spring kicking in. This looks like the two up rider range. The fixed shock tops out at 3.5″ of travel, so the max load the two shocks can carry is 1,035 lbs. You can dial up max preload in the left shock and increase the max about another 100 lbs. Clever engineering packaged for the intended purpose of the bike… but some of us have notions of trying to make this a light touring bike, so a more aggressive riding envelope will have to be accommodated.
Pic 6: Some PC riders have swapped out the fixed shock with another adjustable PC shock. This pic shows the difference between two adjustable and the stock shock configurations. The dual adjustable has only 2 linear rates. The [longest] second rate is 333 lbs. /in rate over about 3.5″, so it has considerable more capacity. But, more importantly, it compresses less for a given load, so the rear of the bike will stay up and maintain good rake/trail numbers for better aggressive riding envelope even with 2 up and a full trunk.
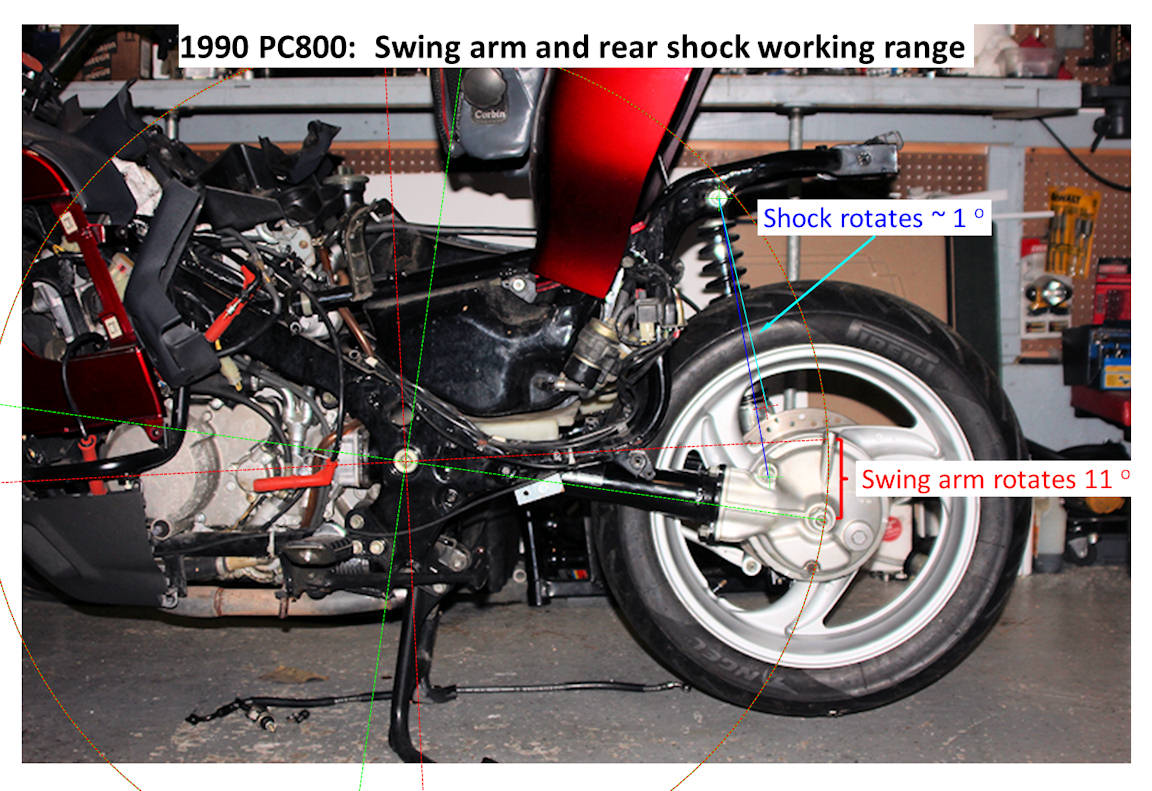
Pic 7: This pic shows the working range of the shocks and swing arm. The near vertical alignment of the shock through its range of motion (~1.5 degrees) shows it is carrying the load differently than bikes designed with larger rear shock mounting angles (more linear), so the increased capacity is a welcome addition.
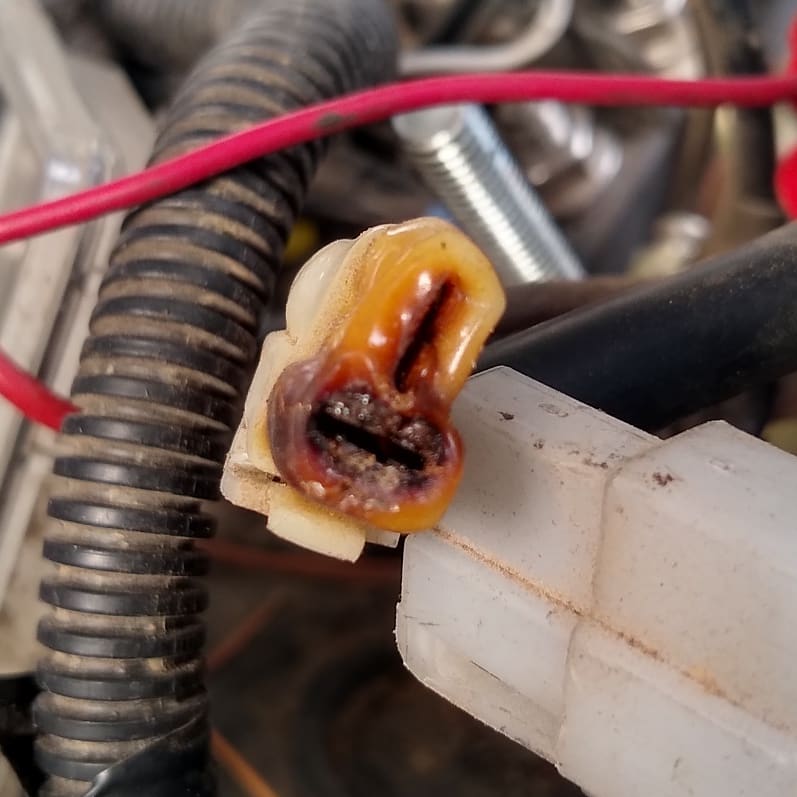
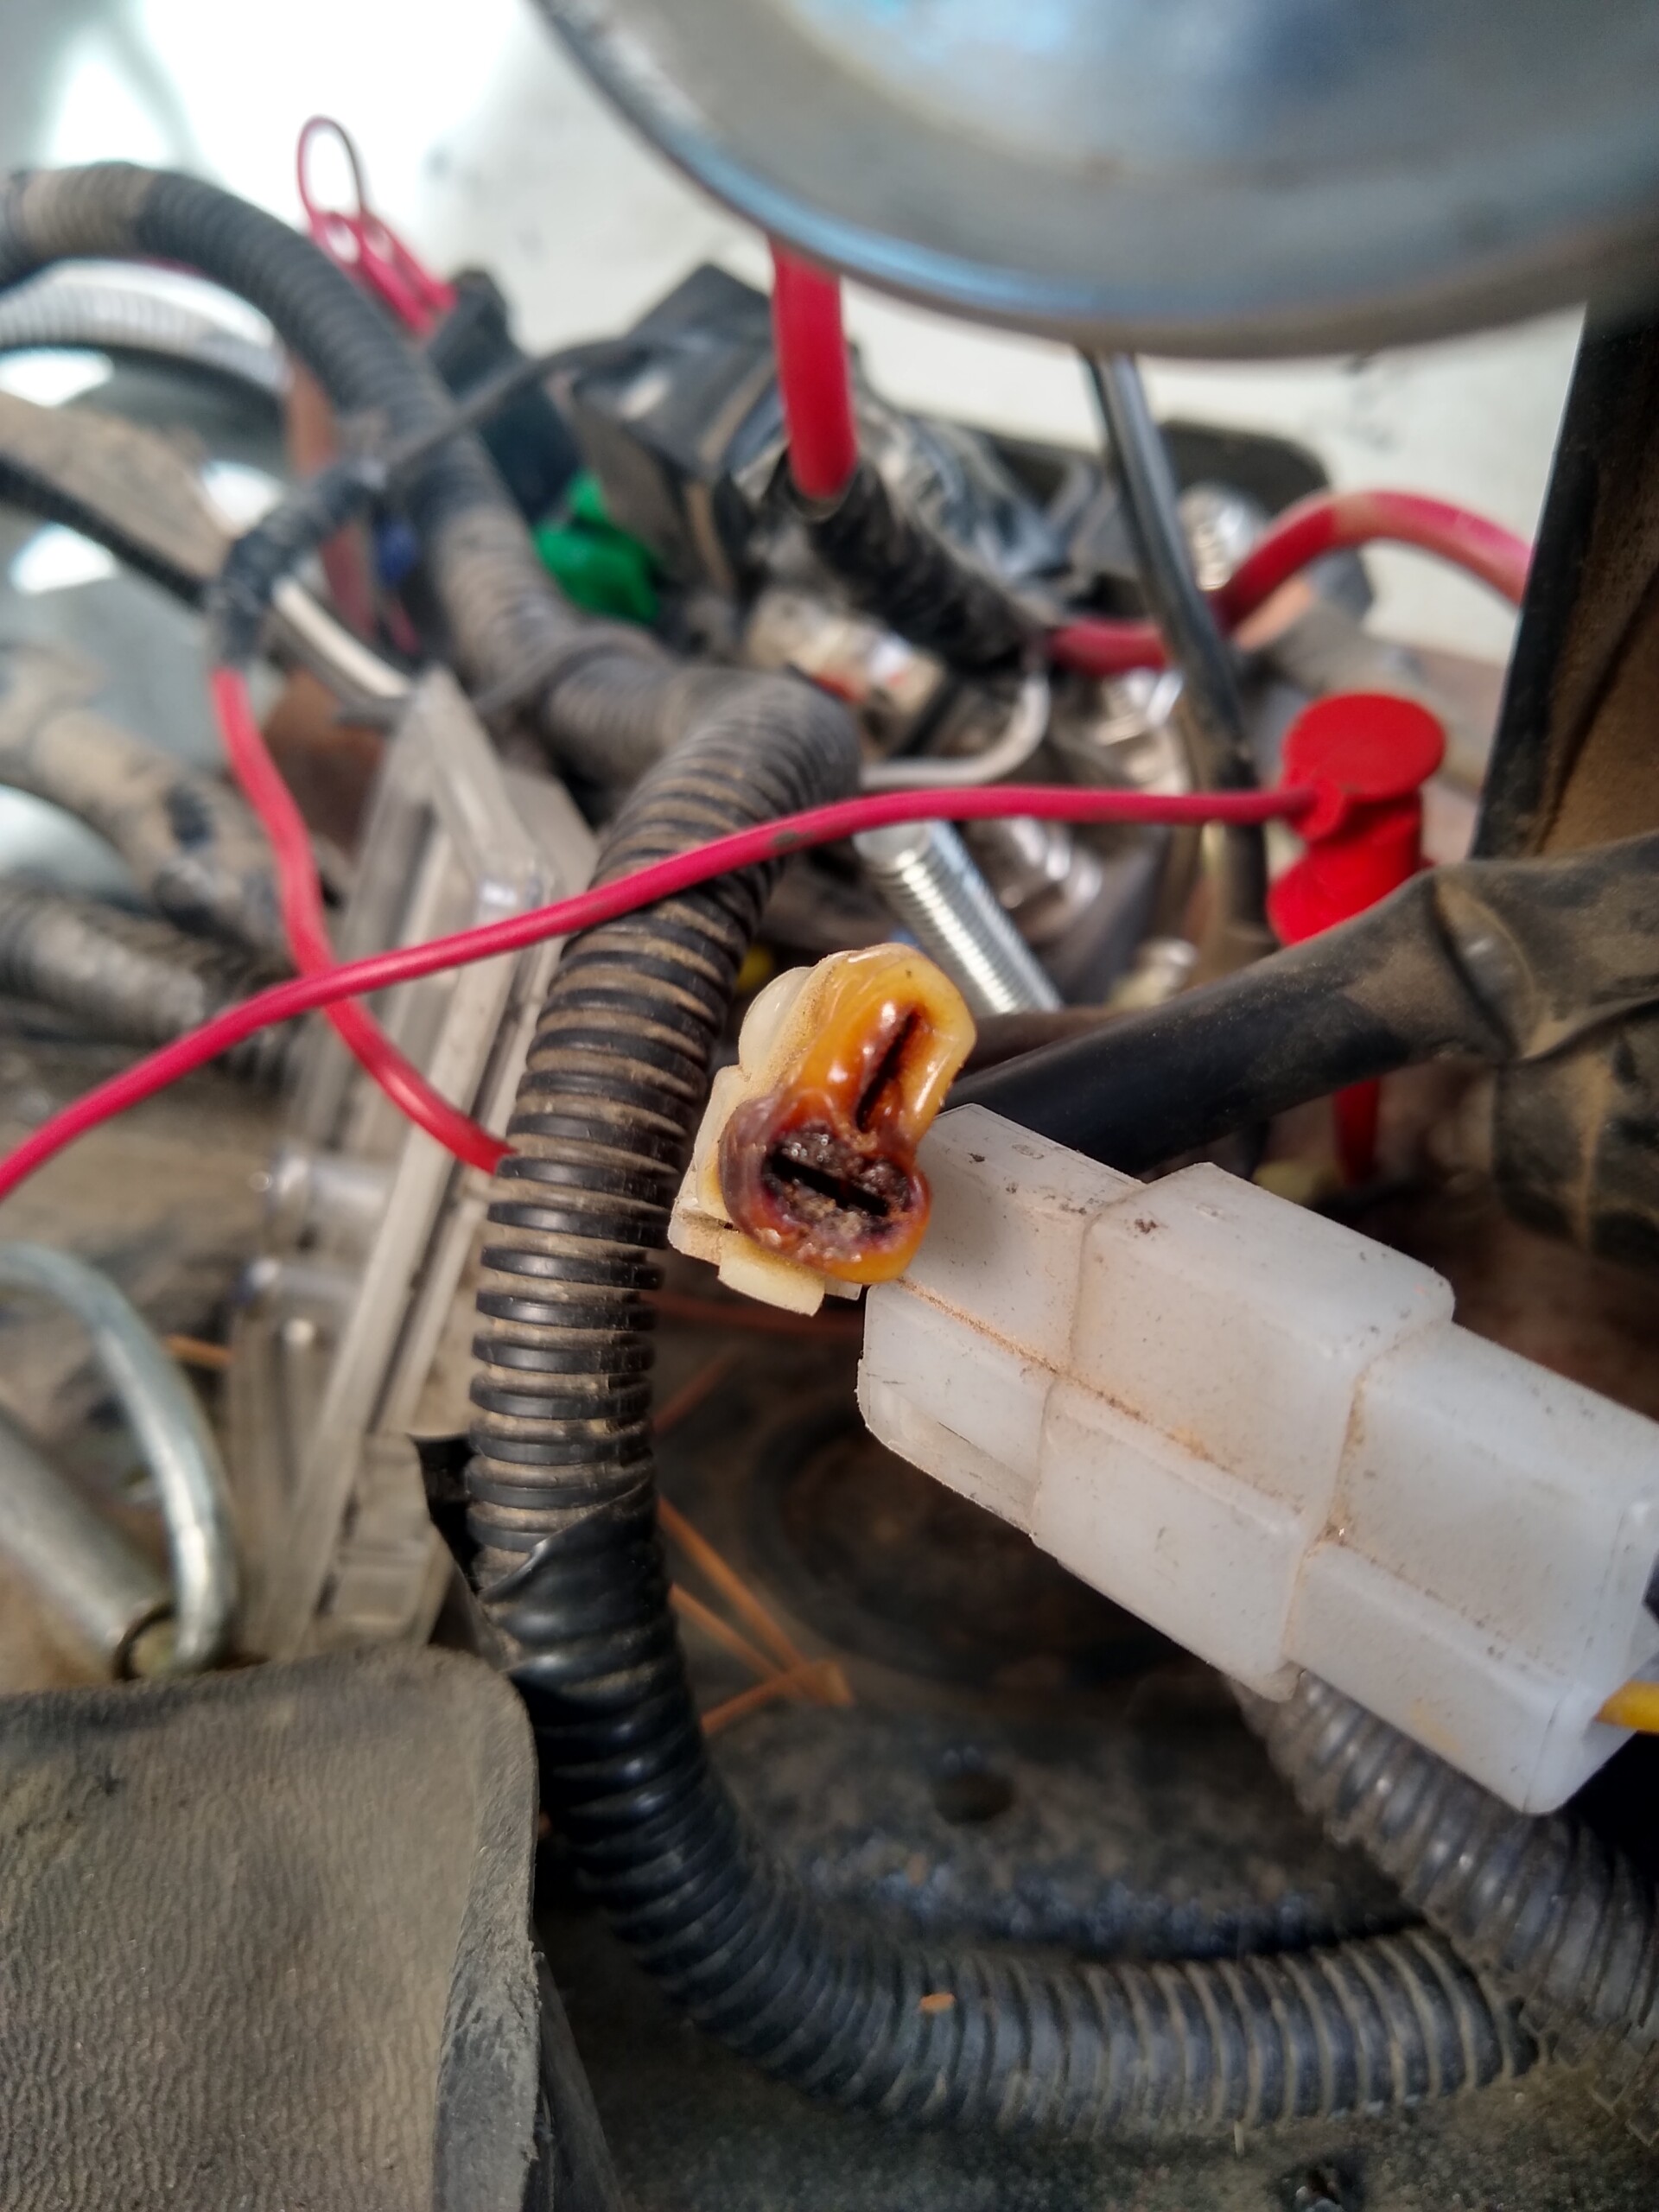
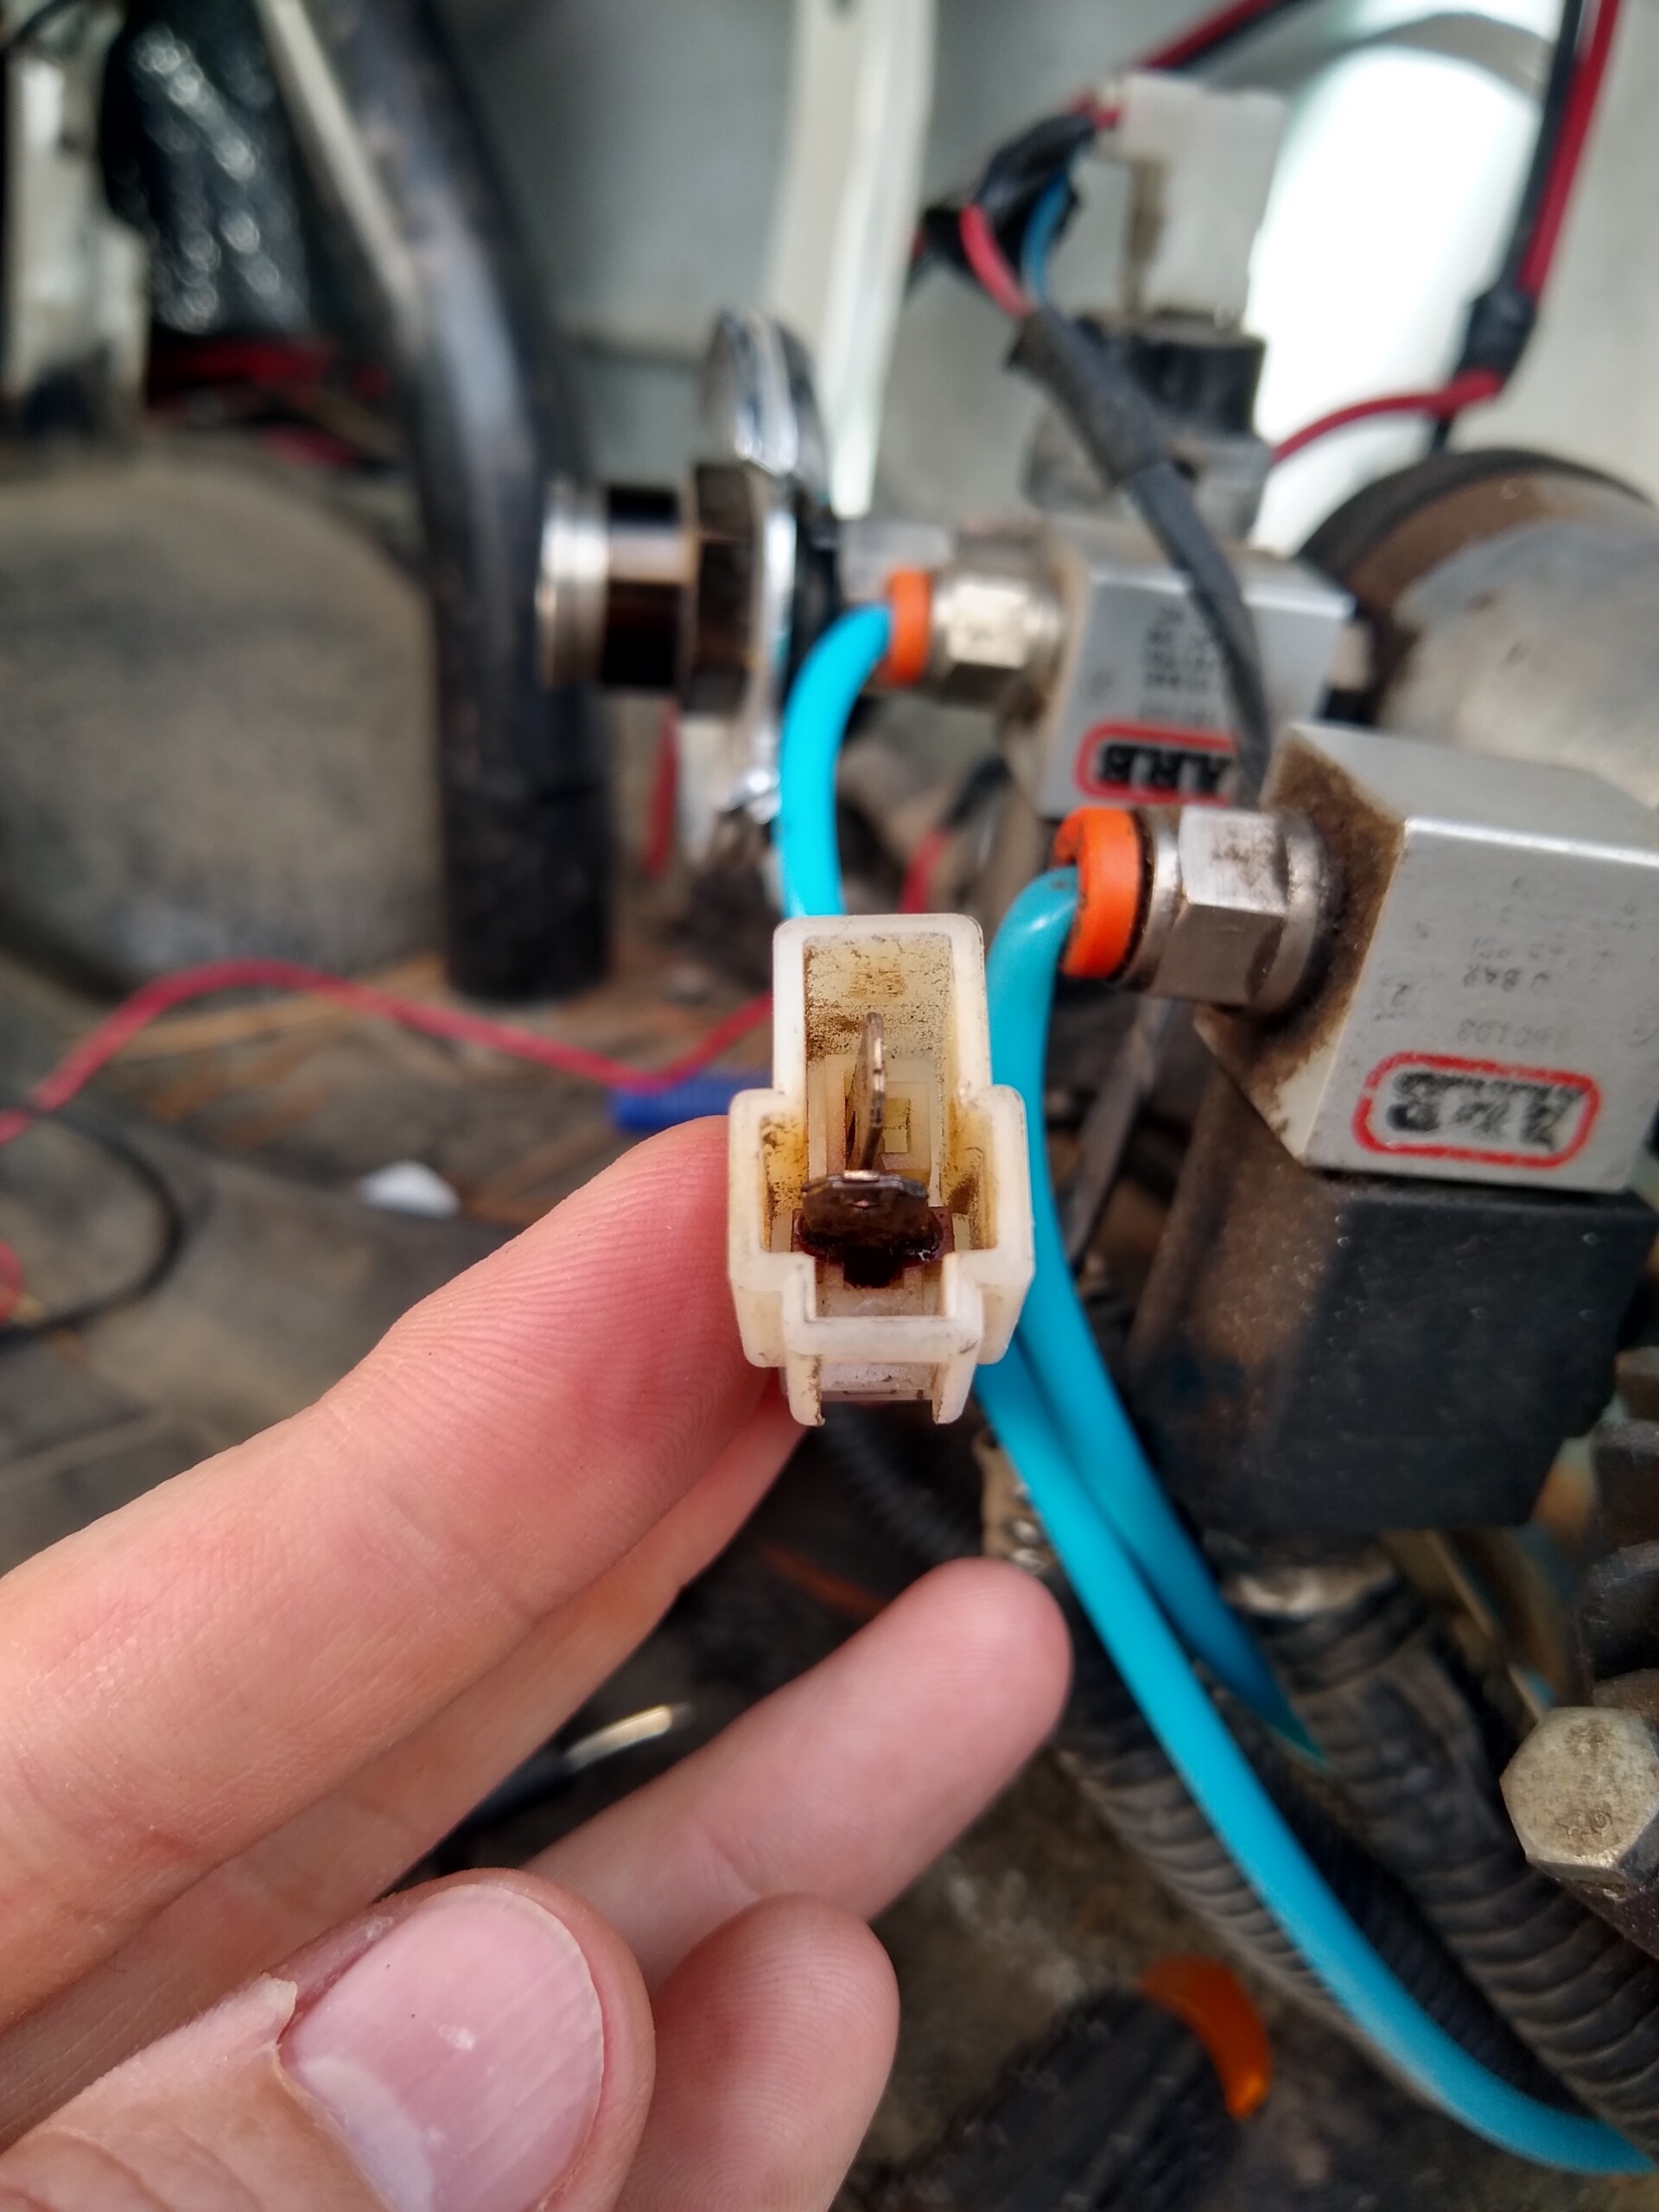
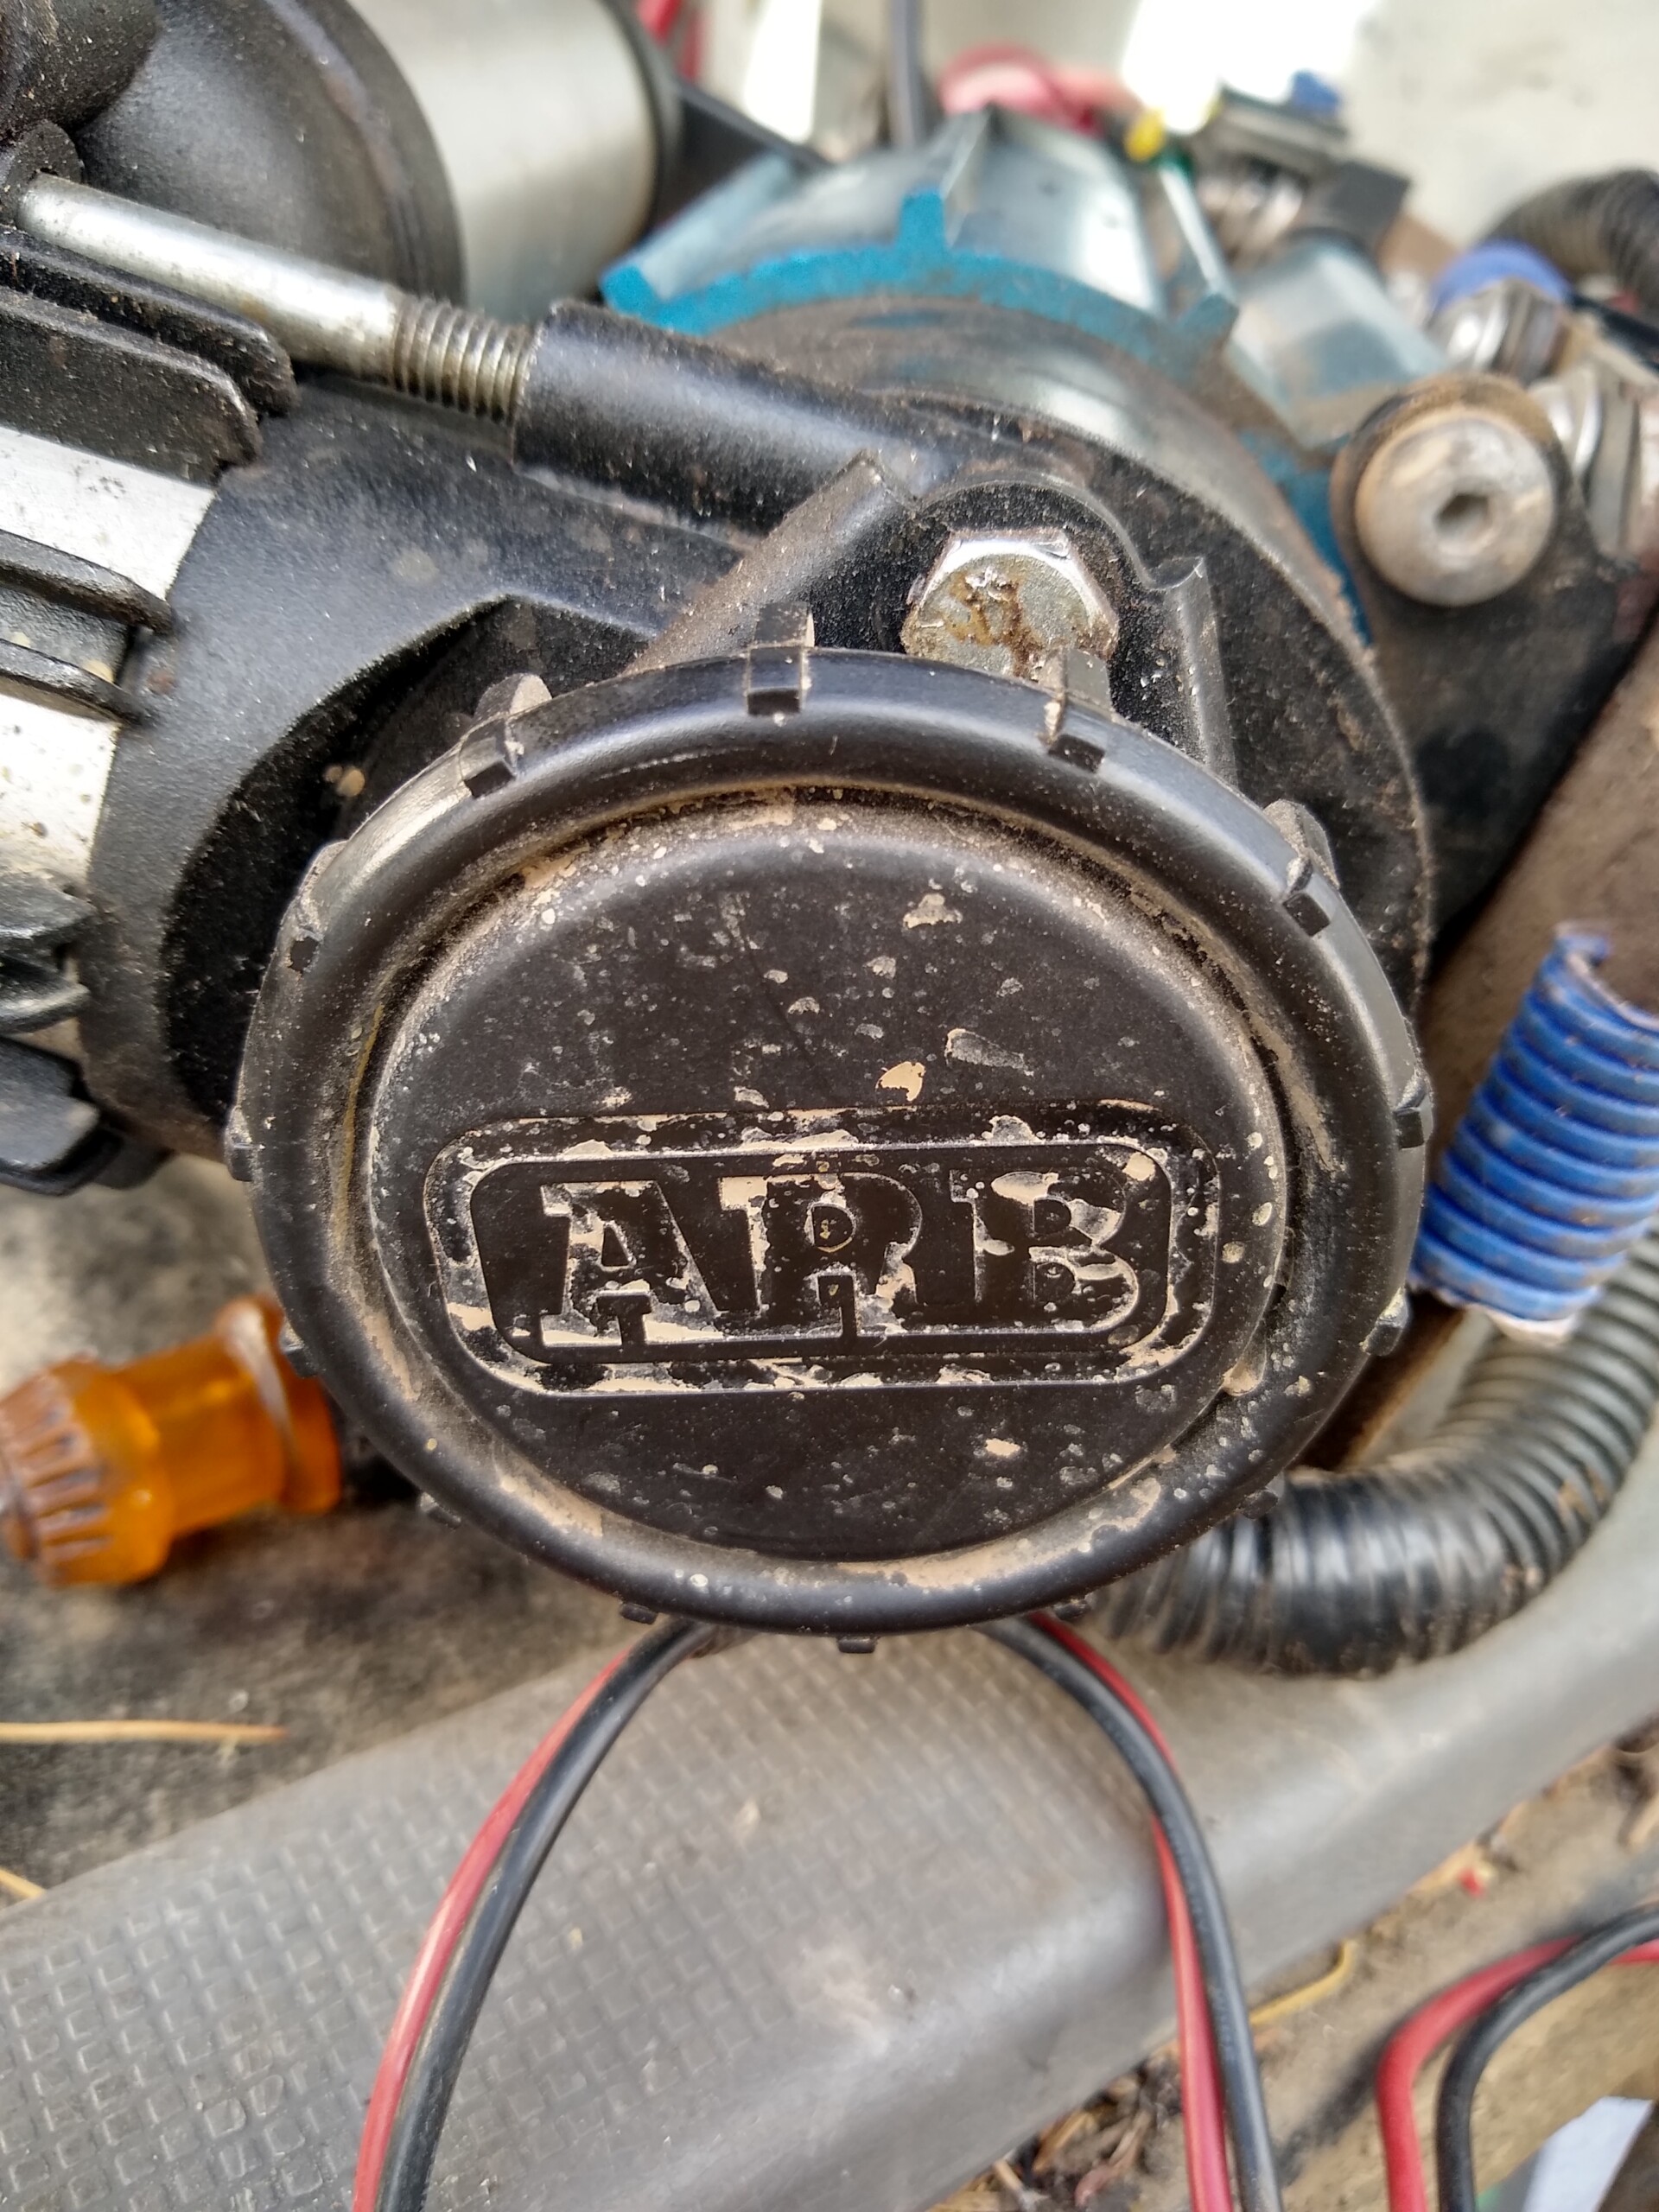
The connector on my ARB Air Compressor got charred after years of use. This is a known flaw in the design of older ARB air compressor and I know several people who have had similar troubles over the years. Luckily this didn’t start a fire. I replaced the connector with something better suited to the current draw and am now back in business.