Arduino project: putting together several demos

I’ve been playing with an Arduino Uno for the last month. After going through the tutorials, I decided to play around with mixing and matching the code and writing a little of my own. I’ve figured out how to use the Fritzing CAD software to document my board setup.
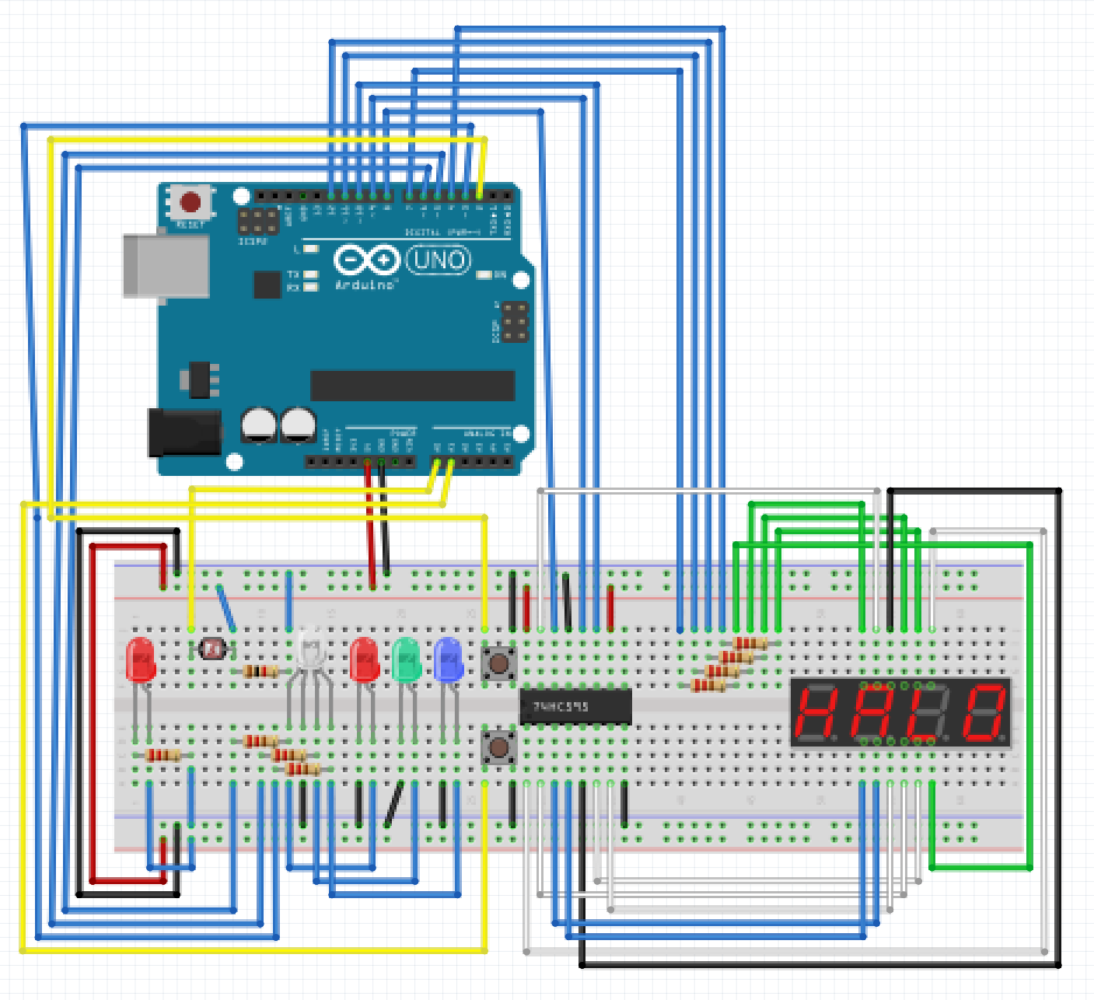
Layout of my little project.

I have a 7 segment 4 character display powered by a shift register, an RGB LED and three single color LEDs on the three PWM pins that the Uno comes with, two push buttons using a debounce library that I found on GitHub, and a photo sensor to detect how much ambient light there is in the room. One interesting note is that I played with several different ways of achieving debounce on my own and decided to go with a library. It’s just easier and more efficient than code that I could write at this point.

The program works using the two buttons as inputs to switch between the four sub-programs. When the LEDs are blinking, you hold down Button 2 and press Button 1 until the 7 segment display reads the program that you want.

The four programs are:

  1. Button 1 turns on and off the LEDs.
  2. Count up clock on the 4 digit 7 segment display.
  3. Fade the RGB LED.
  4. Display the ambient light level on the 4 digit 7 segment display.

To exit out of any of the programs, simply tap Button 2 and you will be taken back to the input.

Working on this project taught me several things including:

  • Shift registers and how they work
  • Bounce issues with inputs and how to fix that
  • What the different pins on an Arduino Uno are capable of
  • Static variables
  • Volatile variables
  • Libraries
  • And a few other things that I’m forgetting!

If you would like to look at my wild spaghetti code or the Fritzing files, it’s all available on a GitHub repository.

Now that this little project is done, I am going to play with some motor controllers and the Arduino. This is all building toward using an Arduino for an APRS radio.

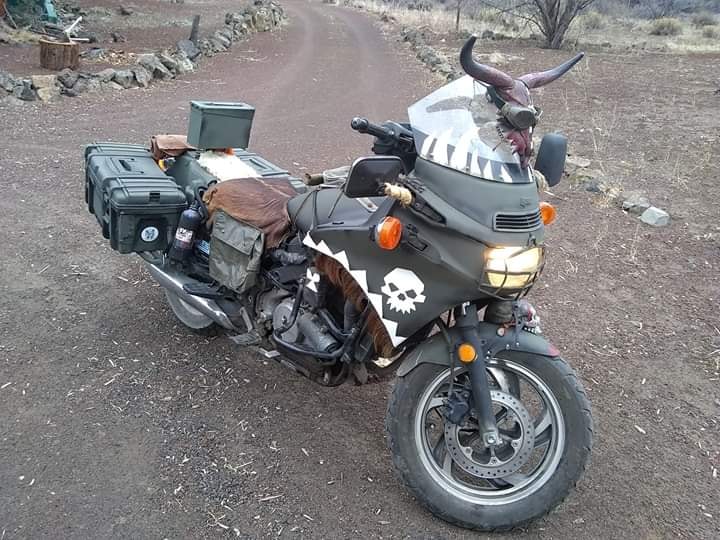
A new PC800 rat rod: The War Pig

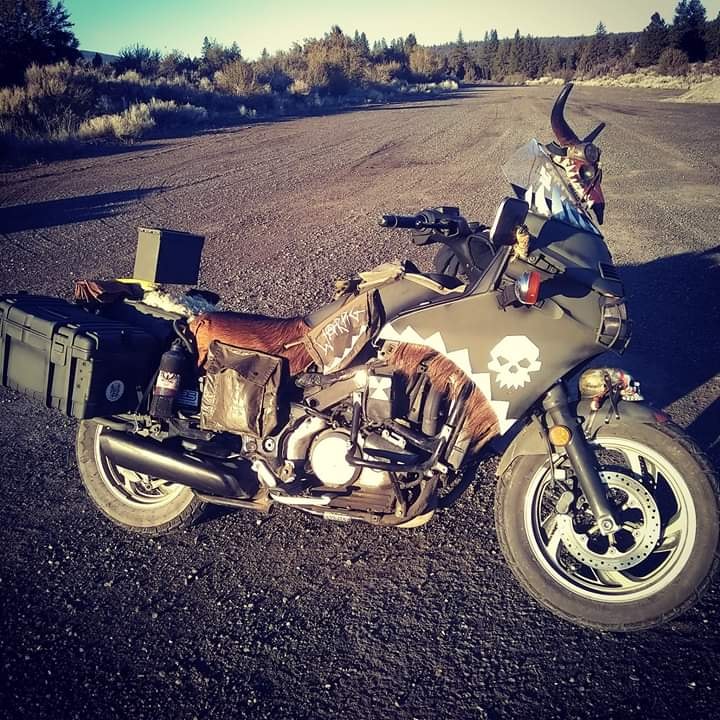
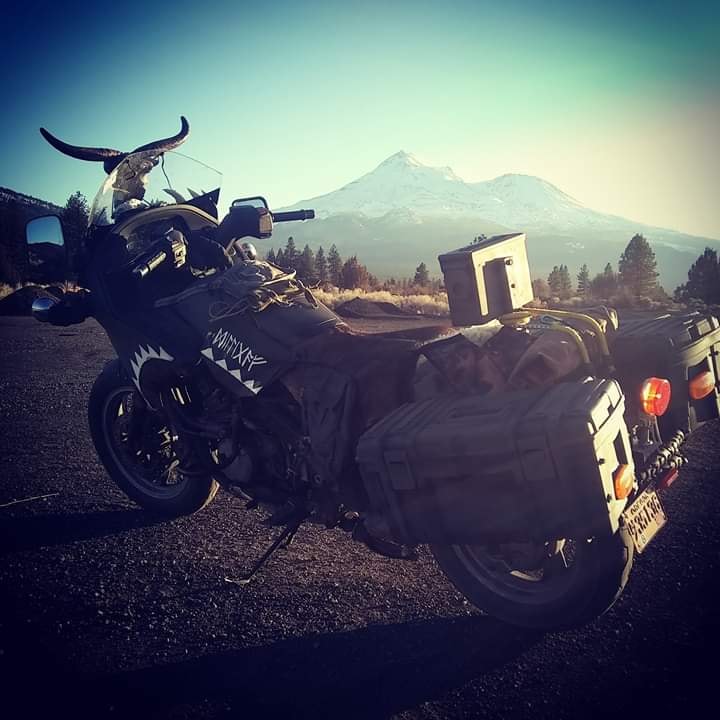
John Norris from the Honda Pacific Coast PC800 Facebook group recently built a new rat rod named The War Pig out of a PC800 bike. Here are a few photos of his wonderful creation!

The War Pig is a really unique bike! John kept part of the front fairing, a cut down windshield, the faux gas tank, and that’s about it. The rest of the plastics are gone for good.
I love the cowhide details on the edge of the fairing and on the seat. The ammo can backrest and the two crates as panniers really make this bike look great.
Here’s the War Pig in front of Mount Shasta on the way to a big adventure! I expect to see John on the highway somewhere in the desert very soon.

Arduino experiments

I recently picked up an inexpensive Arduino Uno starter kit to expand my knowledge of software, hardware, and mechatronics. It’s been a number of years since I had the time to play with coding, electronics, and little blinking lights.

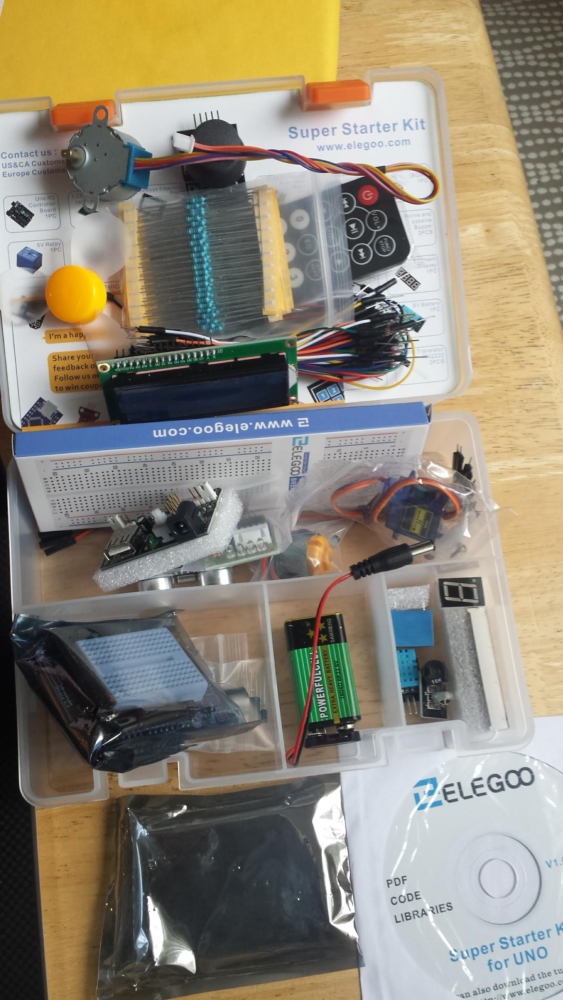
The Arduino starter kit I picked up has a good inventory of different components to play with.

I purchased the Elegoo EL-KIT-003 UNO Project Super Starter Kit with Tutorial for Arduino from Amazon. It is a complete solution for learning the basics of using an Arduino and comes with a lot of nice hardware to play with. So far, I have enjoyed working with the multi-colored LEDs, the joystick, the servo motor, and the four digit LED display using a shift register to control it. I’m looking forward to playing more with the motor driver and doing some more mix-and-match exploration with all of the components that the kit came with.

Playing around with blinking lights, buzzers, and buttons.

As I play around with remixing the tutorials into more interesting projects, I’ll probably post up some instructions and code snippets.

https://www.instagram.com/accounts/login/?next=/p/BupApHQhrSF/
https://www.instagram.com/accounts/login/?next=/p/BupiSuhBiU6/
https://www.instagram.com/accounts/login/?next=/p/Bup8N_OBMj-/