There are several options for the Honda Pacific Coast PC800’s windshield (windscreen for our UK friends). Most bikes came with a stock Hondaline windshield. However, there are two different stock Hondaline windshields — the 1989 model year windshield and the windshield that Honda used for all of the other years. Many of us have replaced our stock windshields over the years with a variety of options (discussed below). If you’re looking for a quick recommendation, I love my Clearview windshield as do many others.
A good windshield that is the correct height for your torso can really improve comfort on a PC800.
A Note on the Stock 1989 Hondaline Windshield
The vast majority of 1989 model year Honda Pacific Coasts have a somewhat defective windshield. It works fine in every way, ESPECIALLY in magnifying the sun into a point and melting the plastic on the motorcycle’s dash. If you have a 1989, you’ve probably seen the bubbled dash. Likely, a previous owner already replaced the windshield with a newer stock Hondaline windshield or an aftermarket windshield. If you still have an original 1989 windshield and are starting to get bubbles, the best thing you can do is to cover your windshield with a cloth when you’re parked in the sun.
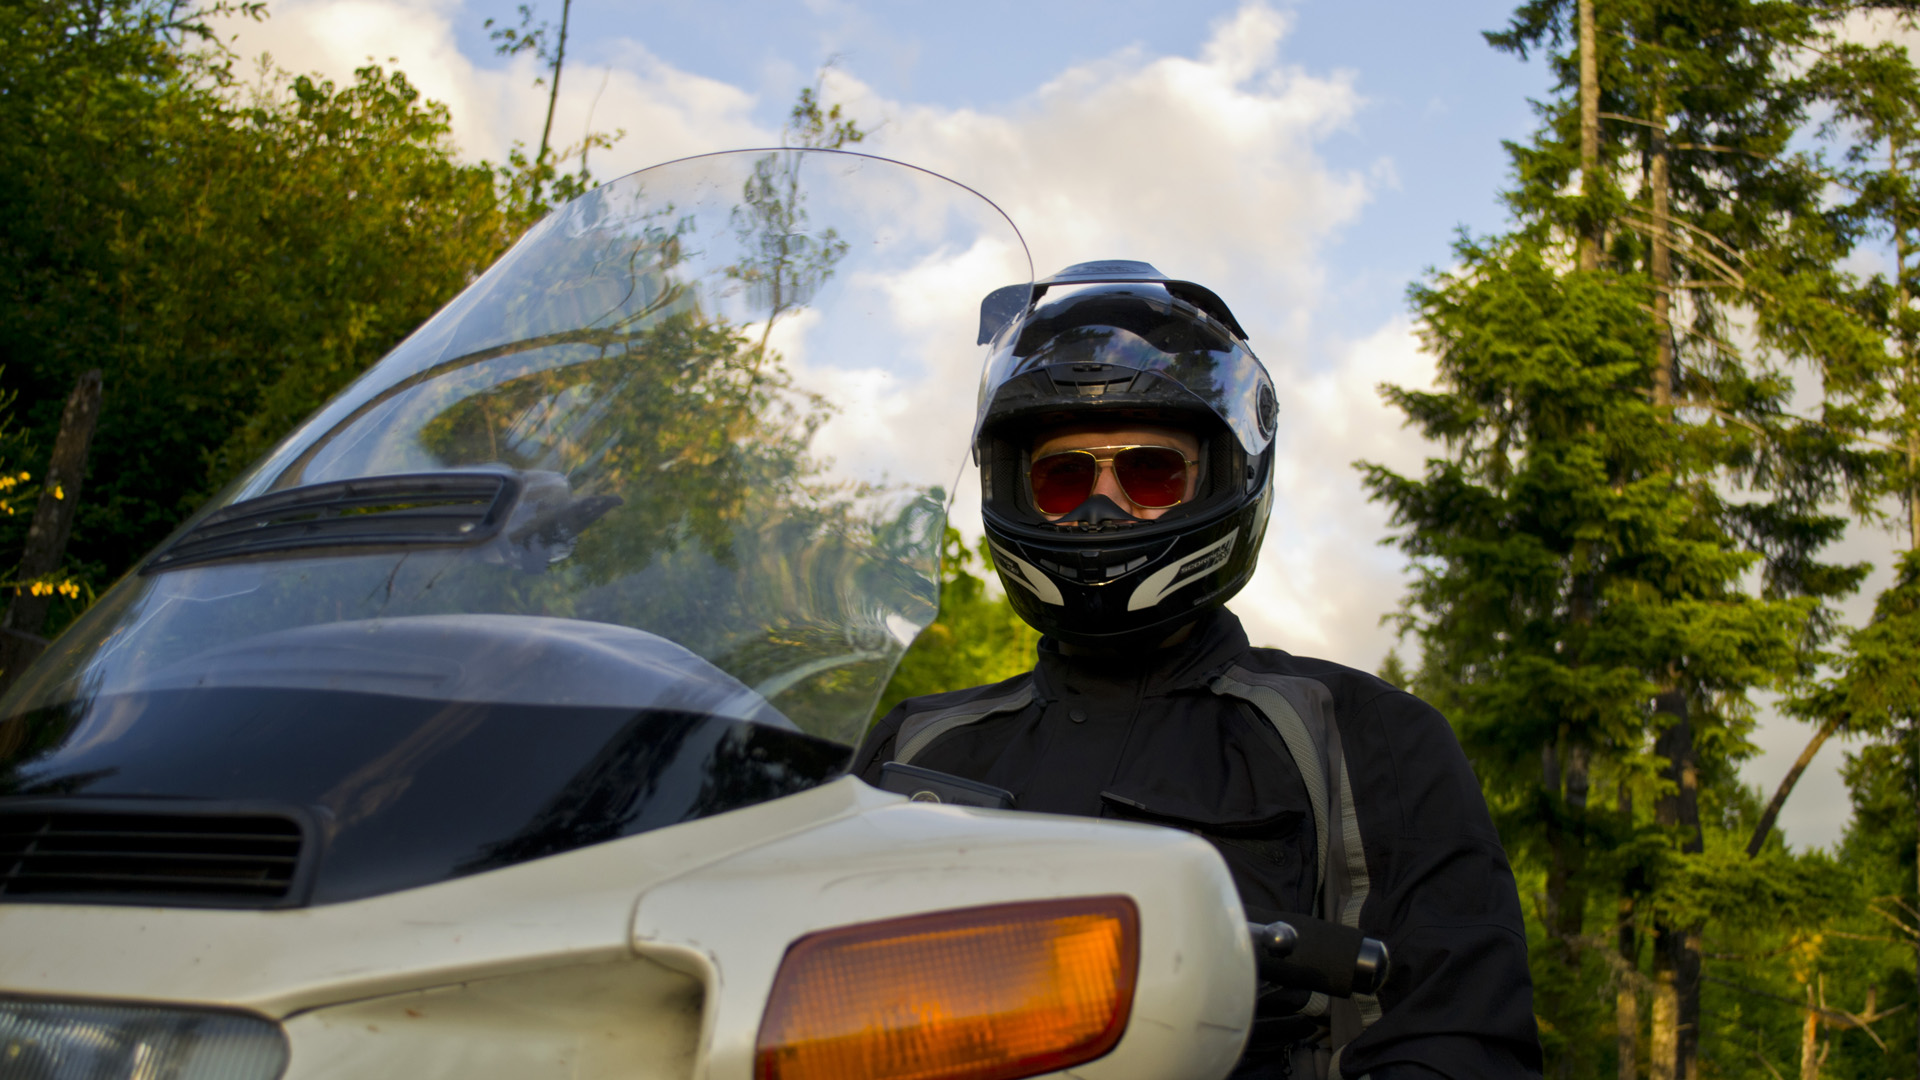
A Note About the Air Bubble, Looking Through the Windshield vs Over, and Helmet Noise
When you’re riding your PC800, you can have one of three riding postitions:
Sit low enough behind the windshield that you’re fully encapsulated in the air bubble it makes. You’ll be looking through the windshield.
Have your head and helmet stick up above the windshield enough to be in the turbulent air coming off the top lip of the windshield which protects your body from the wind and allows you to see over the top of the windshield. However, this makes for a very noisy ride.
Have the windshield be low enough below the bottom of your helmet that your head is fully in the airstream which makes your neck more tired and allows you to see over the windshield. You will get some noise but not as much as Option #2.
I personally am in the Option #2 camp more because I haven’t decided how to address the problem than anything. I’ve tried riding on a bike where I was in Option #3 and it was good but my neck got tired. I also have tried Option #1 by slouching down and looking through the windshield but if the windshield is dirty, this isn’t a great idea. It’s also bad for my back!
When you’re choosing a windshield, the height of the windshield is important. Think about which option you want to be in and go in that direction. There are a variety of products that help to varying degrees to increase the height of the air bubble behind the windshield. Look below for a section dedicated to windshield lips and edging for more details on that.
Aftermarket Windshield Options
Most people are still riding with the OEM Hondaline windshield that came with the bike originally. A few bikes were upgraded to the optional Tall Hondaline windshields. Today, most people end up buying a Clearview windshield.
OEM Tall Hondaline Windshield
Check EBay for this option. Honda does not sell these anymore but they pop up from time to time. The tall windshield will give you a couple more inches of coverage than the stock OEM windshield.
Clearview Windshield
The Clearview windshield is what most people end up when they buy an aftermarket windshield. You can get a variety of taller or shorter heights according to your specifications. You can also get a Goldwing-style vent added which can help to allow a little air flow through during hot weather and helps to collapse some of the air bubble that can otherwise make a *fwhump fwhump fwhump* noise around your body and helmet.
I personally have a Clearview +5″ windshield with a Goldwing-style vent. One issue though is the Clearview windshields are thicker than the OEM Hondaline windshields. This makes fastening it to the bike a little more difficult especially with the valence trim. Don’t worry too much though — many, many PC800 riders have successfully installed Clearview windshields.
A number of people who ride Honda Pacific Coast PC800 motorcycles have been using Rifle windshields. The folks who have them generally seem to like them although I have seen a few reports of too much flex in Rifle windshields though. One nice feature, however, is that you can remove the windshield quite easily with this system if you want to have no windshield in the summer months.
Alex H. was kind enough to send in a few photos of his Rifle windscreen on his Honda Pacific Coast.
7Jurock Windshield
I don’t know any PCer who rides with a 7Jurock windshield but they are available for the PC800. If you ride with one and like it, please let me know and send me a picture!
A Few Unknown Windshields in the Wild
Over the years, a few windshields have popped up attached to bikes on Craigslist with very little information available.
A bike for sale at a used car lot in Florida in May 2018 popped up on Craigslist. One or two people on the PC800 Facebook group believe it might be a Madstad windshield that was grafted onto the Pacific Coast. As far as I am aware, Madstad never made a windshield dedicated to our bikes.
Former Options That Are No More
At one point, Cee Bailey’s used to manufacture a PC800 windshield but they no longer have it listed on their website. You might try calling them up to see if they still can produce one if you’re interested. I’ve only heard of one or two folks who ride with a Cee Bailey’s windshield although they have a pretty decent reputation for aircraft windshields.
Windshield Lips and Edging
A number of people have found it useful to add a lip or some edging to their windshields to make the air bubble behind the windshield be taller. I have played around with a DIY solution where I put some plexiglass on the front of my windshield. It in fact did help. At some point, I need to get around to installing something permanently on my bike.
Laminar Lip
Laminar Lip makes a good solution that allows you to adjust the height of your windshield with a piece of polycarbonate and some velcro. Quite a few PCers ride with one of these.
If you have a Laminar Lip, please send me a photo so I can put it here!
Saeng Micro-Swirl
A few PC800 riders have been experimenting with Saeng Micro-Swirl Gen 4 edging on their windshields. There has been some indication of positive results although I’m not sure I really buy their marketing material. Please let me know if you have used such a product and your experiences!
MRA VarioScreen
One Honda Pacific Coast rider used a MRA VarioScreen replacement spoiler on his PC800 windshield to create a different sort of windshield lip. He reports good results.
Windscreen Spoiler
Touratech sells a variety of clip-on windscreen spoilers that can be clipped onto a PC800’s windshield. A few folks have used different models over the years and have found them to be useful. If you’re using one, let me know and send me a photo!
Puig Clip-On Windscreen Visor
Justin H. from the PC800 Facebook group found a Puig Clip-On Windscreen Visor works well on the Honda Pacific Coast. It is adjustable and clips on easily onto both stock and aftermarket windshields.
DIY Options
You can always DIY an option as well, such as this DIY wind deflector that someone used on a Suzuki Bergman. The same principles can be used to build your own for a PC800.
Andrius K. on the PC800 Facebook group used his 3D printer to print some mounts that he attached to a piece of polycarbonate plastic and then attached the DIY wind deflector to his stock windshield. I should be getting the file that he used to print out the mounts in the coming days or weeks so that others can try this as well.
The trunk release cable on the Honda Pacific Coast PC800 can break after many years of use. Below I document one option to plan ahead for the eventual cable break. There is also information on an automatic trunk latch release system. Both the emergency trunk latch release photos and the automatic trunk latch release system come courtesy of Seth S. who is a long-time active member on the IPCRC Yahoo! group.
Emergency Trunk Latch Release
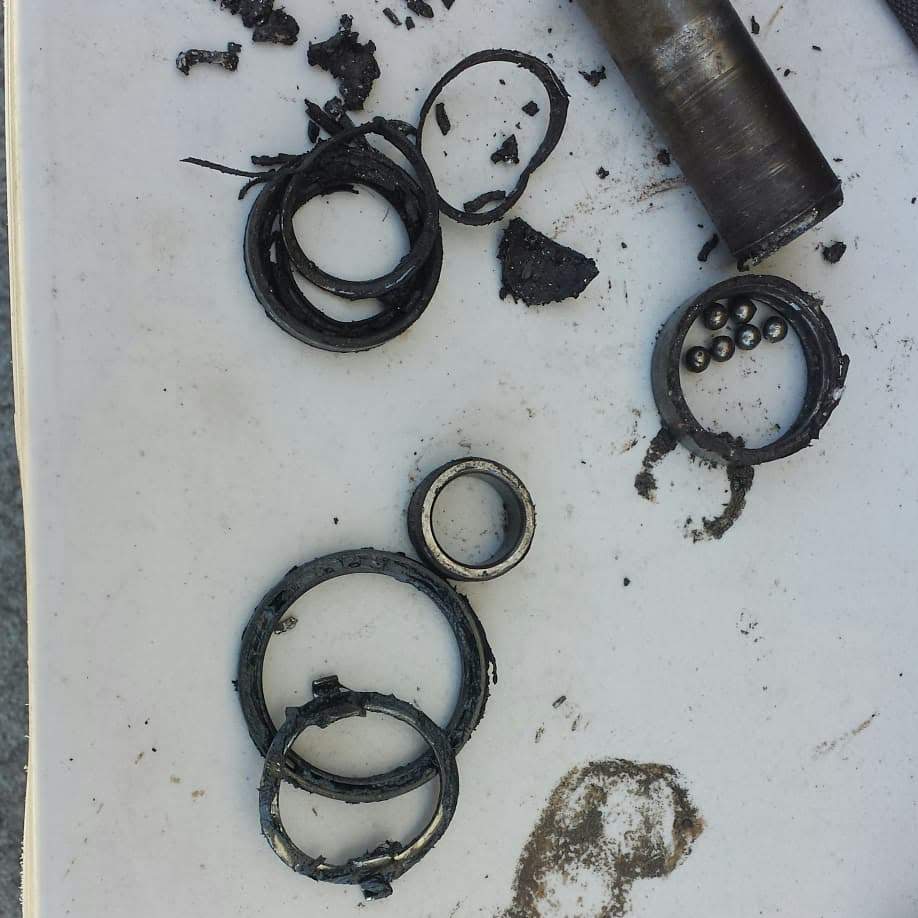
After a fun day of riding your PC800, you get home, open up the fuel door, grab the trunk release handle, and nothing happens! The cable has broken inside the trunk latch cable release assembly. Your gear is now stuck inside the Pacific Coast’s trunk. If you picked up groceries, your ice cream is now melting.
If you find yourself at this point and haven’t planned ahead, there are a couple options depending on where the cable assembly broke. There are two latches on our trunks including one at the top of the trunk and one in the back of the trunk. Depending on where the cable broke, you have some different options.
Step 1: Look for the Cable at the Release Lever
If you’re lucky, the cable has broken at the release lever end. There likely is a little bit of cable still sticking out of the cable housing. Get a pair of needle nose pliers and pull on the end of the cable. The latches in the trunk will likely unlatch and you can open the trunk. Now make sure you don’t close the trunk until you follow some of the steps down below for “future-proofing” your trunk.
Step 2: Remove the Passenger Seat and Look for the Cable
If the cable broke somewhere that you can’t access it from the release lever, you need to remove the passenger seat. You need a 6mm allen key to remove the bolts on both sides of the passenger seat. Those bolts can be rusted in place and might take a lot of effort to remove. The seat can also be really jammed into place if this is the first time you’ve removed it.
Under the seat you’ll find the cable assembly. Using a small wrench (I think a 12mm but I haven’t double checked that. It could be a 14 mm), you can open up the cable assembly and try to actuate the cable from there using a pair of needle nose pliers. Again, if it opens the two latches, immediately follow the below instructions for “future-proofing” your trunk.
Step 3: Actuate the Upper Latch While Also Using the Cable
Occasionally the cable to the upper latch will break while the lower latch cable is still intact. Consider yourself lucky that you don’t need to go to the next step! At this point, you need to open up the cable assembly on the end that leads to the lower latch at the bottom of the trunk. Pull the cable at the same time as you manually actuate the upper trunk latch. You might want to practice how you’ll open the upper trunk latch — I have found that a small flat head screwdriver is a useful tool to do this. As soon as you have your trunk open, follow the below instructions for “future-proofing” your trunk.
Step 4: Manually Actuating the Lower Latch
If you’ve made it here, I’m sorry for you. Likely your trunk release cable has broken down near the lower trunk latch. This is the second worst type of failure (worst is the actual latch failing — I’ve NEVER heard of one of the latches failing though). You are going to need to try and fish down into the depths of the upper trunk cover to find the lower trunk release latch. You’ll need a small arm and a lot of dexterity to make it work. I have heard of one or two people who have successfully done it after many hours of work and cursing. Good luck.
A few folks have gotten so frustrated that they’ve taken a knife to their plastic tupperwear and cut a hole where the lower latch is located to get to it. If you choose this option, you’ll have to repair the plastic or replace it afterward. Perhaps a strategically-placed bumper sticker would be a good option.
Whatever you choose, you’ll want to immediately follow the “future-proofing” information below.
Options for “Future-Proofing” a Honda Pacific Coast’s Trunk
There are two options that I know of to help ensure that you will ALWAYS be able to get into your trunk regardless of if the trunk release cable breaks.
Option 1: Remove the Lower Trunk Release Latch Striker
The easiest thing to do is to remove the lower trunk release latch striker. This is the thing that the latch engages with to hold the trunk closed. In order to do this, you need to remove the rear brake and turn signal lights assembly. Then there are a couple bolts that you remove and the striker comes out. The downside to this approach is that the trunk is a little less secure while you’re riding. You might notice a little bit of flutter in the plastics of the trunk but likely it won’t be a problem. Several PCers run their bikes this way.
Now, if you suffer a trunk release cable failure, all you have to do is pop the passenger seat off and actuate the upper trunk release latch. Be sure to keep a 6mm allen wrench handy (outside of the trunk!) so that you can get into your trunk if you have a problem.
Option 2: Install an Emergency Lower Trunk Latch Release Cable
If you’re willing to do a little more work, you can install a secondary cable or rope to manually actuate your lower trunk release cable. To do this, you need to remove the trunk tail cowl (the “duck bill” thing on the back of the trunk). There are a bunch of self-tapping screws inside the trunk that need to be removed in order to remove the tail cowl. Now the entire lower trunk release latch assembly will be exposed.
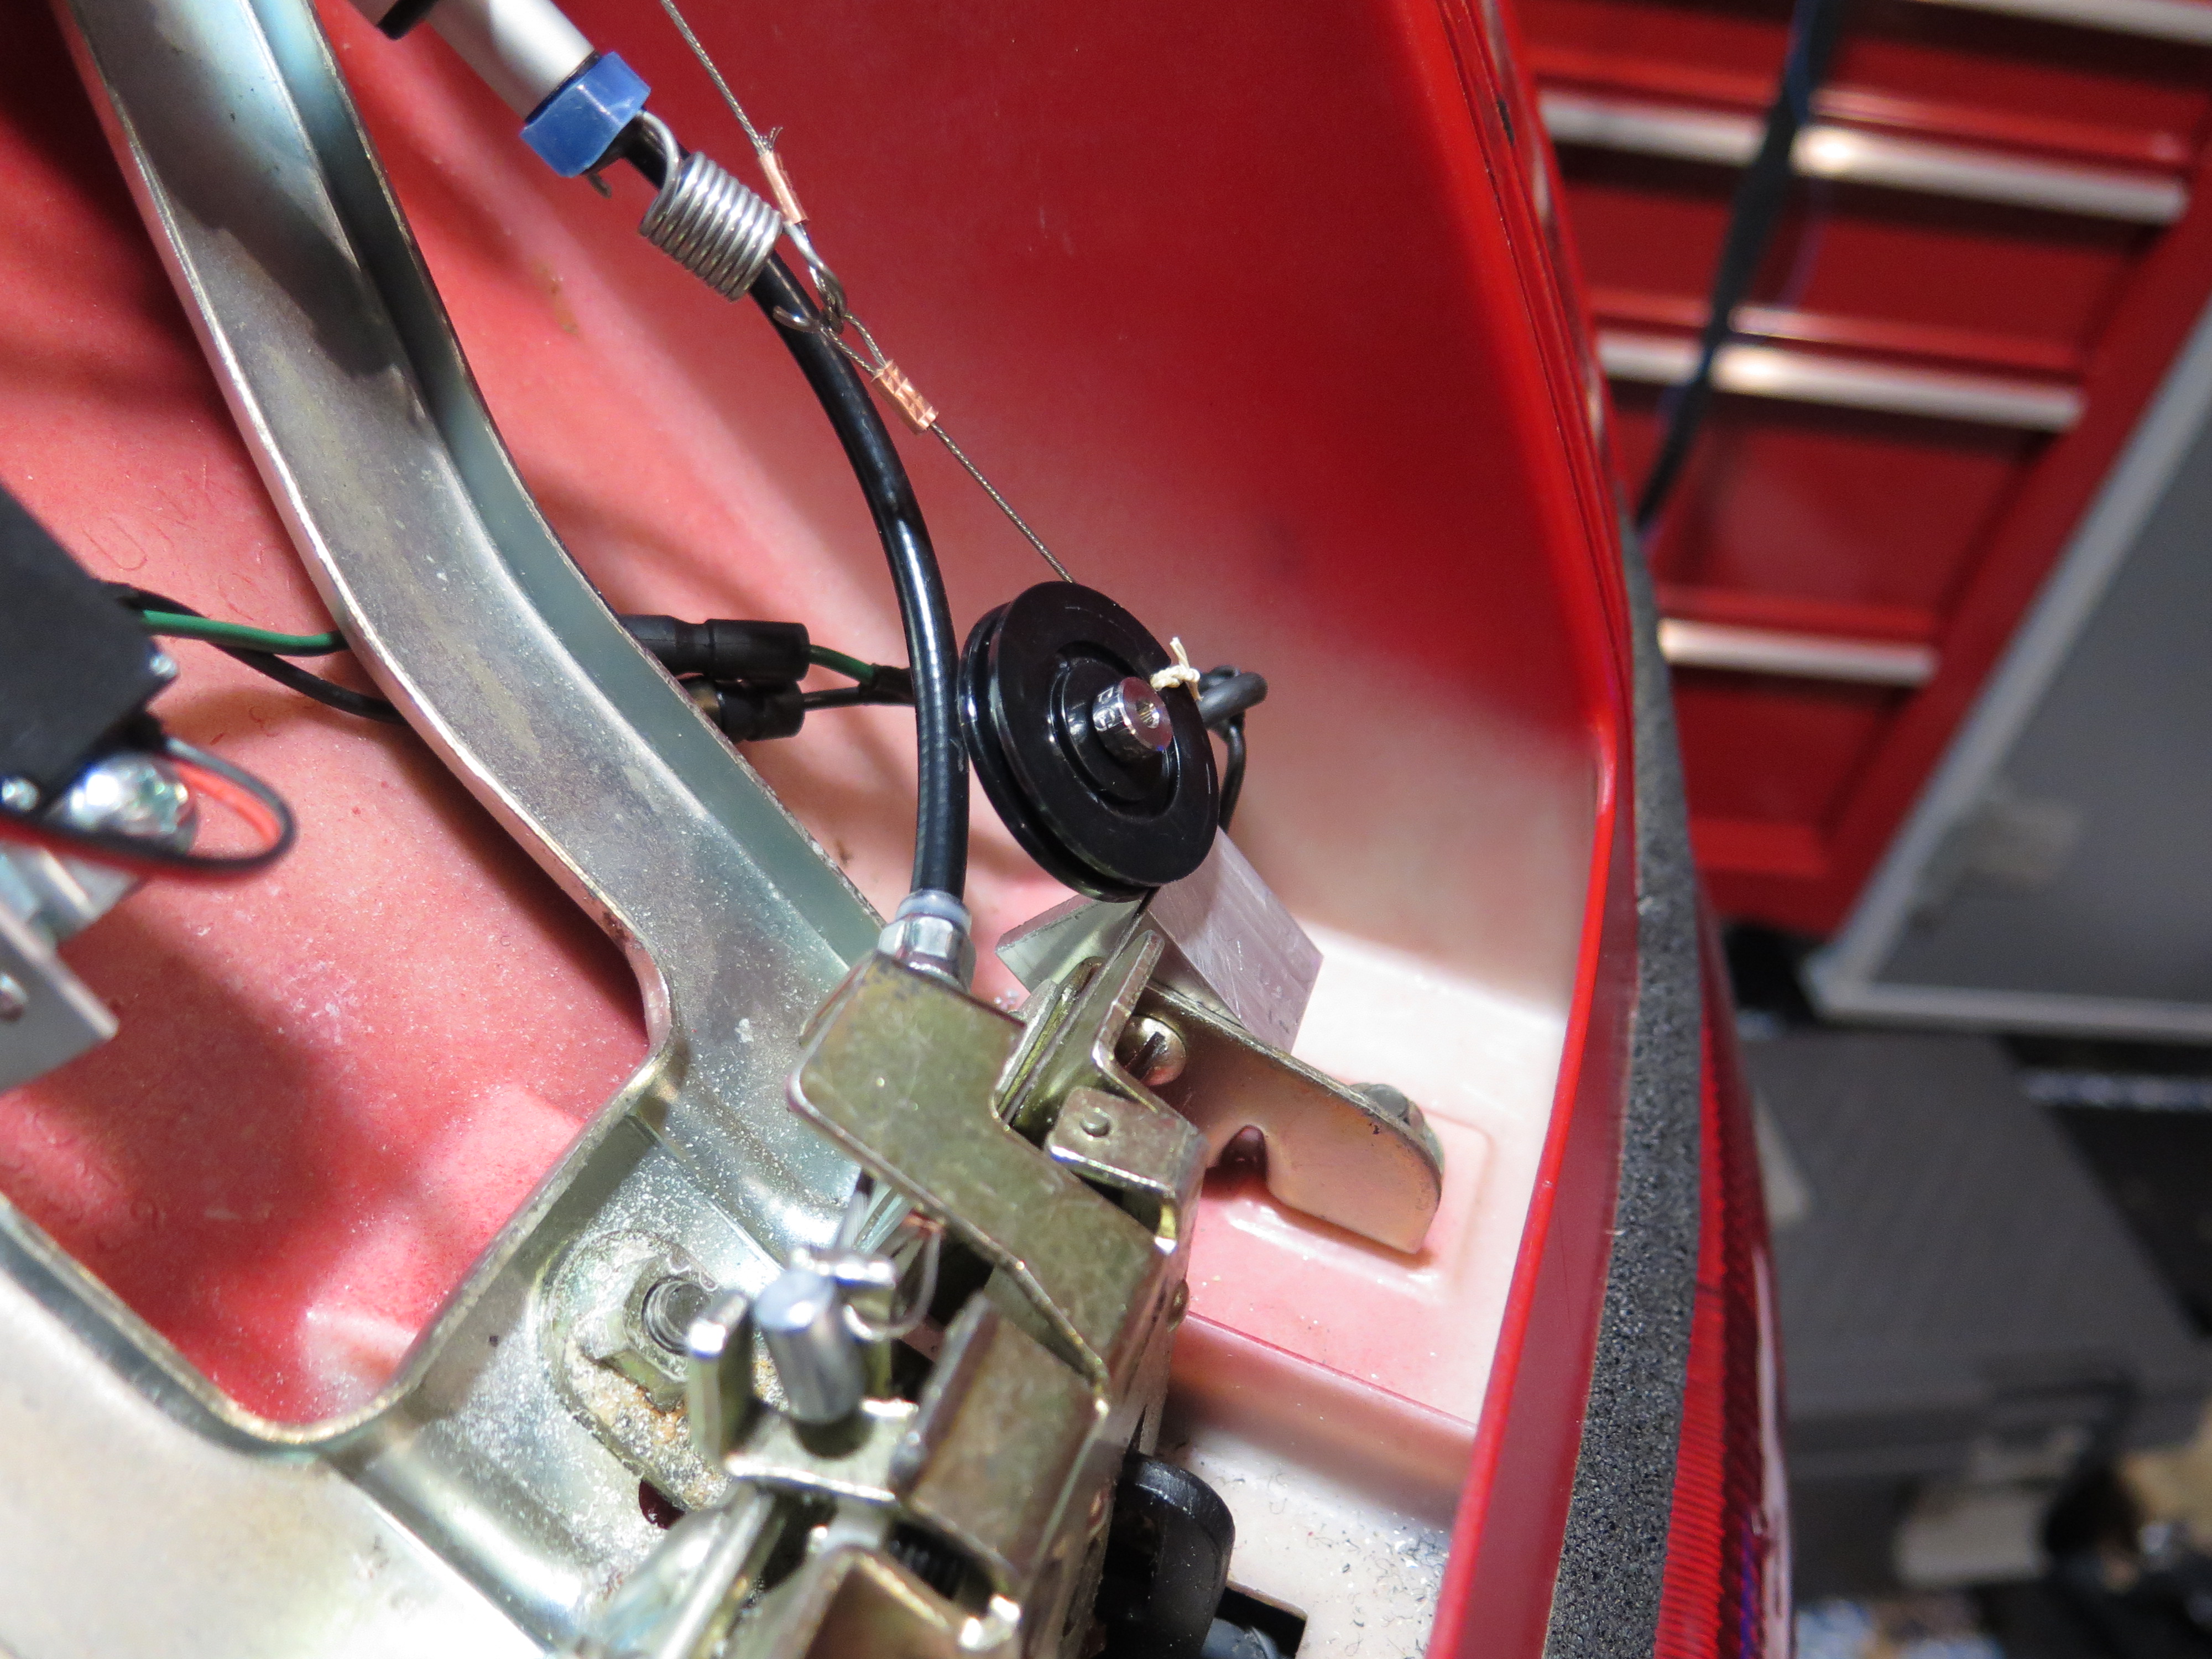
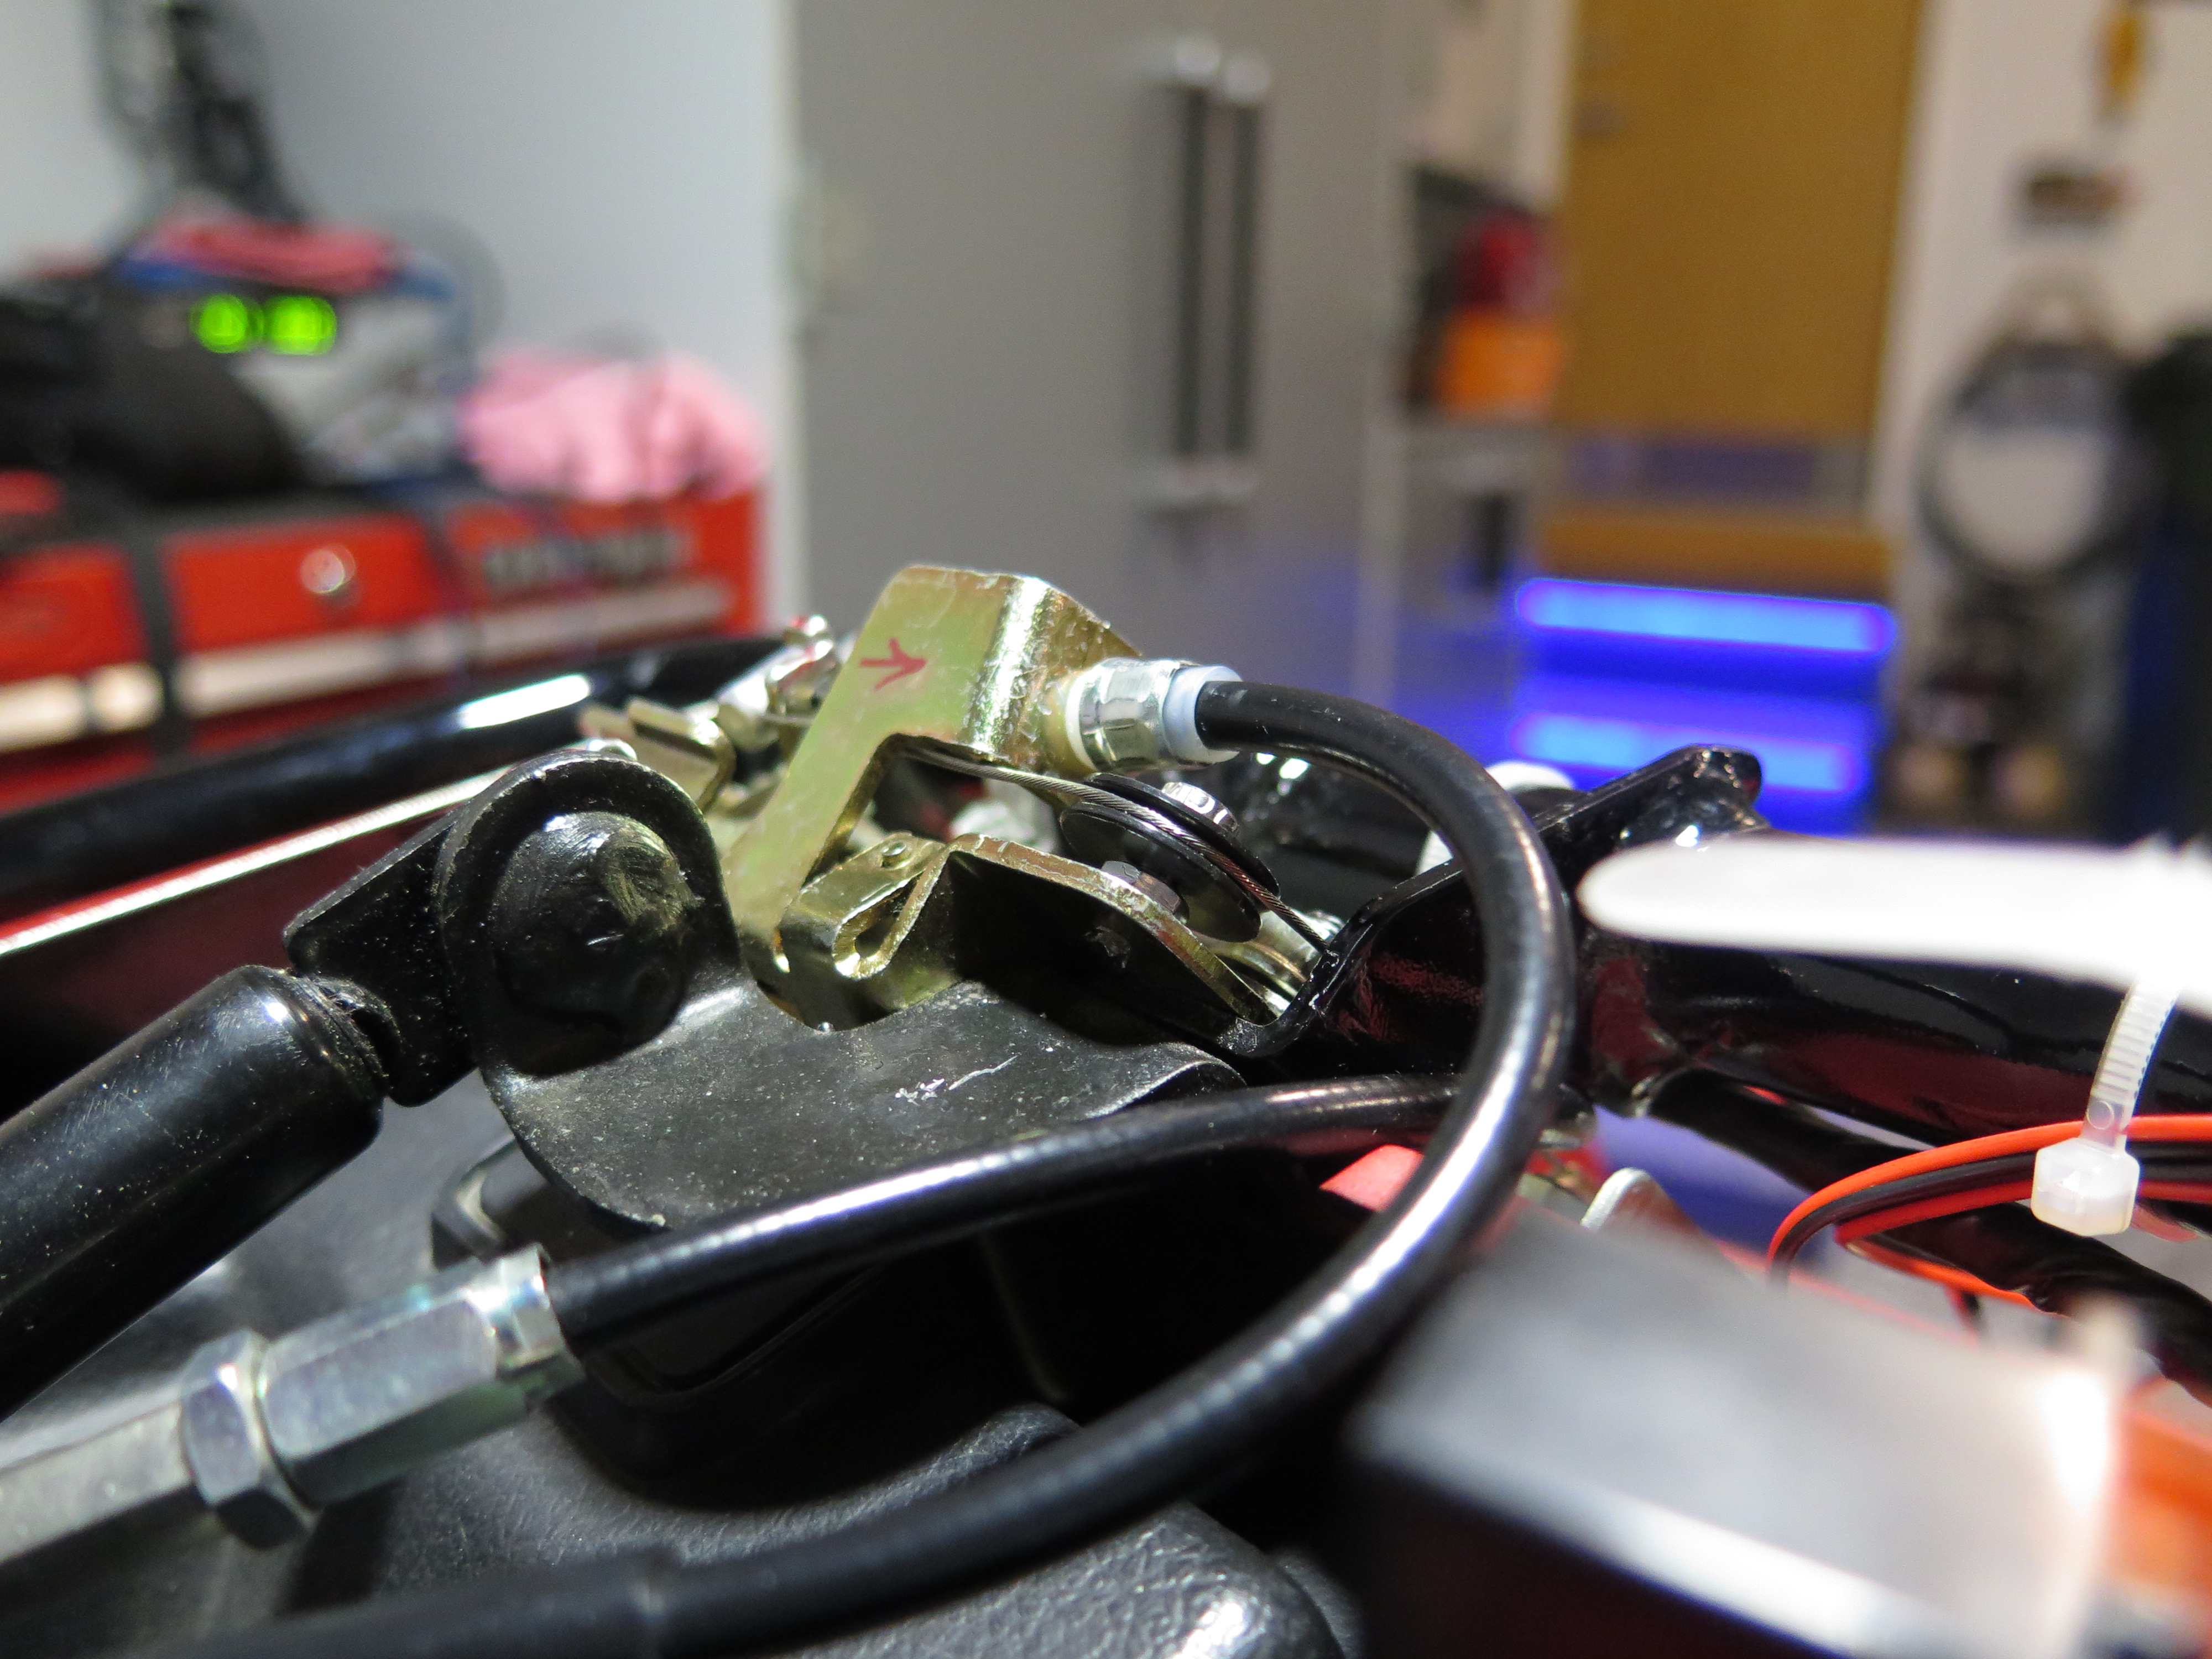
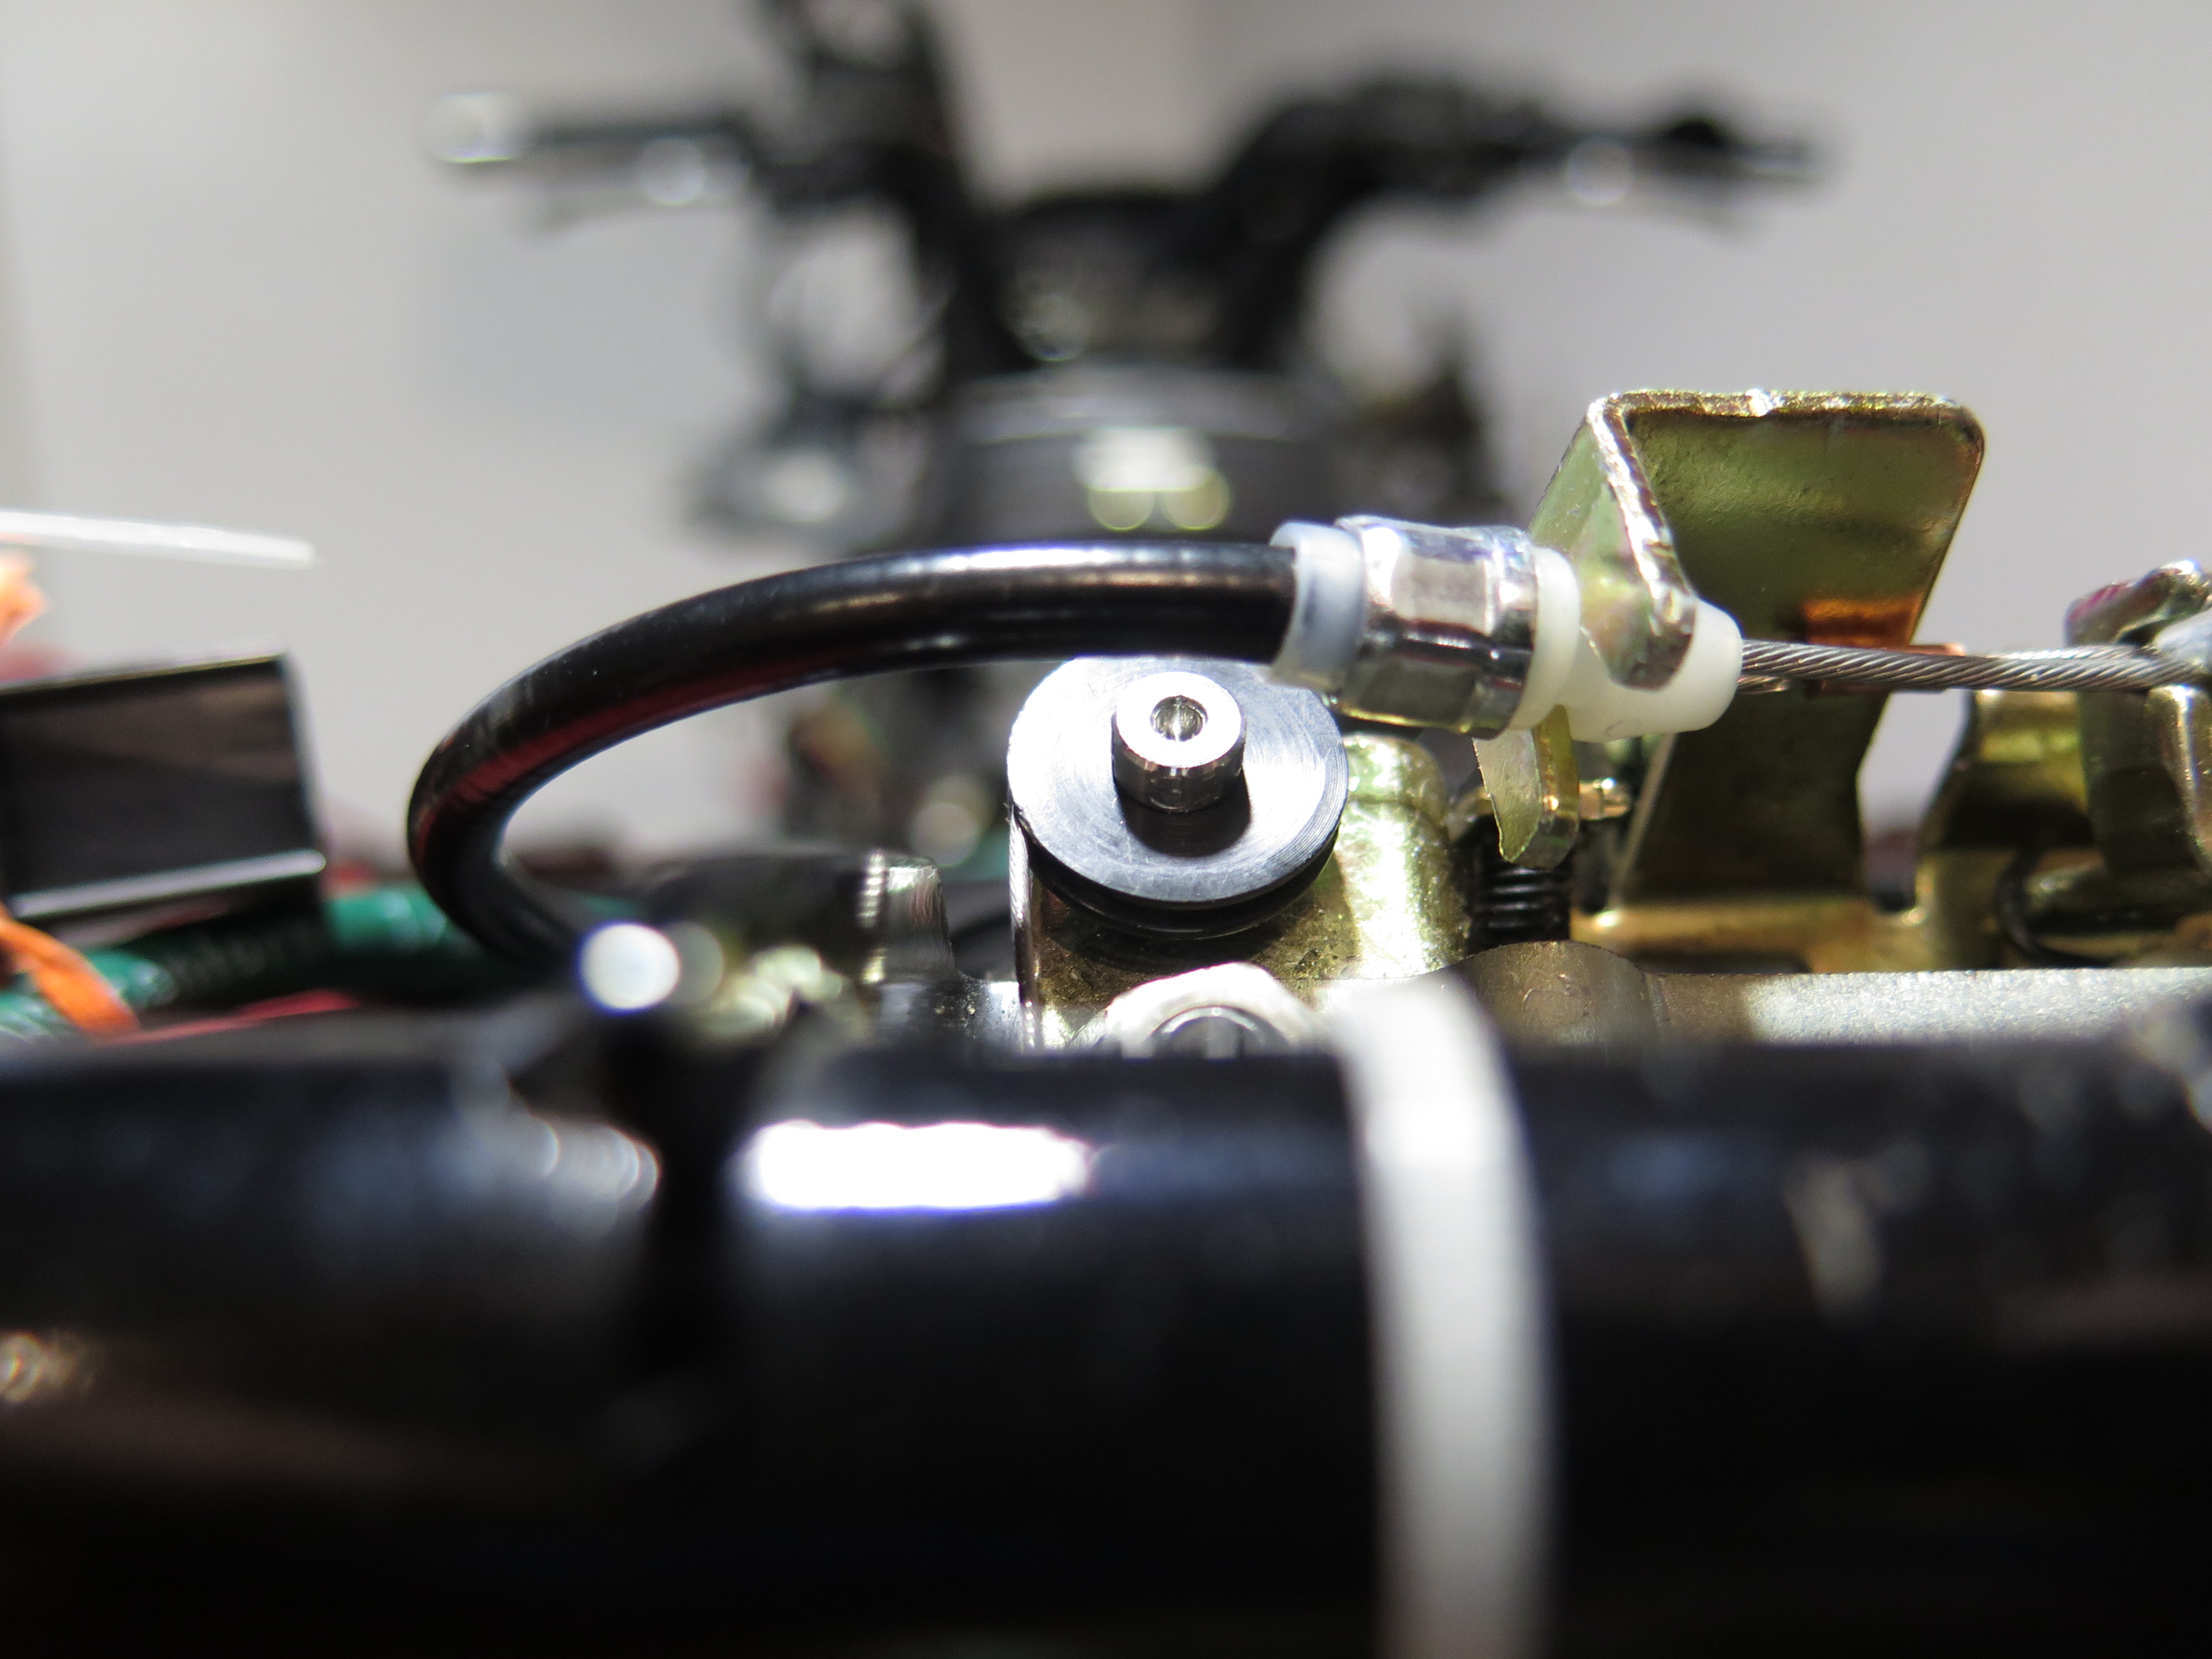
You can now install either a rope or a cable to manually actuate the lower trunk latch. Seth S. sent me some photos (below) that show how he installed a pulley and a stainless steel aircraft cable to make his emergency trunk release look very professional.
This is the lower pulley assembly that Seth S. installed on his PC800. The cable is attached to the lower latch so that if the stock trunk release cable breaks, he can still get into his trunk.
Automatic Trunk Opening for the Honda Pacific Coast PC800
Seth S. also has developed a wonderful electric latch release setup for his Honda Pacific Coast. If you have a little mechanical and electrical knowledge, this might be a project that you want to do in order to really take your PC800 to the next level of coolness.
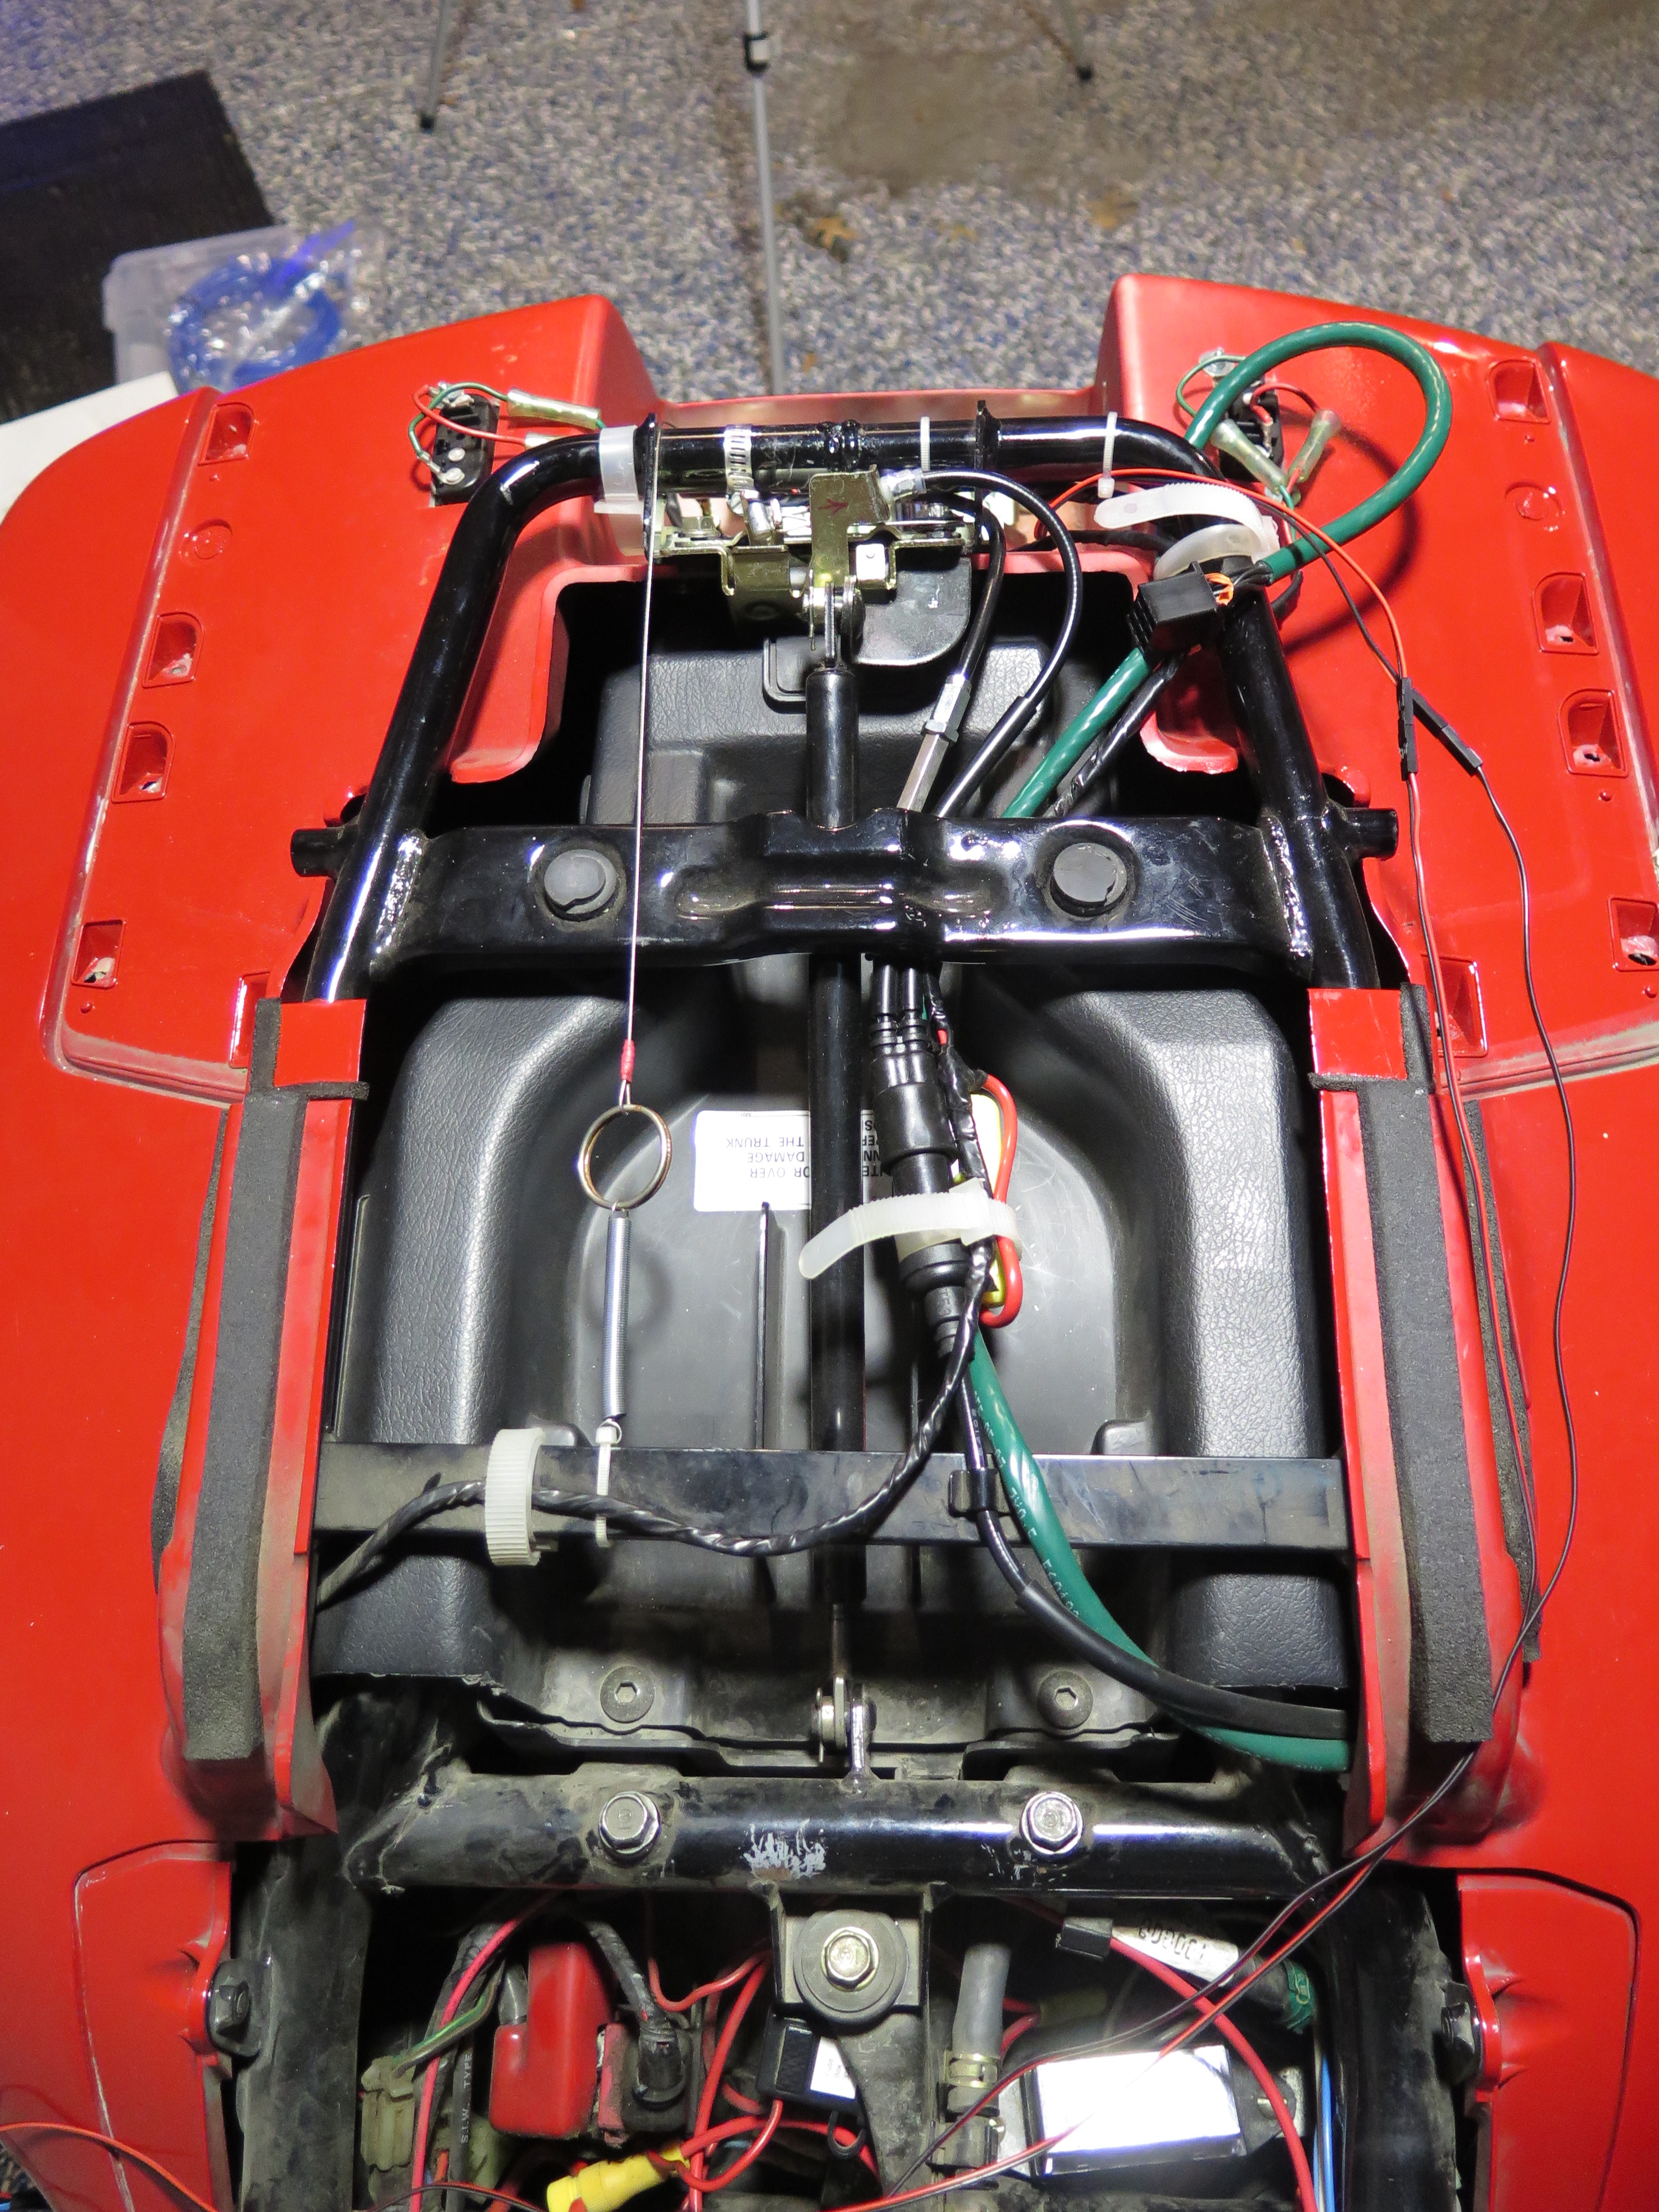
This is the lower trunk latch electric actuator that Seth S. mounted in his trunk tail cowl. The think cable behind the electric actuator is the emergency trunk release cable.This is where the electric actuator for the lower trunk release latch goes. The cable circles around the pulley and goes to the latch. Note that the emergency trunk release cable is connected above the pulley. Also note that he used a small wire tie to make sure the cable doesn’t skip off the pulley when the stock trunk release cable is used.This is the rear view of the entire lower electric actuator assembly. Also note that the electric actuator for the upper trunk release latch is shown on the left side. It’s quite the clever design.
This is looking from the top down. You can see the emergency trunk latch release cable on the left side.Here is a close-up of how the upper trunk latch actuator is mounted to the trunk cowl frame.Here is a close-up of the upper pulley assembly to get the upper trunk electric latch actuator to interface with the upper latch assembly.Here’s another view of the upper pulley assembly.
Above is a video of the three different ways of how Seth S. can now open his trunk. First, he opens the trunk with the stock release latch located under the fuel door. Second, he opens using the emergency release cable and manually actuating the upper latch. Third, he uses the electric actuators to open the trunk.
Thanks again to Seth S. for agreeing to let me post these photos on my website. All credit goes to him for these awesome photos and his innovative approach to opening our PC800 trunks!
Recently someone pointed me to this neat electric trunk release mechanism that someone in Japan made. It is another good option to upgrade your PC’s trunk release system.