This morning I installed some handlebar risers on my PC800. A few weeks ago I went on a crazy 1300 mile ride in 36 hours and found that my back was killing me and my hand was going numb. Conversations on the IPCRC convinced me to buy a set of handlebar risers made by GenMar Mfg. Several places sell the H121 kit which fits the PC among other bikes. I chose to buy mine directly from GenMar to support their business more than I would buying from a distributor. It took about five days for them to arrive. They ship out of Arrey, New Mexico.
When getting ready to do the install, I found that Jim has a good write-up of his installation. I used his photos as a reference for my installation of the bar risers. Since I like taking photos of my wonderful bike, I decided to write up this how-to to compliment what Jim has already produced.

The package included two bar risers, two sets of longer bolts, and some instructions. The instructions are the same as found on GenMar’s website. In general, I am favorably impressed with the build quality of the risers. Trying to find a machine shop that would make those bar risers as a one-off for you or even making them yourself in your home shop would end up costing as much or more than buying them from GenMar. Plus with GenMar risers, there is no trial and error. They just work.

The first thing I did was put a towel over my faux gas tank. This is to keep from nicking the plastic and to give myself somewhere to rub up against with my zippers and snaps while I’m working. The instructions that came with the bar risers also mentioned that you could lay your handlebars on the towel. I never had to do that but you might want to.

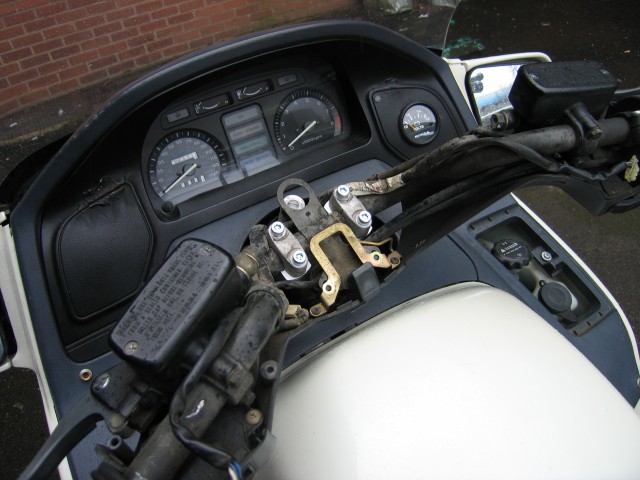
The first step is to pop off the center plastic. It comes off perhaps a little too easily on my bike. Doing this exposes some screws that need to be removed.

There are three screws underneath the center plastic cover. Remove all three of them and save them. They look like specialized screws that I bet are expensive to replace.

Next, remove the three bottom screws on each side of the handlebars (total of six screws). My screwdriver was just barely short enough to fit between the dash plastic and the screws. It would be better to have a shorter screwdriver next time.

The next step is to remove the plugs going into the switches on the top of the handlebar plastics. It was pretty difficult to remove mine and I thought I had broken the high/low beam switch but I was able to push it all back together and it worked. *whew!* Take your time removing these. And make sure to grease the connectors before you put them back together.

With the top handlebar plastic is removed, I marked the location of the handlebars and the top handlebar clamps. This will be important later to make sure the angle of the bars is set correctly when you reassemble. I assumed that the last person to remove the handlebars had put them back the way they had been at the factory. Looking at the plastics, it appears that in fact the bars were rotated correctly.

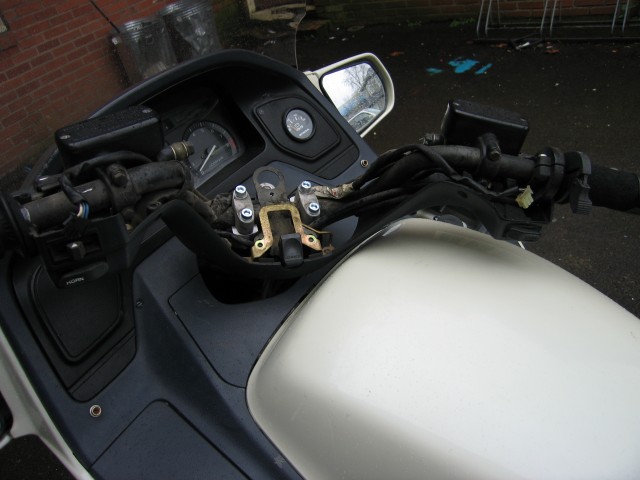
With the bars marked, I then unbolted the four big allen head bolts. I pulled off the handlebar top clamps after some futzing to get them to break free. I made sure to mark which clamp went on which side of the handlebars and in which orientation. I figure it’s best to put it back to the way the factory had installed it rather than in some other random orientation.

It took a little effort to get the four bolts lined up with the four holes and the bar risers. I had to remove the two zip ties from each side of the wiring running up the handlebars. Rather than cutting them off, I was able to release the zip tie locks and was thus able to reuse them when I buttoned everything back up. Bolting down the handlebars, I made sure that everything was lined up correctly. This means that the bars are centered and at the correct rotation. It took me about five minutes of work to get them the way they are supposed to be. Also I had to be very careful to not cross-thread the bolts as I put them into the bottom clamps. Be careful not to screw that step up. Otherwise, it’ll get expensive!

The next step was to make sure that none of the cables were binding and nothing was hitting anywhere with the bars pushed to both extreme ends of their travel. It all looked good for me.

Checking the fit in the other direction.

The only real downside I’ve found with this upgrade is that the key switch doesn’t move with the handlebars. It now is one inch down in a hole. This is going to make locking the bars a bit harder but not impossible. I can remove the center cover of plastic in 5 seconds to lock the bars. Eventually I plan to weld on an extender tab on my keys. That way it won’t matter so much about the key lock being an inch down in the hole.

The next step was to reinstall the zip ties that I had carefully removed earlier. I made sure to reinstall them not too tight so nothing would be cut through. The throttle cables on the right side did not go in the zip tie.

Here you can see how far down the key is sunk into the handlebar plastic. Not the end of the world but it is a bit annoying. As I said earlier, I’m planning to weld something onto the end of the key so it’s easier to turn.

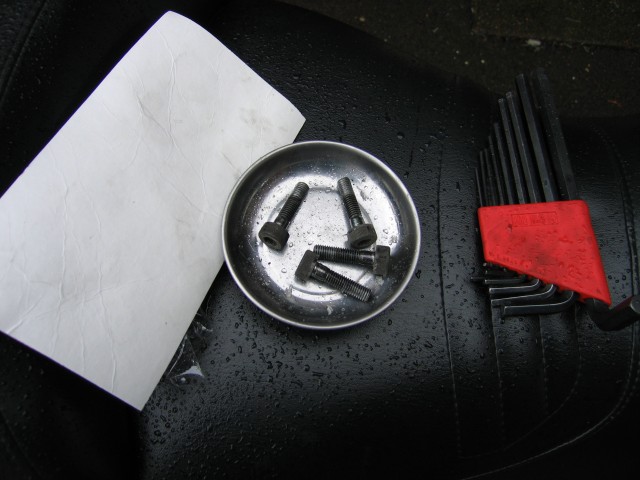
When you’re all done with the install, you will have the four original handlebar clamp bolts left over. Keep these things around. Maybe a future owner or maybe even you might decide to go back to the original bar height. It will save a lot of money and time if you still have these things around.


