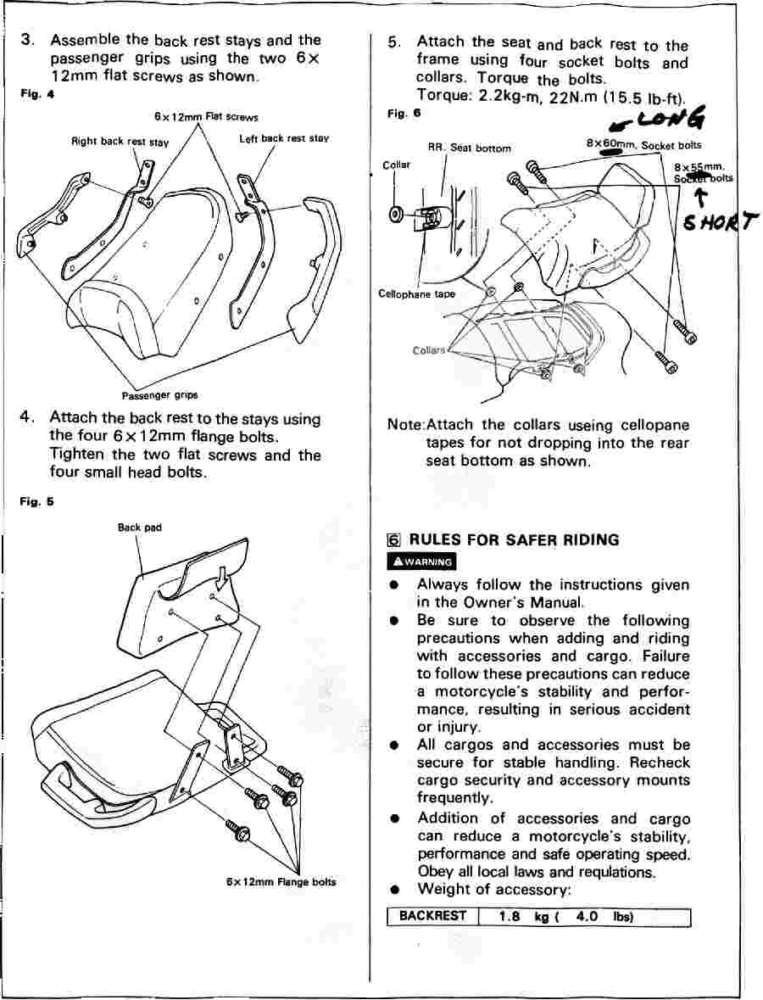
How to install a Hondaline backrest on a Honda Pacific Coast PC800 motorcycle

Here are the relevant installation instructions for installing a Hondaline backrest (P/N: 08111-MR500) for a passenger on a Honda Pacific Coast. This comes from Leland Sheppard’s archive of PC800 Honda Pacific Coast motorcycle information. After Leland’s passing, I have been curating all of the knowledge he left our wonderful little motorcycle community. Below are Leland’s words:


The following two images are the American Honda Motor Co. installation instructions for the PC800 passenger backrest, copyright American Honda Motor Co, Inc., 1988.  Some Installation suggestions from frustrated installers follow the images…

Page 1:
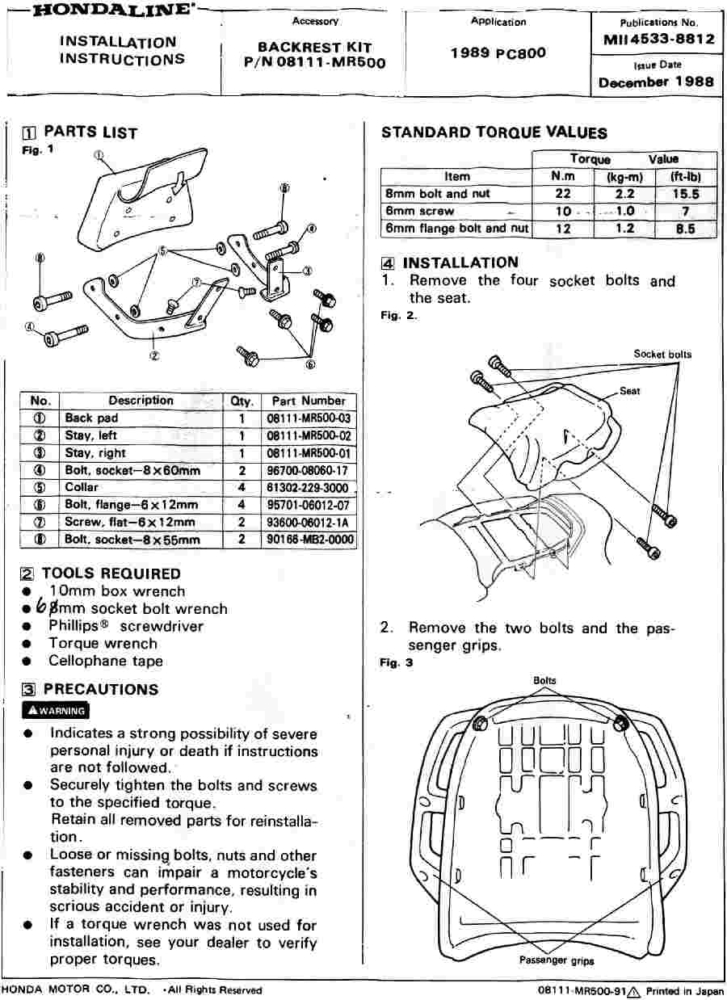
Installation Notes:

Alex Vrenios offered the following tips:

Although the two bolts one must remove to detach the hand rails (Fig. 2) go through the seat, the two flat-head screws one uses to
reattach the hand rails DO NOT go through the seat!  (Their heads are too small for the seat holes anyway!)  These two screws go into the seat brackets (into the counter-sunk holes drilled for that purpose) as shown in Fig. 4, which should be obvious. (But not to me!)  [It wasn’t obvious to me either and I didn’t get the flathead screws with mine; instead I struggled to get the original bolts to fit and finally went to the hardware store and bought longer ones for one of the two backrests I’ve installed. Leland]

Alex continues:

I mistakenly assumed that the screws were supposed to go  through the holes in the seat, then through the bracket holes and into the hand rails. I cannot tell you how disturbing it was to find longer 6mm screws at Home Depot, only to discover that this arrangement was nearly impossible to remount on the bike. A closer look at the instructions (yes, I read them first, but not carefully enough it seems) revealed the true mounting technique.  Everything went together pretty smoothly after I made that change.

Another “trick” I found helpful:

The instructions say you should use tape to hold the four short collars, extensions to the metal tubes that the four seat bolts go hrough. I found this was not a satisfactory way to hold them in place while applying the grip of Hercules on the hand rails to get all four bolts in. What I did was to put a short collar on a tube, wrap it with one and a quarter turns of electrical tape, using dots of super glue to secure the tape end. I then put these lengthened tubes into the seat, and ran the bolts through them. I still had one come apart, but it was a LOT easier than what they suggested, in my opinion…
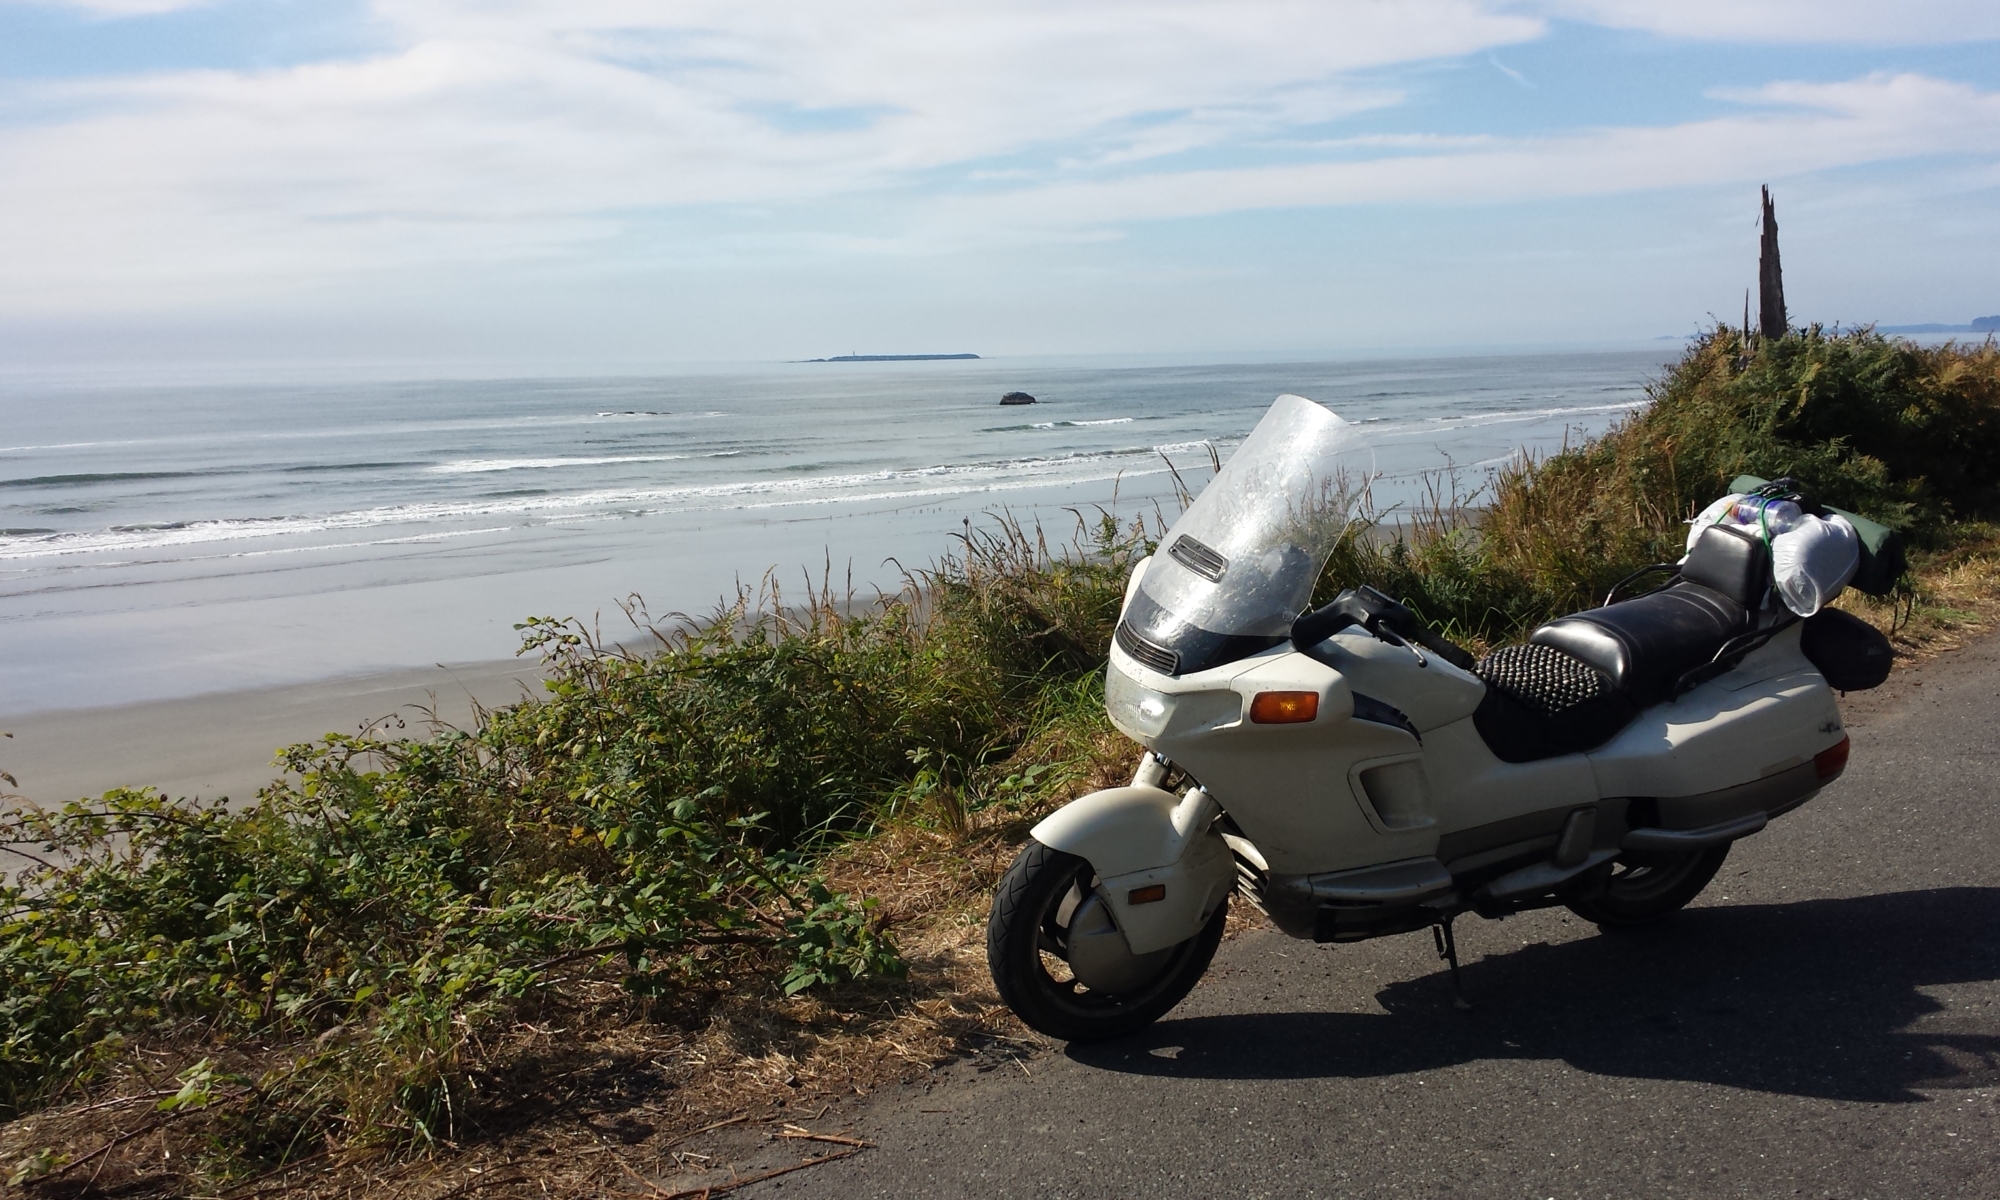
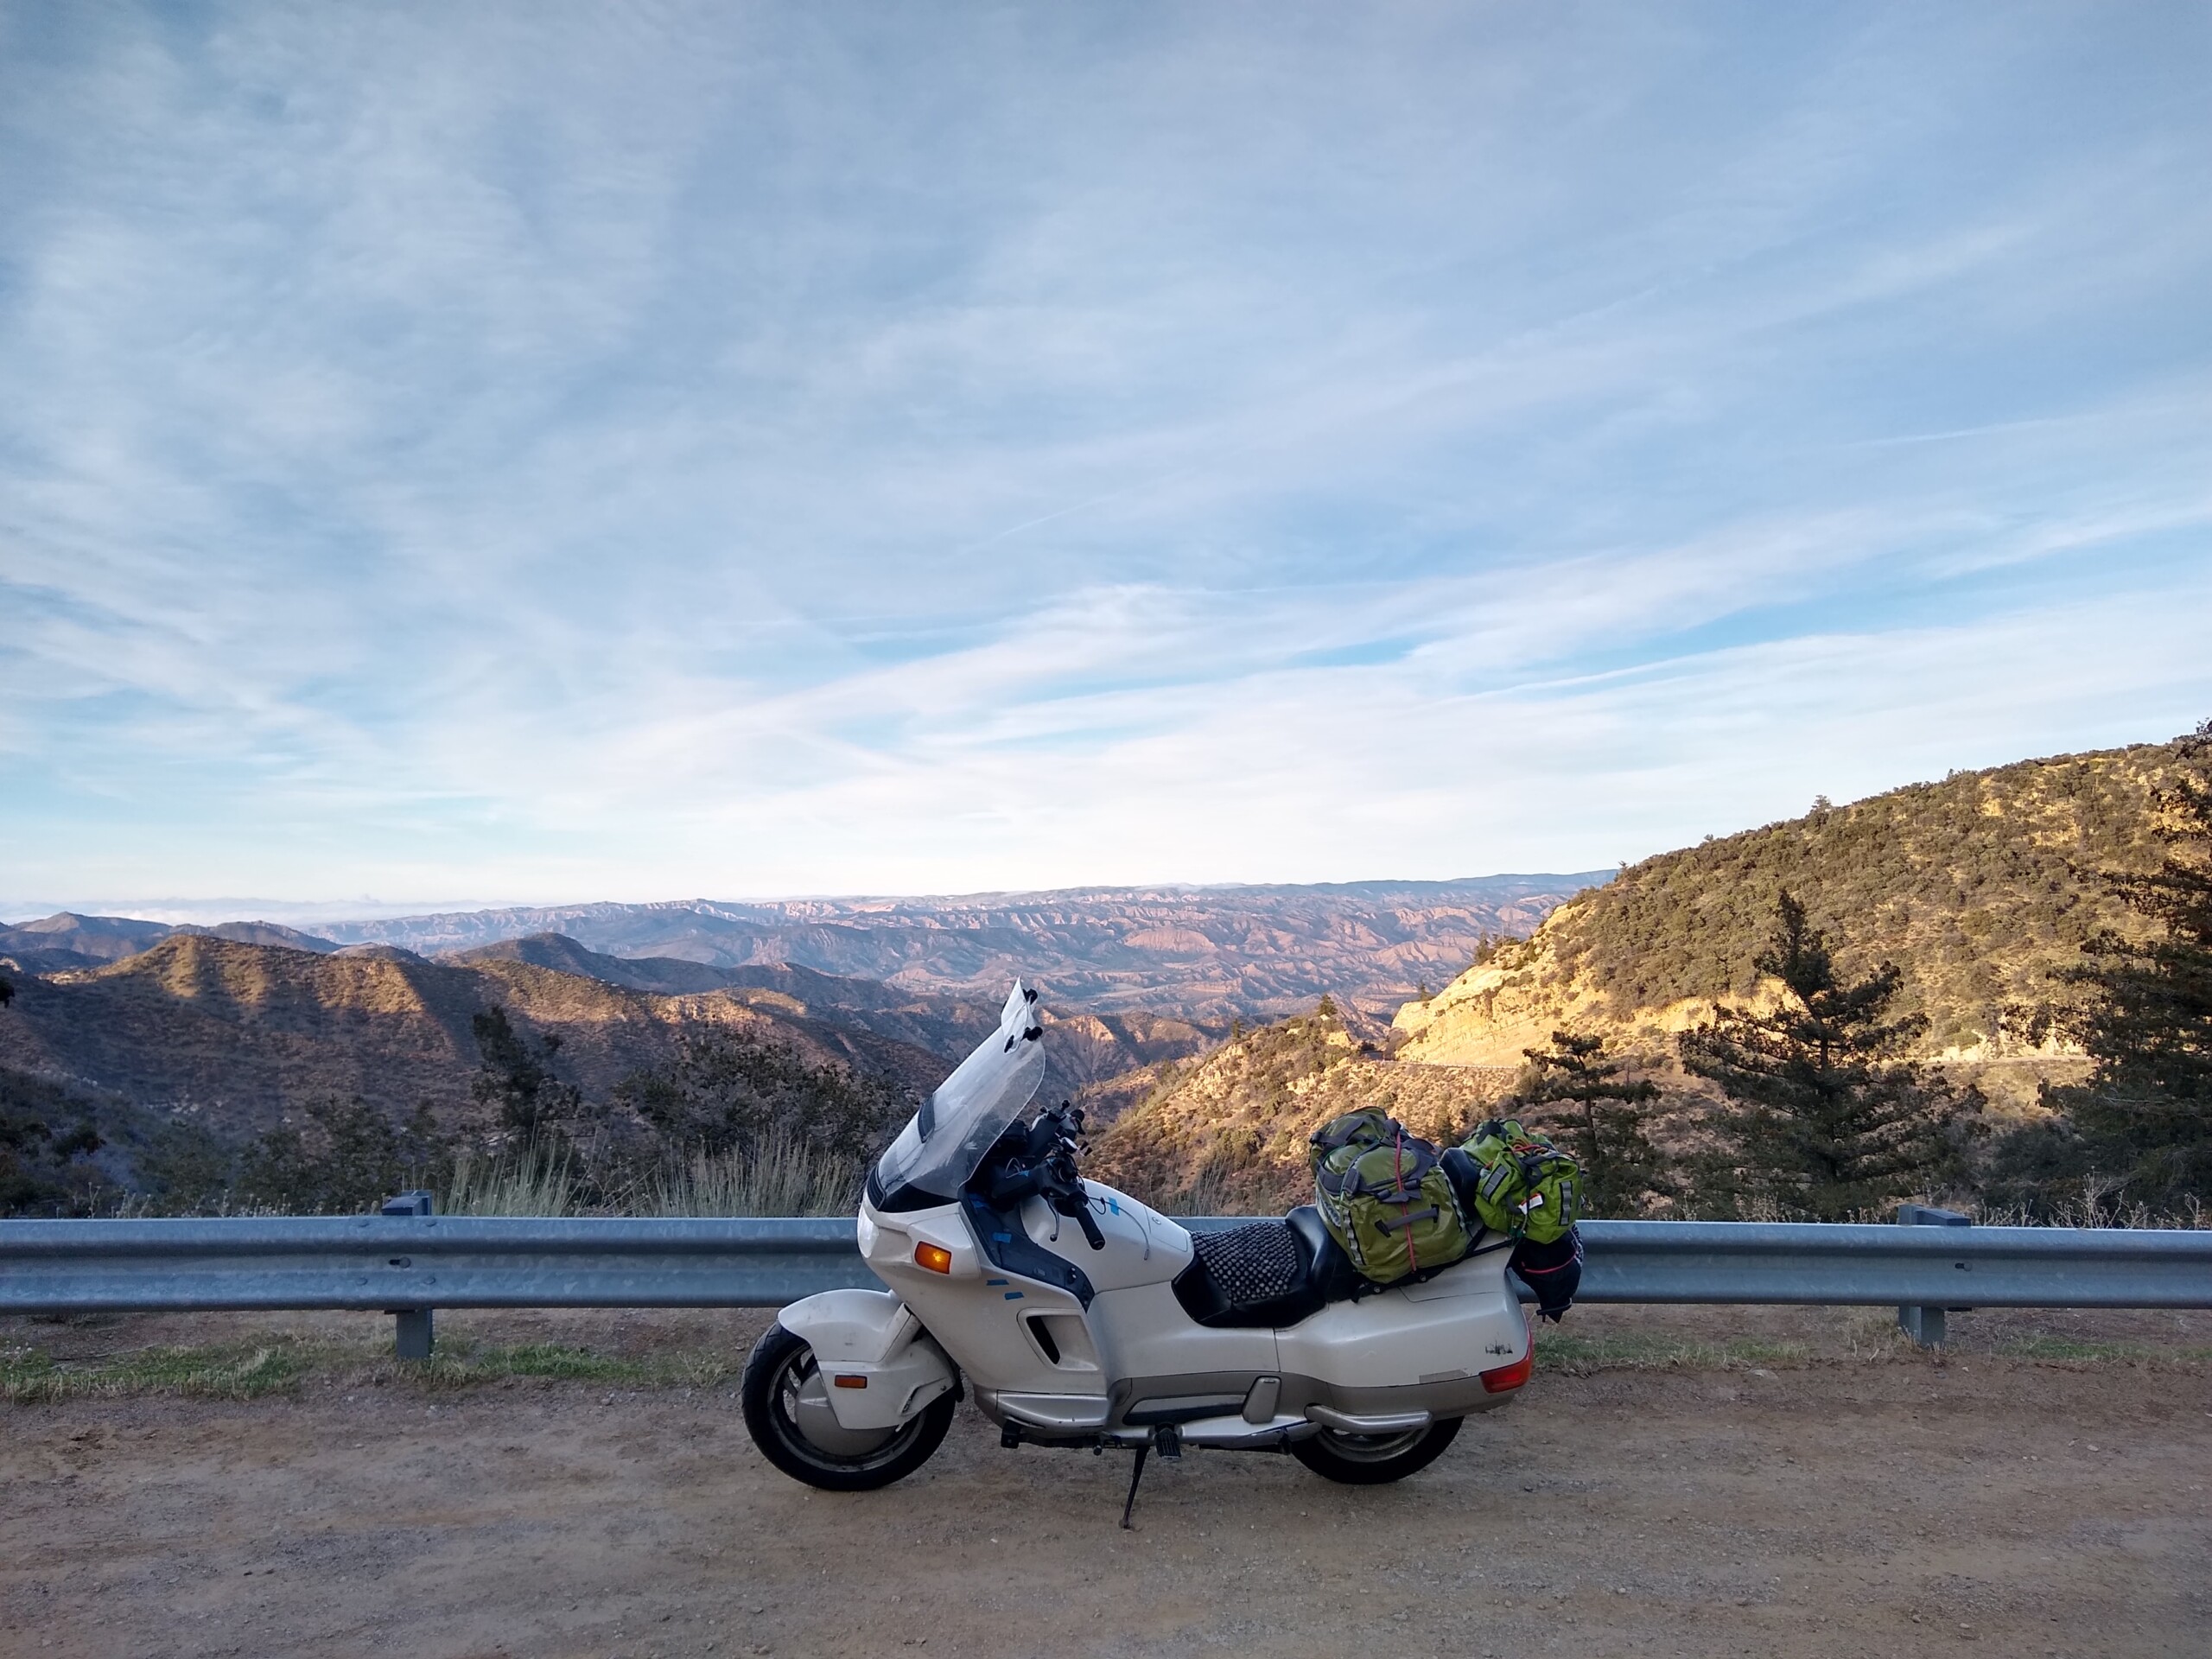
California Highway 33

I rode my Honda Pacific Coast down California Highway 33 on the way to Torrance for a work trip. This has to be one of the most sublime pieces of asphalt on the west coast. What a crazy, magical, impossible road! I was having so much fun that I only took one photo the entire way. I will for sure be back to this road.

New Mirrors for the Honda Pacific Coast

With the recent shortage of new old stock Honda Pacific Coast PC800 mirror assemblies, the price of used mirrors on eBay has gone through the roof. Luckily, Alex Ivanov from Russia has stepped into the gap and is offering most of the plastic parts for the mirror housing assembly for sale. He has developed molds of the mirror plastics that he can use to cast new mirror plastics for you on demand and mail to you.

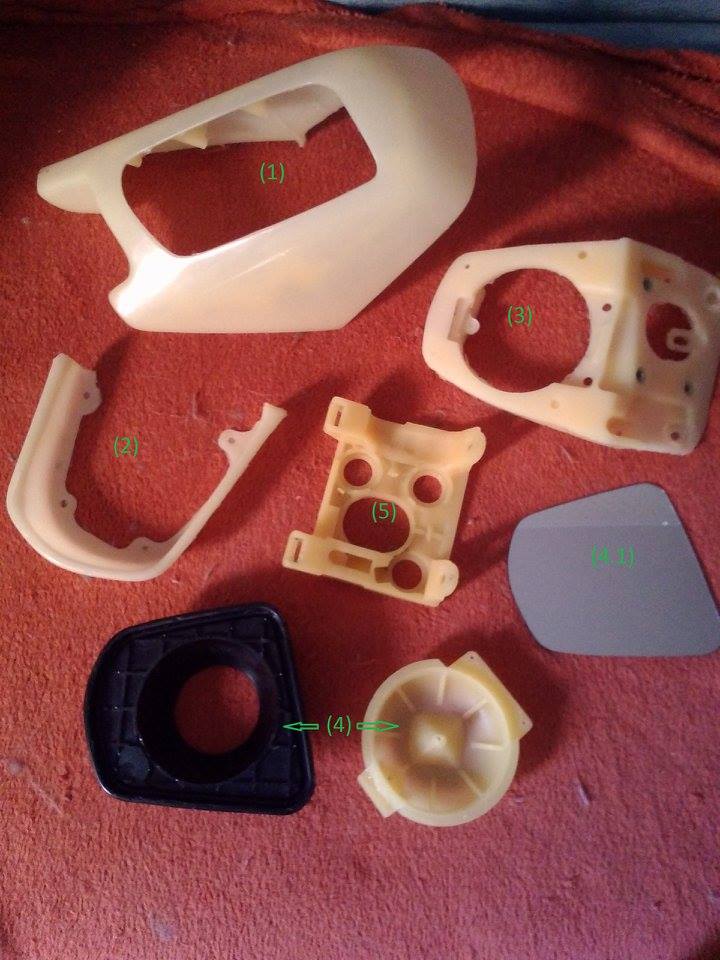
New cast plastic parts available from Alex Ivanov. Note the numbers to denote which part is which when ordering. Also please order directly from him.

I should note that I have not ordered any parts from Alex so I cannot speak to the quality of the prints or the timeliness of shipping. However, Alex has been around on the PC800 Facebook group for a few years now. The below information is from Alex. I have edited a few pieces of grammar to make it a bit easier to understand.

Also please note that the prices listed are from 2017 and ARE NOT CURRENT! They will give you a ballpark idea of the price but please email Alex directly to inquire about current pricing. He has had price increases on his raw plastic materials recently.

One other note: Alex’s first language is Russian. He writes pretty decent English but please don’t expect him to have perfect grammar or spelling.

If you wish to order parts from me, please send your orders details (needed parts, preferred payment and shipping etc) to my email pc800plastic@gmail.com (it’s much easier for me to keep orders info there).

Please specify the number of needed parts according to the above photo (1 – 5), because “I need the full mirror set” sometimes means “all pieces in the picture” or “all mirror pieces without the mounting plate” or even “all plastic without the glass.” Please, let’s save our time 🙂

Pricing (as of 2017 – prices are higher now due to rising cost of materials and shipping — in USD)

(1) Mirror housing: Left housing $50, right housing $50 [NOTE this is the 2017 price].
(2) Visor trim 8812(0/6)-MR5-003ZE (left/right). $15 each [NOTE this is the 2017 price] .
(3) Main bracket on which the mirror is assembled 881(1/2)2-MR5-003 (left/right) (it may be necessary to sand the mounting hole of the turn signal, because different mirrors have slightly different dimensions due to age-related deformations) – $50 [NOTE this is the 2017 price] .
(4) Fastening elements of the mirror glass 881(1/2)1-MR5-003 (left/right), the assembled set with the ability to adjust the mirror position. Note that I have no possibility of making the metal washer as in the original mirror, so I use some spring wire. It works pretty good after completely assembling the mirror. There may be some local defects on the outer edge, but anyway it will fix the mirror glass properly. $20 [NOTE this is the 2017 price] .
(4.1) Mirror glass – local glass workshops asked about $30 [NOTE this is the 2017 price] for one piece of cut mirror glass. Maybe it will be cheaper to make it in your local car mirror repairing workshops, if available. The glass can be installed in place warming up the plastic with a household hair-dryer (but the better way is to use an industrial dryer or go to a car mirror repair workshop).
(5) Mounting plate for fastening to the motorcycle 881(3/4)1-MR5-003 (left/right). The hooks that fix the washer-holding-plate are almost always partly absolete (see photos), but a strip of scotch tape solves the issue for the life of the motorcycle. $20 [NOTE this is the 2017 price] .

To be 100% happy you’ll need a turn signal, a safety wire, spring (toothed) washers of the mirror fastening to the motorcycle and the correct fastening hardware. In other words, you need your broken mirror assembly to harvest specific metal parts and the turn signal lens assembly from.

Shipping for one full set to Europe with regular post is about $15-20 [NOTE this is the 2017 price] . To USA – about $30-35 [NOTE this is the 2017 price] .

I use two ways of payment:
a) direct pay by PayPal;
b) special lot at Ebay with ordered parts, again paying by PayPal, but with extra 10% Ebay fees, customer guaranties etc.
Of course i’m open to your suggestions.

It usually takes me about 5-7 days to make the parts if I am out of stock, if I’m not lacking of materials – those plastics are imported and sometimes local dealer have customs troubles for weeks…

Please send me your order details (needed parts, preferred payment and shipping etc) to my e-mail pc800plastic@gmail.com. Once again – please specify the numbers of needed parts according to the above photo (1 – 5), because “I need a full mirror set” sometimes means “everything in the picture” or “all the mirror plastics without the mounting plate” or even “all plastics without the glass”. Please, let’s save our time 🙂

PS: I also make bumper covers which are about $50-60 [NOTE this is the 2017 price]

Alex Ivanov