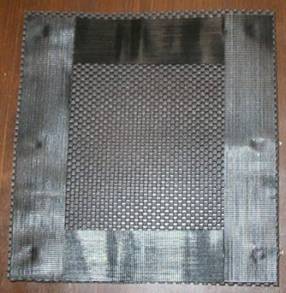
The patterns on this page can be used to make your own trunk carpets for a Honda Pacific Coast PC800 trunk.
Editor’s note: I am preserving Leland Sheppard’s PC800-related content after his passing. This is one of his pages that I felt the PC800 community would want to have preserved. Leland may be on his final Iron Butt ride but he is not forgotten.
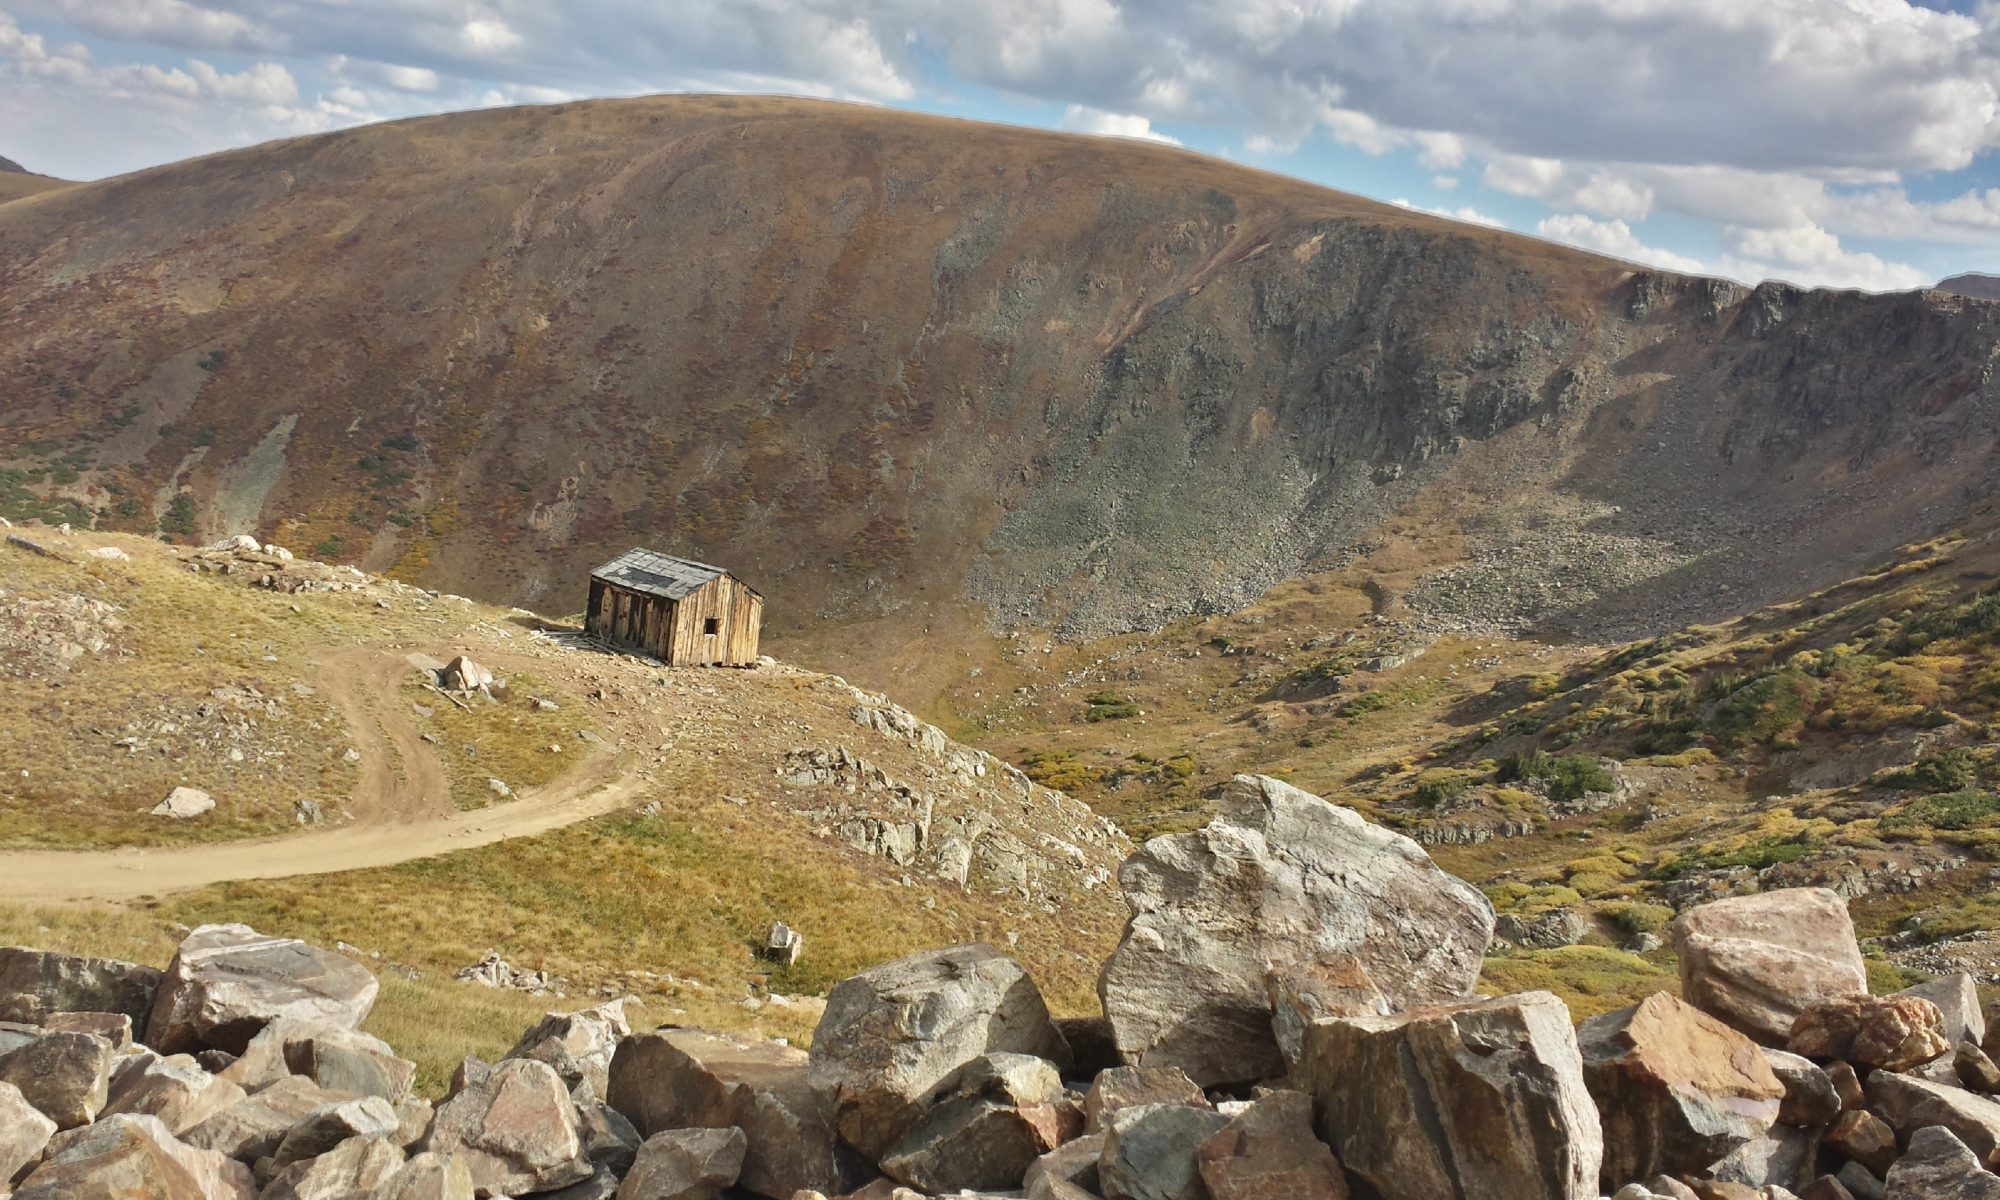
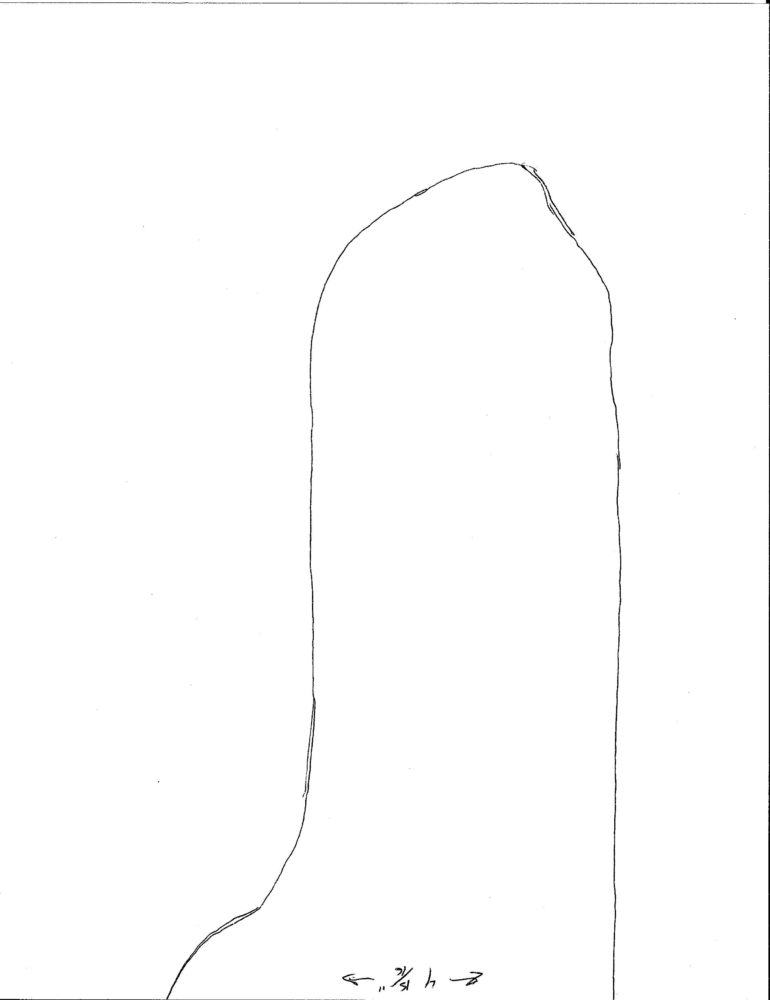
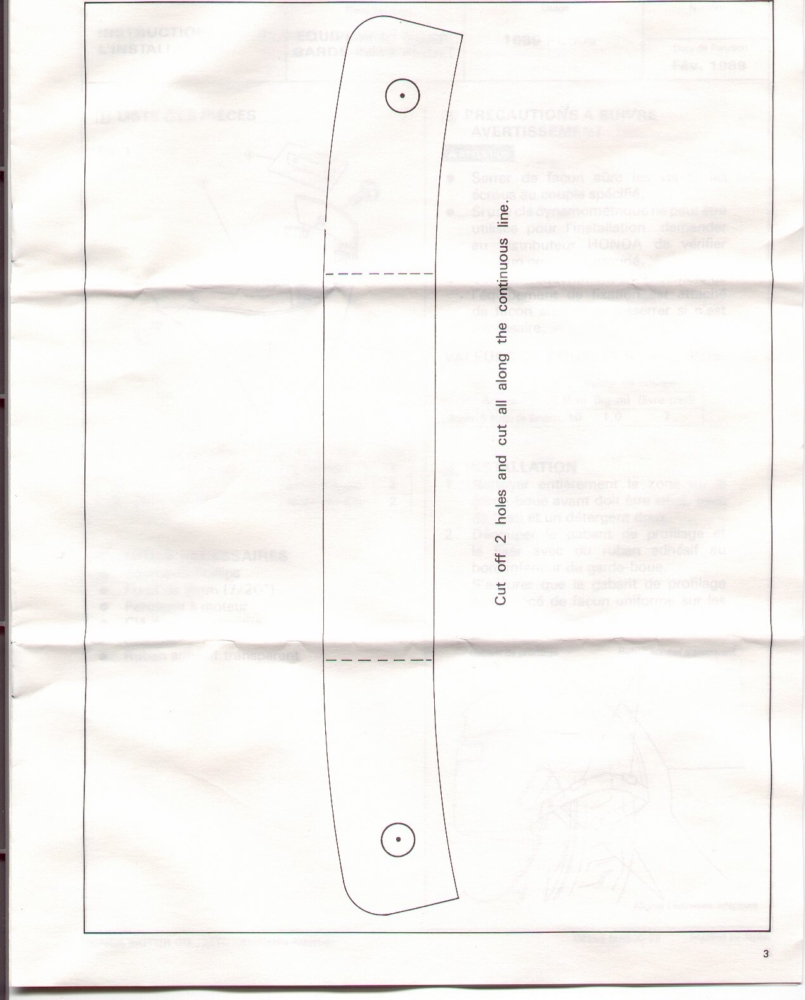
For purposes of checking the scale of your printout, the right side junction should be 4 15/16 inches wide and the left side junction should be 5 5/8 inches wide. See below where I have written in the dimension. If you print each of the .jpg files below on 8.5×11 paper and print full page (no borders), the scale should come out right.
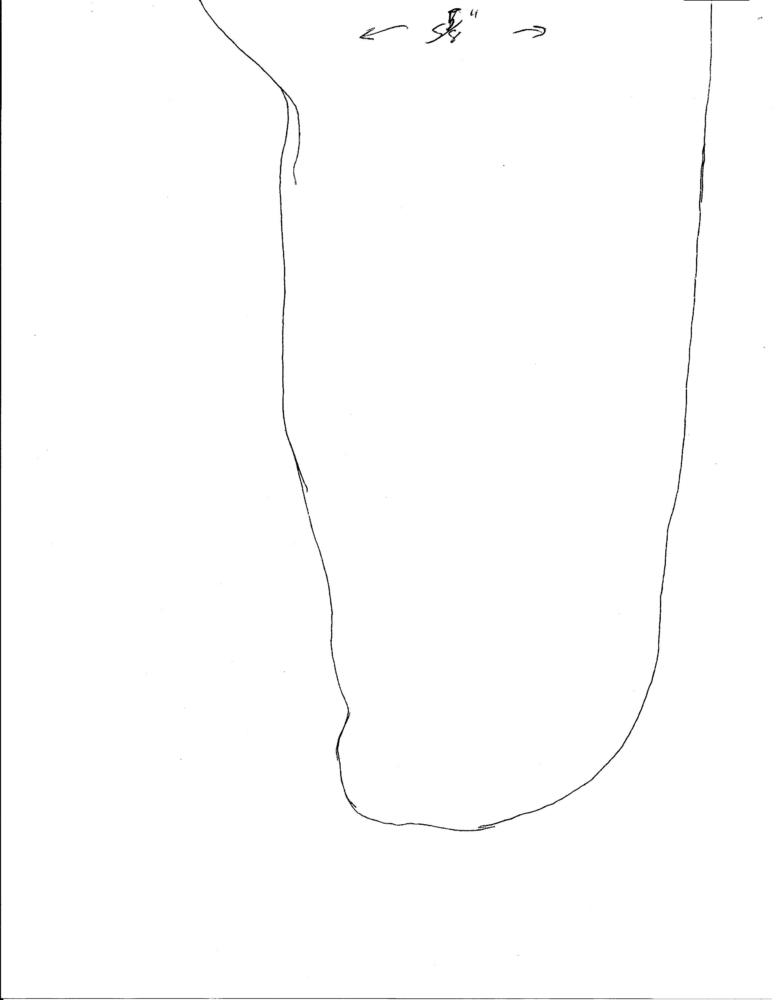
This page contains a description of how to install a front mud guard kit P/N: 08156-MR500 on a Honda Pacific Coast PC800 motorcycle.
Editor’s note: I am preserving Leland Sheppard’s PC800-related content after his passing. This is one of his pages that I felt the PC800 community would want to have preserved. Leland may be on his final Iron Butt ride but he is not forgotten.
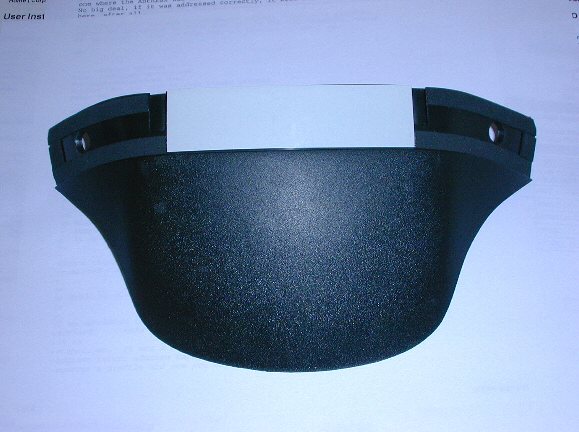
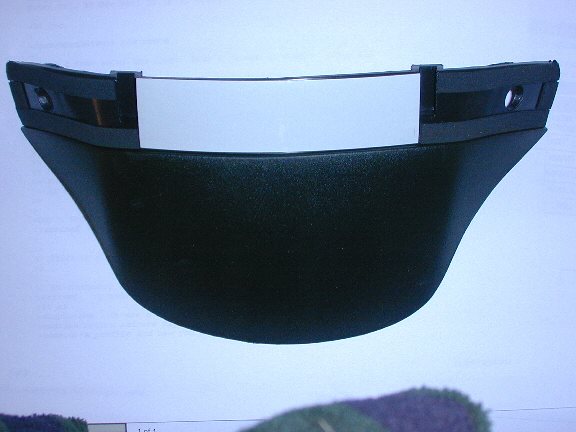
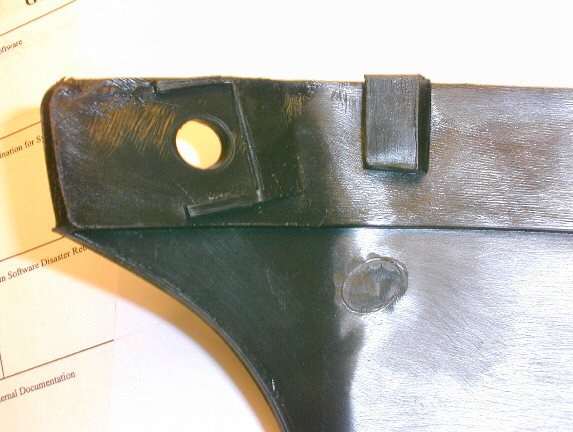
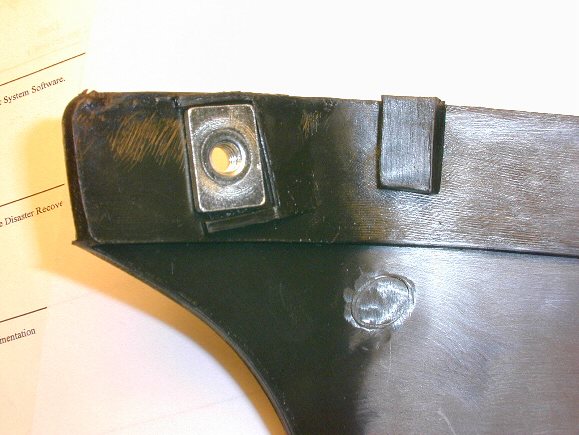
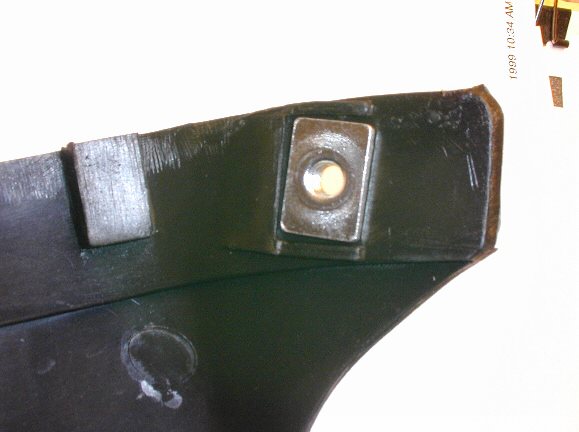
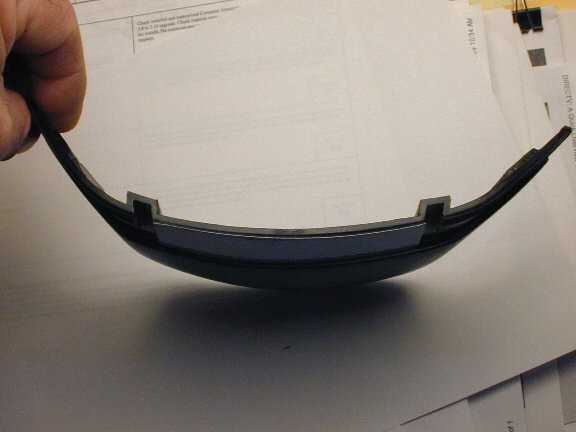
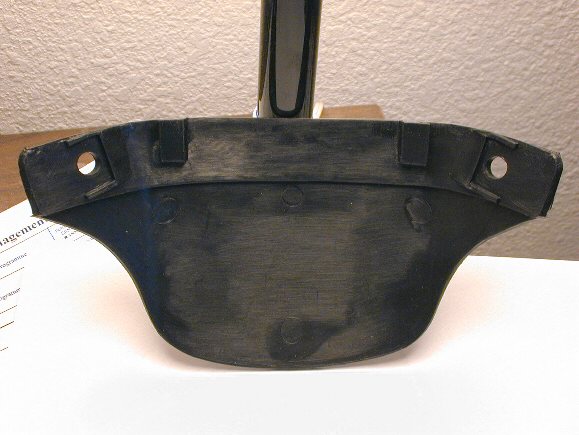
Once upon a time, Honda produced a mud flap for the PC800. It was designed to fit the ’89 through ’96 models at least. Because the ’97 and ’98 models had an ST-like fender, this mud flap would probably not work with those model years.
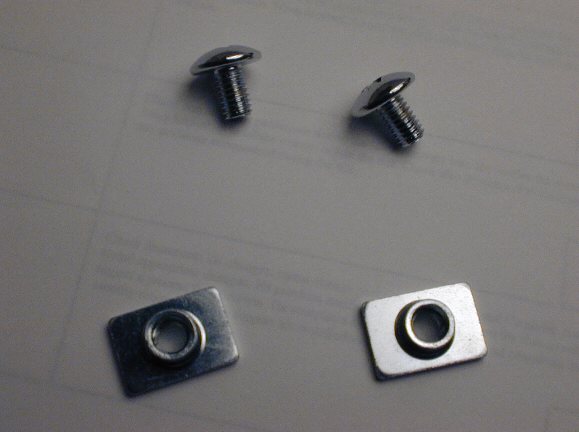
Mark Fellure and Ross Vicencio graciously agreed to let me be the temporary recipient of a Hondaline PC800 Mud Flap still in its original package. The instruction sheets shown here were scanned from the instruction sheets included with the mud flap. The pictures of the flap were taken by yours truly.
The instructions are copyright Honda Motor Co., Ltd., and they are dated February 1989. The Honda part number for this product was 08156-MR500.
My hope is that between the information contained in the instruction sheets and the pictures and the dimensions listed below, that you will be able to reproduce this mudflap and/or install one you already have.
Please let me know if you have any questions on the information contained on this site: Leland Sheppard [Editor’s Note: Since Leland’s passing, I have been maintaining his PC800-related memories. Contact me if there are any questions.]
Mud Flap dimensions:
Overall width: 9 15/16 inches Overall height: 4 1/2 inches Extension below fender: 3 1/2 inches Center to center distance of the mounting holes: 7 9/16
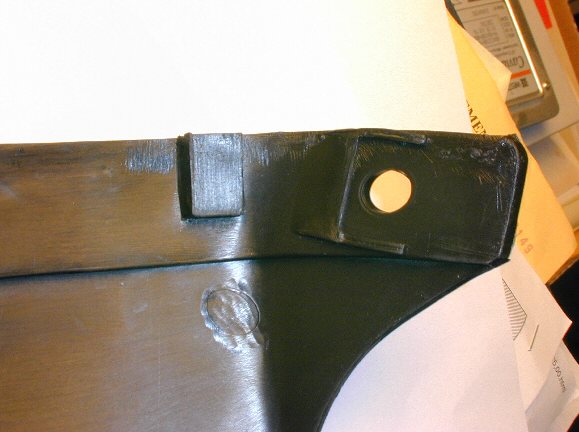
The square recesses are 3/16 deep by 1/4 wide; they start 2 13/16 inches in from each end and are 3 3/4 inches apart.
Click on any of the images for a full-size version.
The page 3 linked photo is a full scale scan of an original template used to align the mounting holes when installing the mud flap in a 1989 PC800.
You need to find a program that will allow the image to be printed at actual size. Web browsers from Netscape and Microsoft do NOT print at the correct size and I couldn’t figure out a way to make them do it; I tried IE 5.5, Netscape 4.7 and Netscape 6.1.
I was able to print correctly using Canon Photo, EZPhoto 2.7, Kodak Imaging for Windows (comes with Windows 95 and 98) and Hotshots 1.5.08. If you find other programs that can be used to print correctly, please let me know and I will add them to this list. Please note that all of these programs are photo editors.
In order to print the image correctly, be sure your printer does NOT have “scale to fit” turned on. Either “print on letter size” without scaling or “print at 100% of original” should work fine.
In order to verify that yours printed correctly, measure the distance between the dots at the center of the bolt hole circles at each end of the template. The distance between them should be 7 and 27/32 inches or 19.93 centimeters. If you get a figure that is more than a hair smaller than this, your image was scaled and you should try again.
Once you have printed this image correctly, you should be able to tape the template in place on the back of the front fender and drill your holes for the mounting bolts in the appropriate place. The dotted lines should straddle the joints on each side of the center section of the fender.
Editor’s note: I am preserving Leland Sheppard’s PC800-related content after his passing. This is one of his pages that I felt the PC800 community would want to have preserved. Leland may be on his final Iron Butt ride but he is not forgotten.
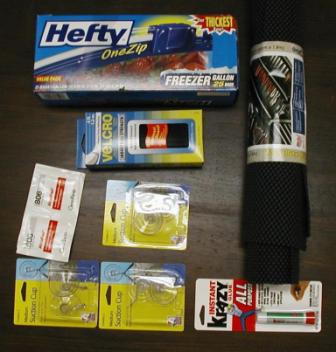
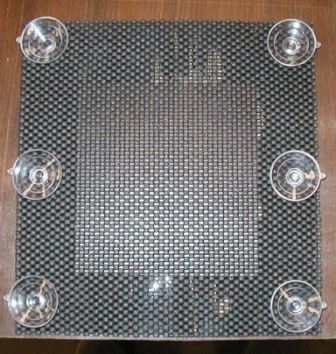
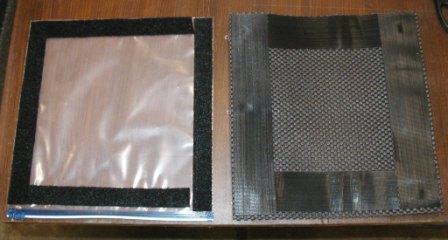
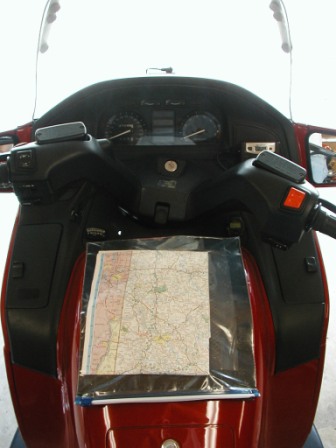
I made my prior one with the baggie glued directly to the pad and the suction cups glued to the baggie. The problem is if you mess up and pull too hard on the baggie opening it the small diameter of the suction cup attachment rips a hole in the baggie and then you have to make an entirely new unit. That is why I tried to make it with Velcro this time so the baggie is replaceable. The only glue I have found that reliably sticks to the suction cups and the baggie is Krazy Glue. Even epoxy made for plastic pulled right off.
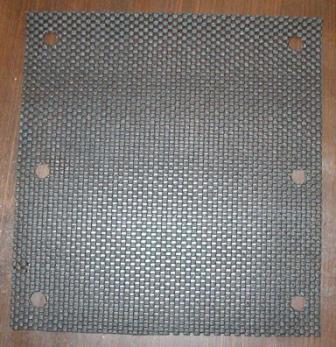
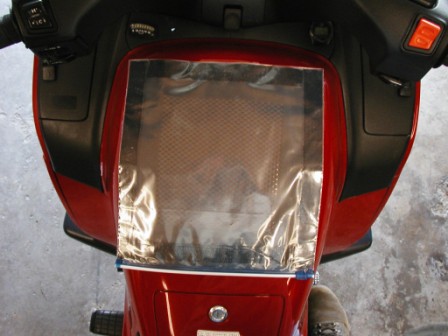
This is a picture of needed materials. The baggies are 1 gallon freezer bags. I wish there was a size between a gallon and a quart. I use the freezer bags as they are thicker. The rubber tool box liner I bought at Harbor Freight but Sears and other places should have it. I tried to find something solid that I thought would not scratch the shelter but could not find anything cheap. This is cheap and works. Note the alcohol pads. No glue sticks to the baggie if you don’t wipe it down with alcohol. I did not try the putting the Velcro on without wiping it down. The Velcro is probably the most expensive thing here. The nice thing is it removes all the writing on the freezer bags. Also wipe off the top of the suction cups where they will attach to the Velcro. The Velcro I used had some strong adhesive on it so I initially decided to just try attaching the suction cups to it. I had to Krazy Glue them on about an hour later as they popped off. So far that has held. I then punched 6 holes to allow the suction cups to poke through and attach to the Velcro and I did not think I could get a strong enough attachment to the rubber pad. The pad is cut to exactly the size of the baggie including the slider so the slider cannot touch the shelter. Here is the pad with the Velcro installed. Do I really need this much Velcro? After installation I doubt it but I figured if I used 2 inch wide on the pad and 1 inch wide on the baggie I could lessen the strain on the baggie if I stuff several maps into it by loosening the edges and moving them in slightly. This gives me room to do itThis is the bottom of the pad. Note the position of the removal tabs on the suction cups. It is much easier to remove the map case from the bike if you remember to point the tabs for removal of the suction cups outward so you can hook them with your finger when you pull them off.Here is the pad and baggie with the Velcro installed.Here it is installed on the bike Installed on the bike with a map folded up in it.