After some super cold (for western Oregon) weather last month where it hit 8 F at night, I decided it was time to get a few pieces of heated riding gear. Enter Warm n Safe’s Heat Troller. Doing some research on the several companies that carry digital riding gear thermostats, I decided to get it from Warm n Safe. People over at ADVRider really like them and everyone who has used them seems to think they’re a good company.
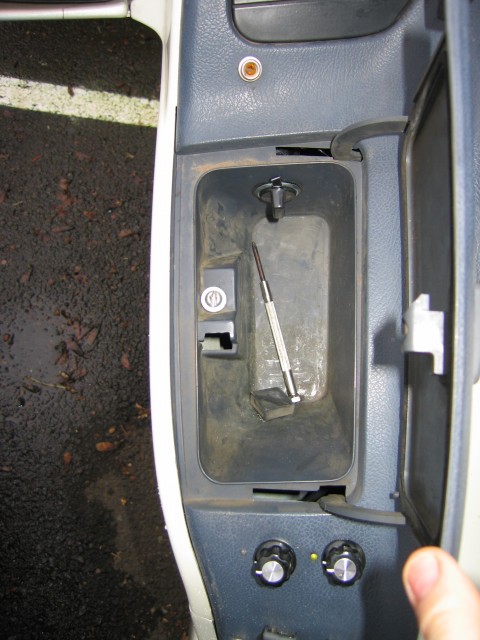
The installation process went fairly smoothly. I chose to put the dual controllers and indicator lights in the left dash plastic just above knee level and below the “glove box.” The template that comes on the instructions for the Heat Troller worked just fine to help me align and drill the holes. I ended up using the brass spacers that are included in every permanent mount Heat Troller. There’s a good chance I could have gotten away without using them but by the time I realized that, I had already made the holes too big to turn back. In the end it worked after adding a washer to each thermostat. I used it to fill up some extra space. Oops 🙂
While I was putting one of the thermostat controls into its final position I managed to snap off one of the legs on the indicator LED. A quick trip to my soldering iron and it was all fixed up. Those little LED legs are fragile! And also too long for the way I installed it. I bent mine in kind of a U shape to make the LEDs be at the proper height.
To button up the thermostat installation, I covered both thermostat circuit boards in dielectric grease. The hope is that by covering them in dielectric grease, I will never have to worry about water or road grime shorting out the Heat Troller. If you don’t want to use grease, I remember reading (I think) on the Warm n Safe website that clear nail polish works well, too.
And now for a small rant:
I don’t understand why the Heat Troller or any of its competitors doesn’t come with a way to disconnect the thermostat controls from the loooong cables that run back to the Heat Troller control unit. My installation is such that I will have to take the whole Heat Troller off the bike if I need to take off the dash plastic in the future. It makes sense to me to add in a couple of connectors near the thermostats. That way, it would be a snap to disconnect whatever plastic panel the Heat Troller thermostats happen to be connected to. I’d even pay an extra $10-20 for this feature!
Back to the story…
I found the best place on the bike to mount the Heat Troller control unit box thing is underneath the seat on the left side of the bike. I used the double-sided sticky tape Velcro stuff right on the gas tank where the big curve in the tank is (at the back by the trunk). That space is just a big void otherwise. Might as well fill it with something useful! This also provides enough length to get the power cable to the battery (or in my case, an auxiliary fuse block in the trunk).
The cables running to the front of the bike were routed up the top left frame tube and zip tied down. After a couple of rides I pulled the plastic panel off the bike along that frame rail to check to see how everything is doing. No melting so far! I guess the real test will come in the summer but judging by the other wires that run along that same path, I shouldn’t have a problem.
Initially I was planning to have the two coaxial plugs that hook to heated clothing from the Heat Troller stick out from under the seat. I ended up opting to install some BMW plugs on the dash plastic instead. The reason I did this is for all those days during the year when I don’t need heated riding gear. On those days I’d much rather have some nice clean socket plug caps than a couple of dangling pigtails sticking out from under the seat or between the body plastics. Warm n Safe has a nice set of BMW plug sockets and a good set of BMW plug connectors with an 18 inch cable and coaxial plug at the end. At the same time I also picked up some 12 or 18 inch (I forget now. Measure it yourself to make sure you’re getting the right one!) coaxial plug cables to extend the reach of the cables up to the BMW plug sockets.
WARNING FOR TALL RIDERS:
In retrospect I wish I had installed the BMW socket plugs up higher on the bike. The place I ended up putting them (see photos below) is right where my knee goes when I ride. It isn’t a HUGE annoyance but it is a bit annoying. I am planning to buy some right angle BMW plugs in the near future to replace my straight-out BMW plugs. However had I measured 5 times instead of 4 before cutting, I would have put them up higher on the plastic where my knee won’t hit. If you’re a shorter rider this probably won’t be a problem but if you’re tall, double-check the fitment before you cut plastic.
After I tightened down the BMW sockets, I coated the sockets from top to bottom with silicone RTV sealant stuff. I chose to use black in case any was visible from outside the plastics. Now those plugs are water-tight and won’t short out as easily.
Having ridden it for about five hours in cold weather since installing the Heat Troller I can say that I absolutely love having heated gear. The position of the controller knobs is perfect to reach while riding. The little LED lights are out of my line of sight when my head is up but it only takes a quick glance down to see the status of the units. Aside from the minor plug inconvenience, I would say that this installation is a success. In the future though I think I will add a toggle switch on the dash to quickly kill the power to the Heat Troller. This will be very useful when I am running my heated gear at full blast and need to stop at a stop sign or stoplight. No more dangerous voltage drops!
Here are a few photos of the finished installation. I got too excited cutting plastic during the install to remember to take photos of the process.
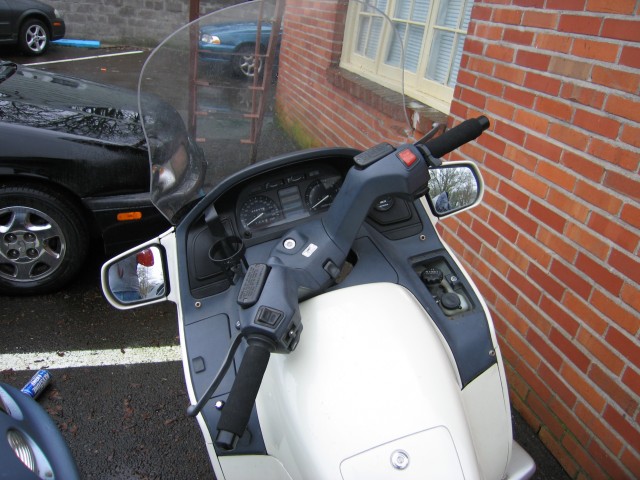
The controllers and BWM sockets are on the left side mostly obscured by the handle bars.
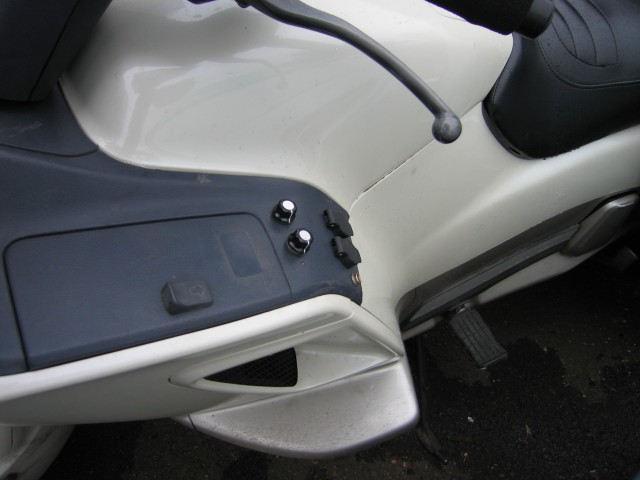
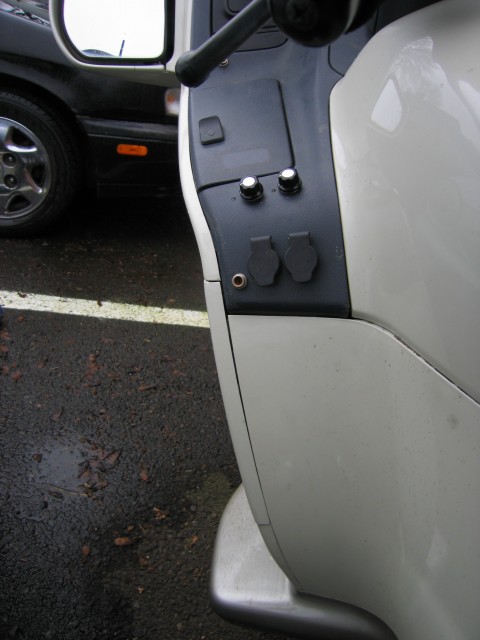
If I ever install another Heat Troller on another motorcycle, I will be sure to verify that my knee won’t hit the plugs.
