
I’ve been playing with an Arduino Uno for the last month. After going through the tutorials, I decided to play around with mixing and matching the code and writing a little of my own. I’ve figured out how to use the Fritzing CAD software to document my board setup.
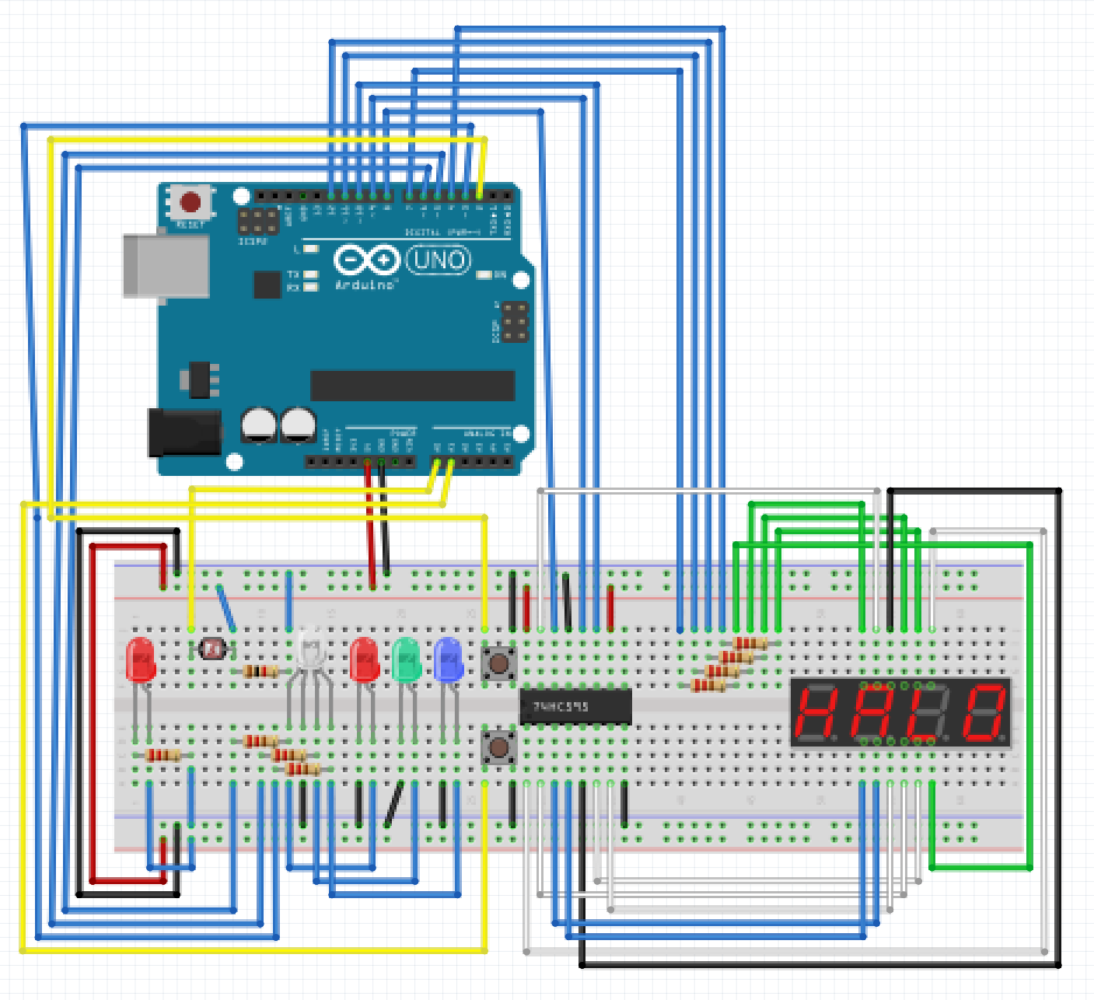
I have a 7 segment 4 character display powered by a shift register, an RGB LED and three single color LEDs on the three PWM pins that the Uno comes with, two push buttons using a debounce library that I found on GitHub, and a photo sensor to detect how much ambient light there is in the room. One interesting note is that I played with several different ways of achieving debounce on my own and decided to go with a library. It’s just easier and more efficient than code that I could write at this point.
The program works using the two buttons as inputs to switch between the four sub-programs. When the LEDs are blinking, you hold down Button 2 and press Button 1 until the 7 segment display reads the program that you want.
The four programs are:
- Button 1 turns on and off the LEDs.
- Count up clock on the 4 digit 7 segment display.
- Fade the RGB LED.
- Display the ambient light level on the 4 digit 7 segment display.
To exit out of any of the programs, simply tap Button 2 and you will be taken back to the input.
Working on this project taught me several things including:
- Shift registers and how they work
- Bounce issues with inputs and how to fix that
- What the different pins on an Arduino Uno are capable of
- Static variables
- Volatile variables
- Libraries
- And a few other things that I’m forgetting!
If you would like to look at my wild spaghetti code or the Fritzing files, it’s all available on a GitHub repository.
Now that this little project is done, I am going to play with some motor controllers and the Arduino. This is all building toward using an Arduino for an APRS radio.
